For decades, astrophotography was split into two camps. On one side, you had the landscape photographers capturing the Milky Way arching over a lonely pine tree with a wide-angle lens. On the other hand, you had the deep-space specialists – the “faint photon hunters” – who used massive telescopes to track nebulae and galaxies from their backyards. But recently, a new discipline has emerged that bridges the two: The Deepscape.
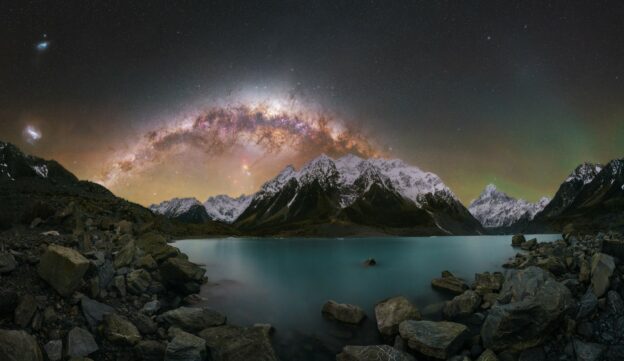
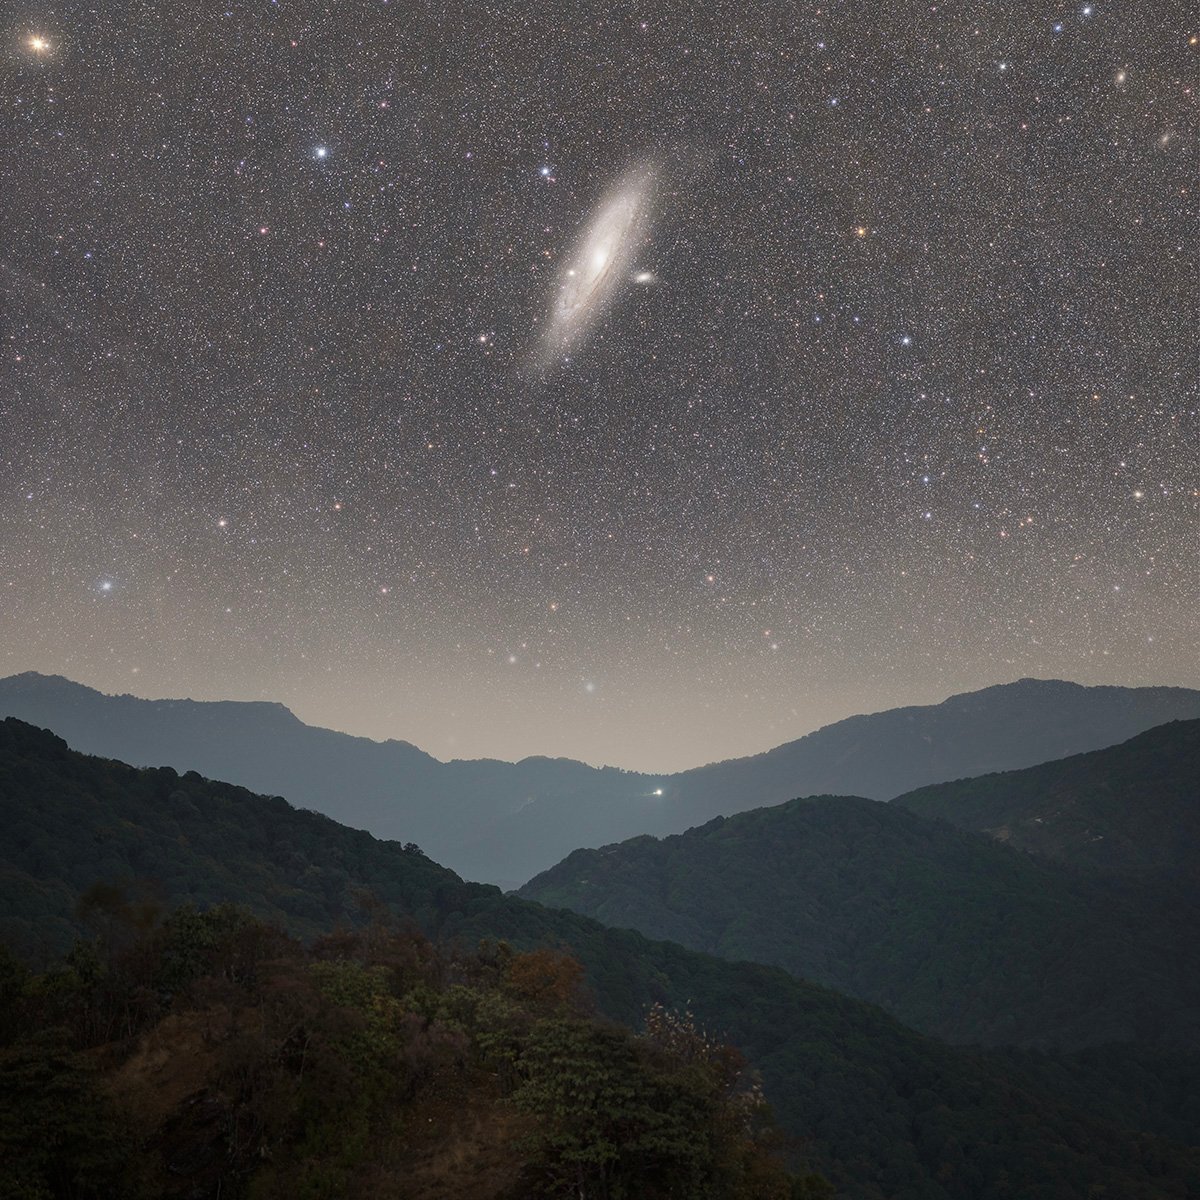
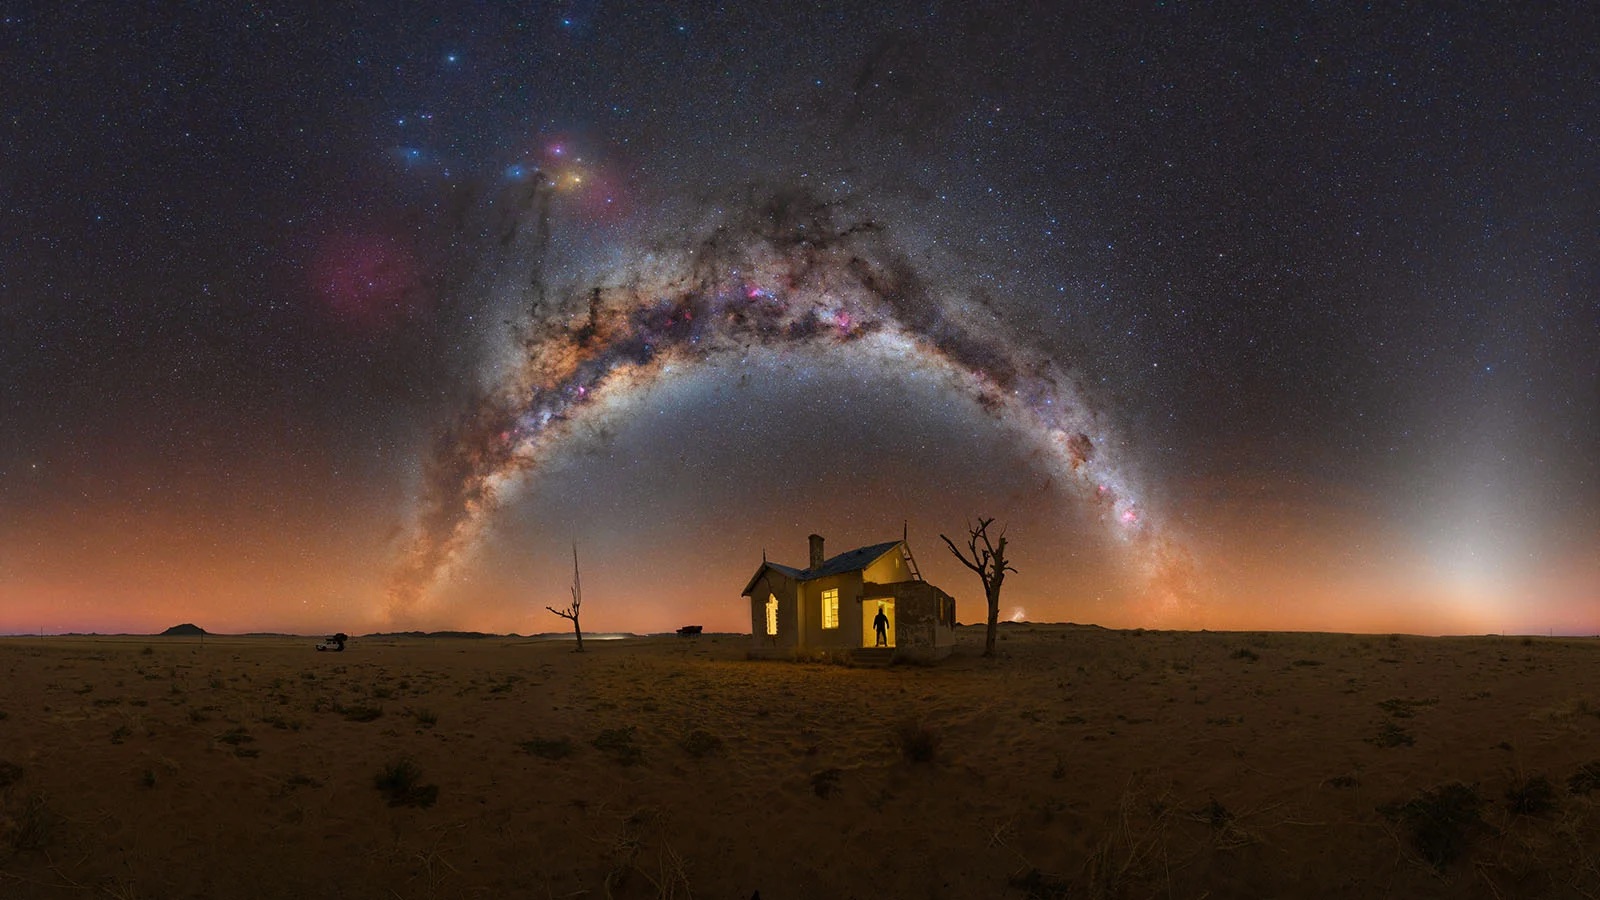
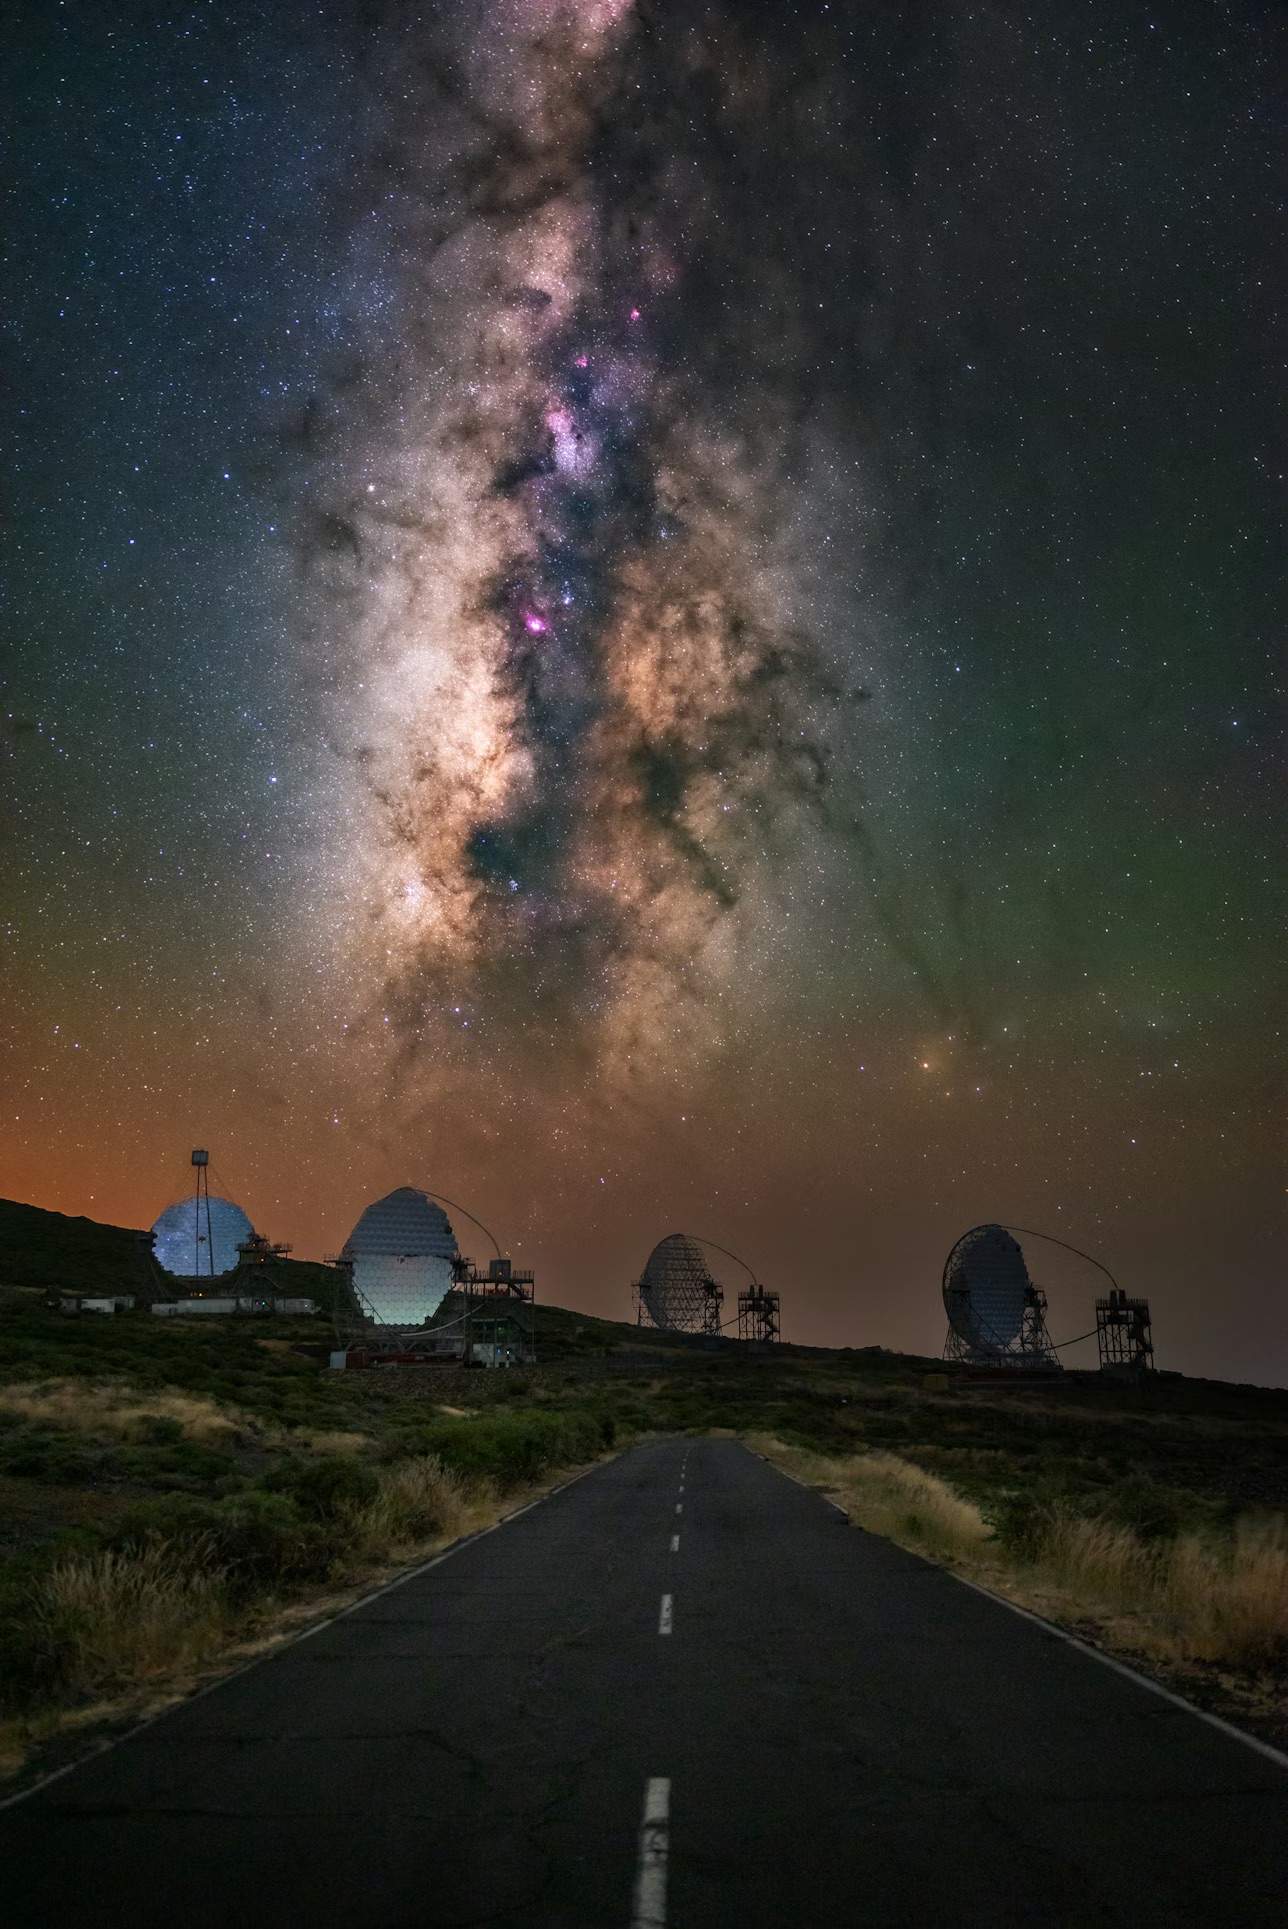
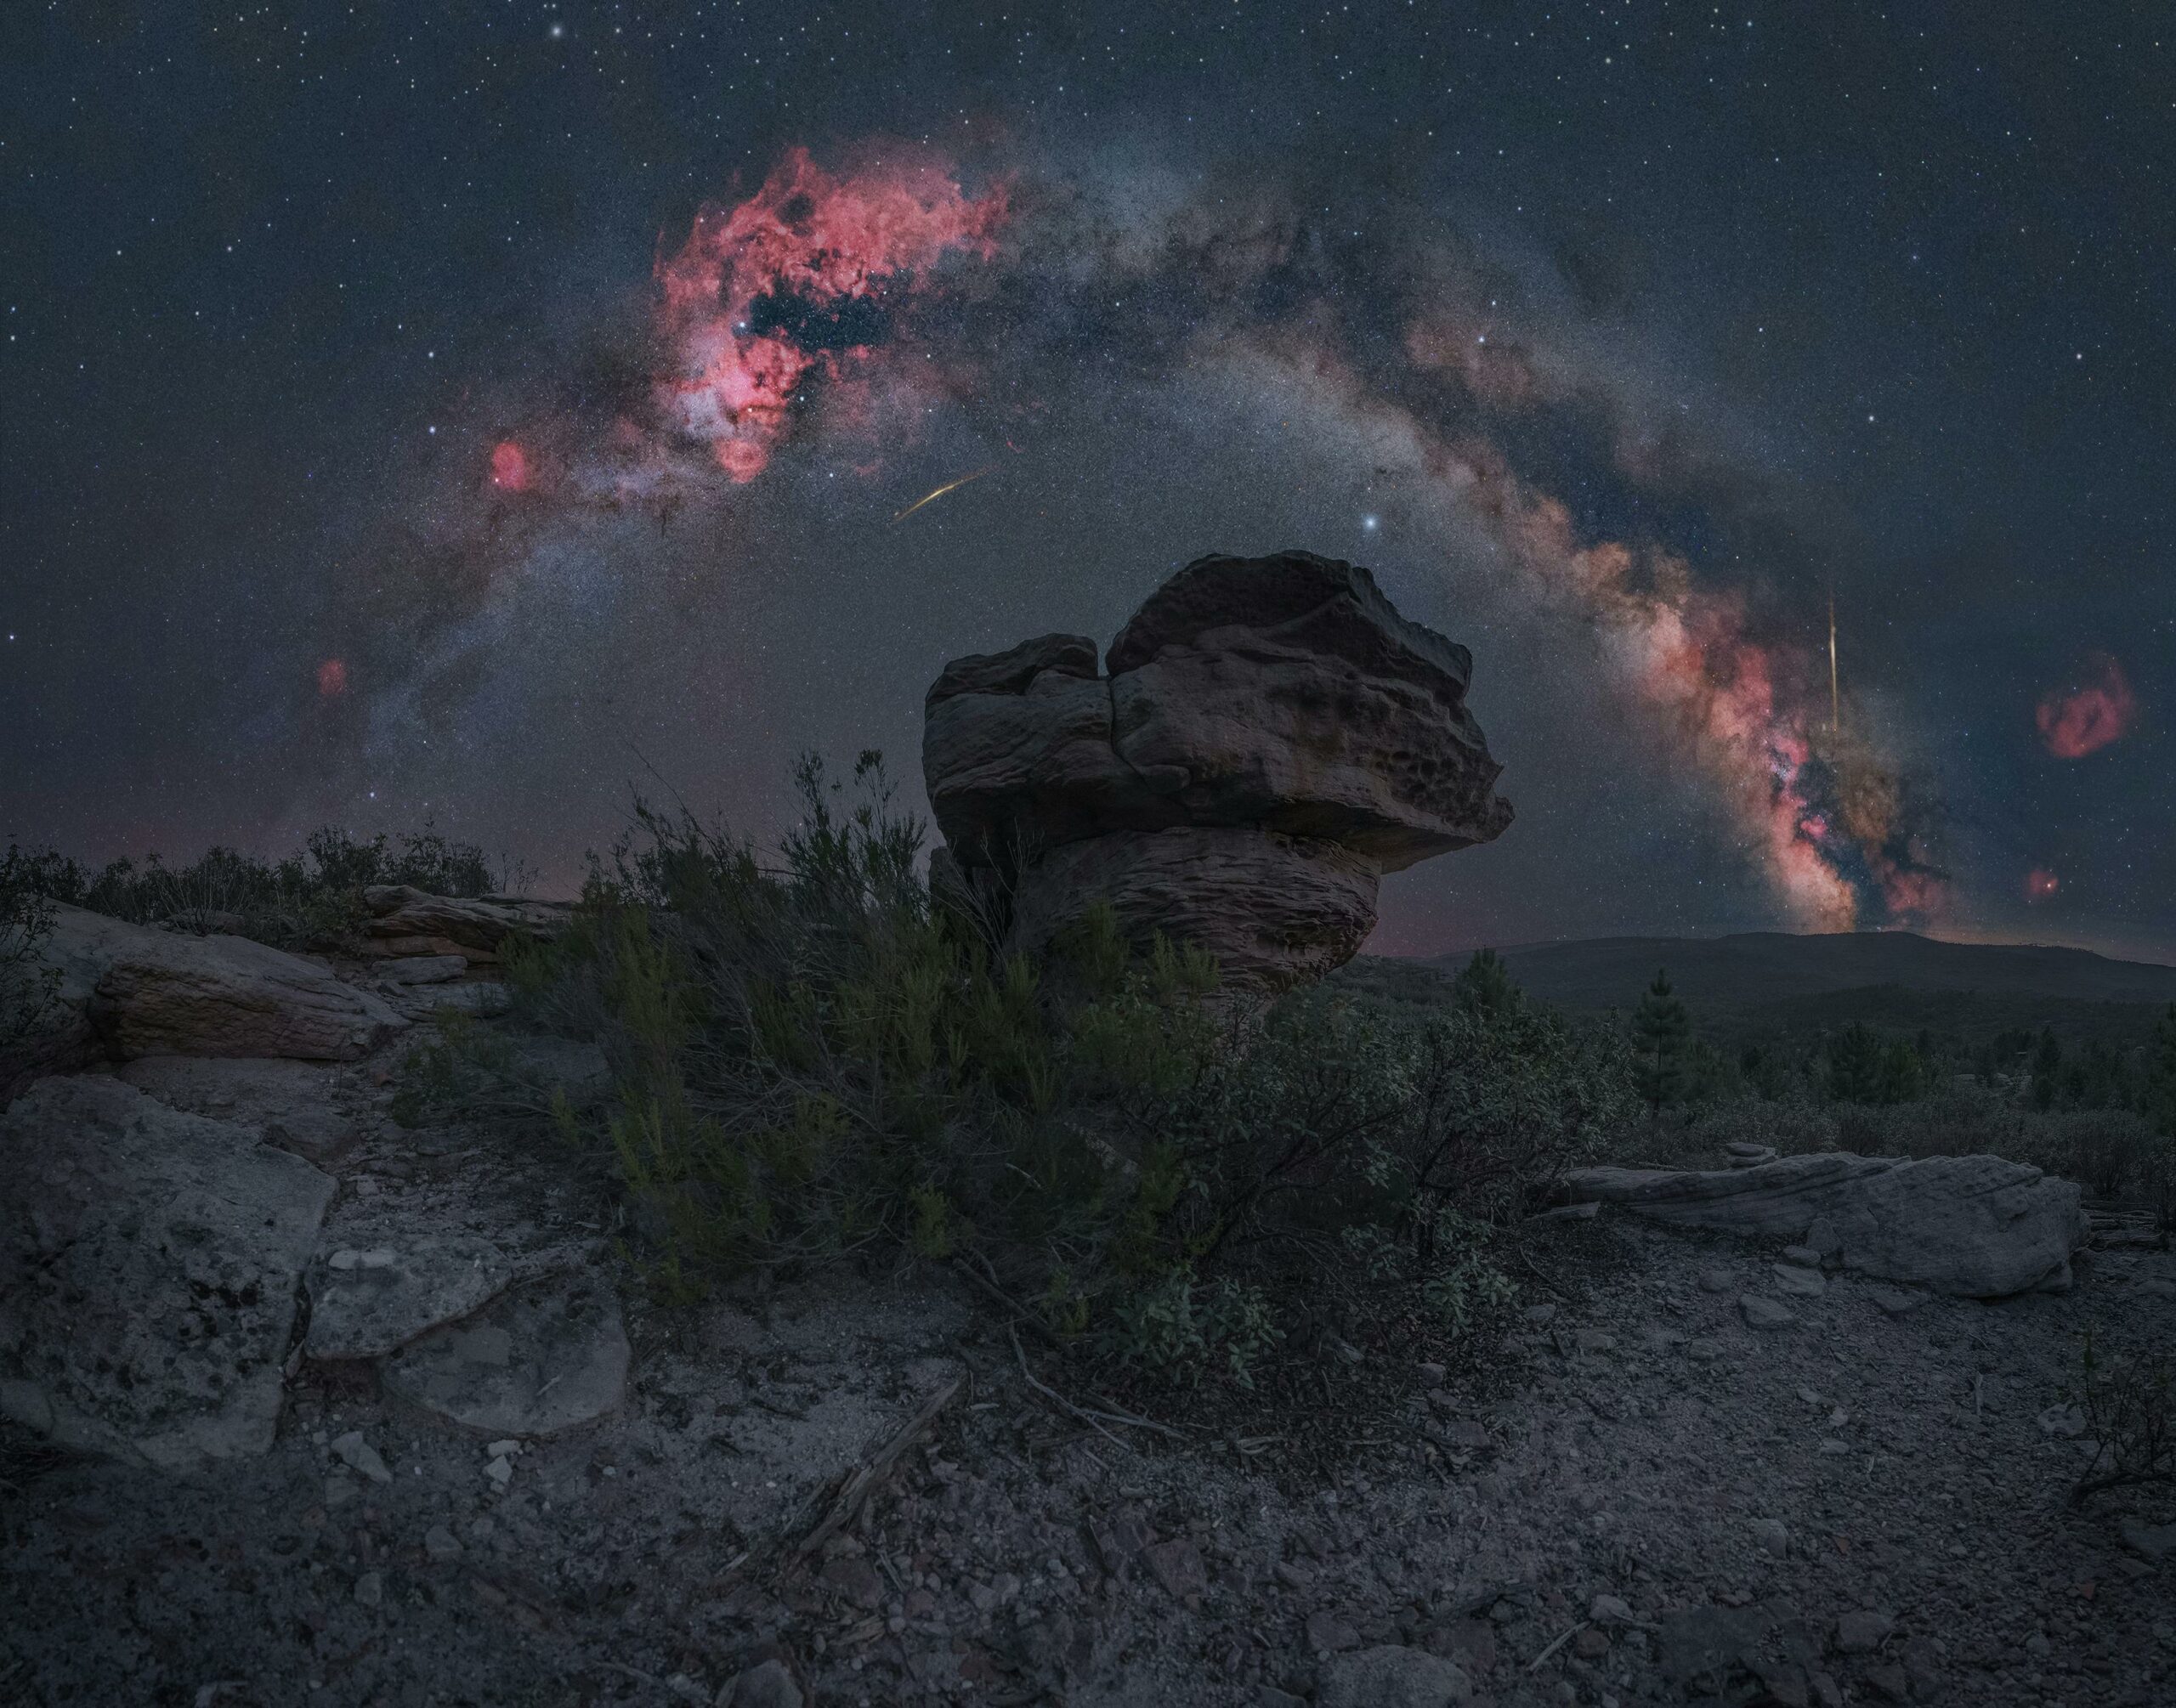
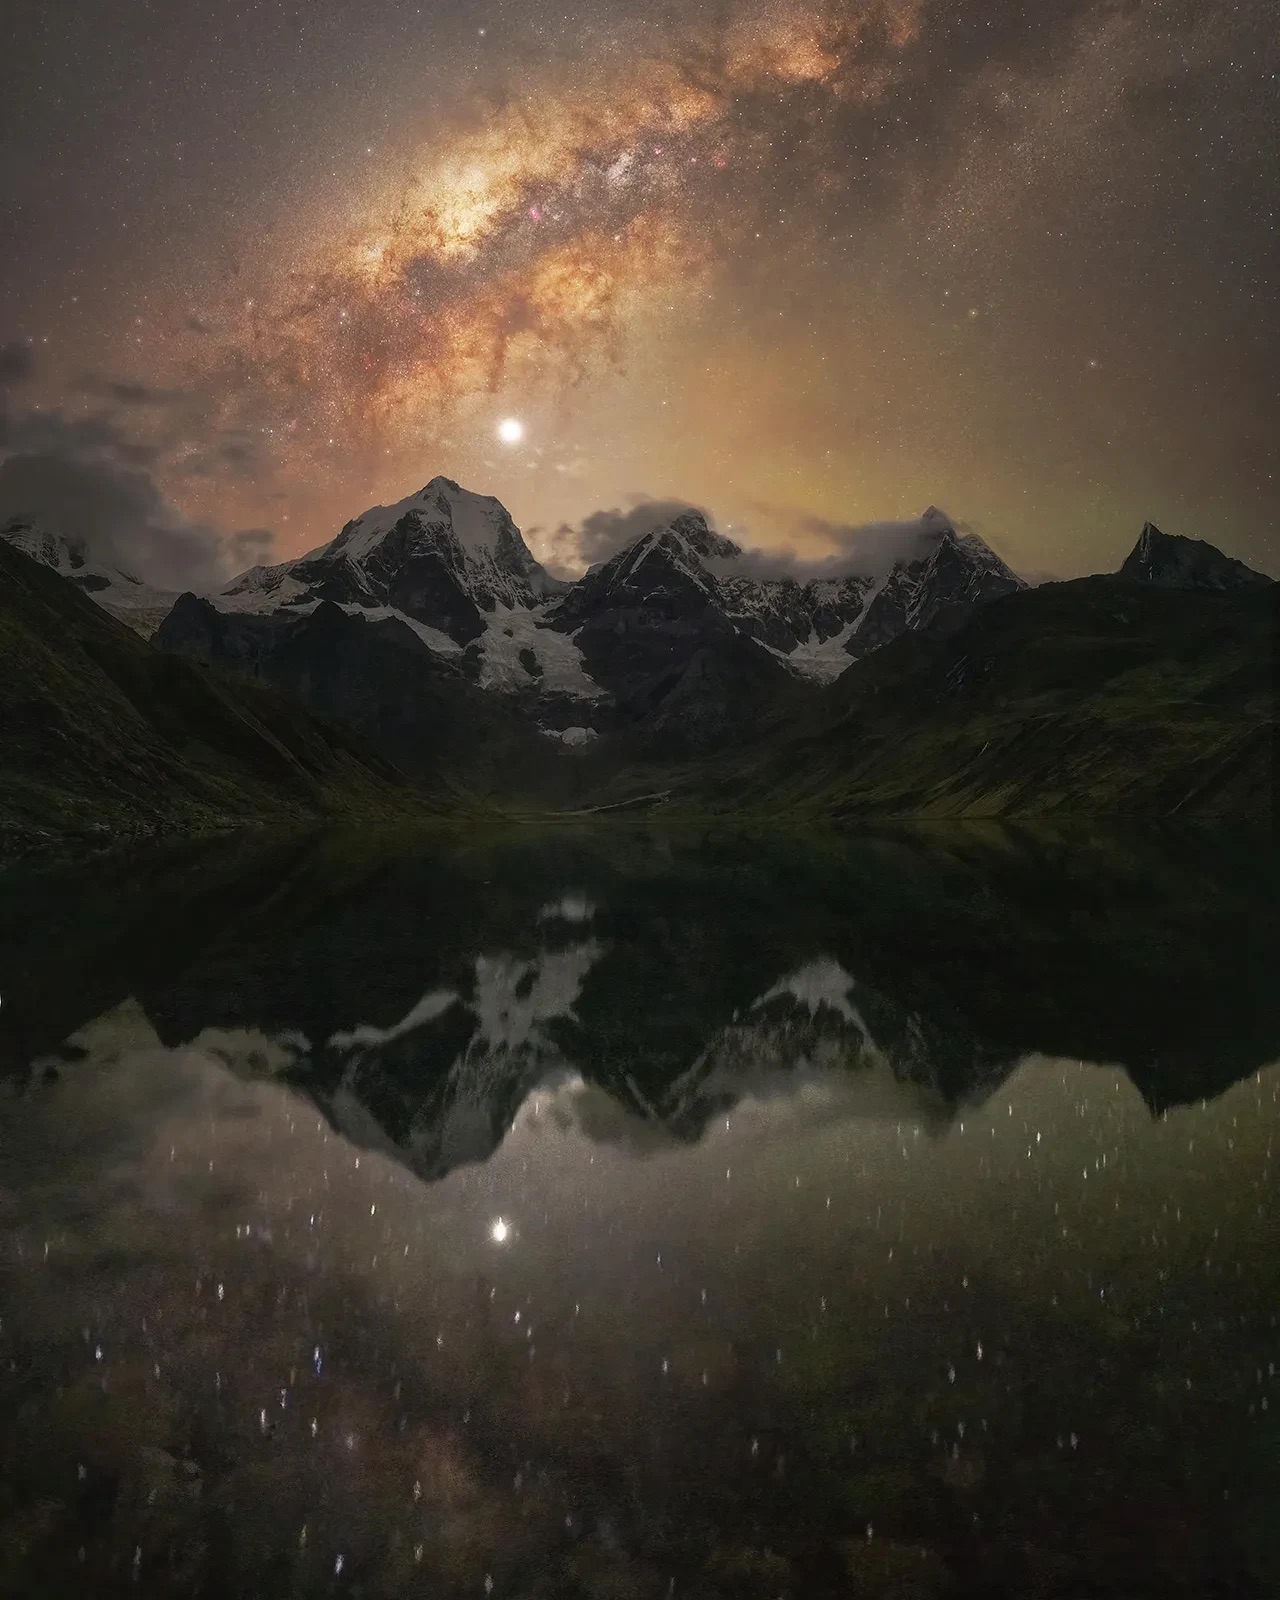
A deepscape is a photograph that pairs a distant, high-detail deep-space object (DSO) – like the Orion Nebula, the Andromeda Galaxy, or the Pleiades – with a terrestrial foreground. It is the “final boss” of night photography. It requires the precision of an astronomer and the eye of a landscape artist.
Here is your comprehensive guide to capturing the universe without losing the Earth.
1. The Gear: Moving Beyond the Tripod
When you’re shooting at 14mm, the Earth’s rotation is a minor nuisance. When you’re zooming into a nebula at 200mm or 400mm, the Earth’s rotation is a violent blur. To bridge this gap, your gear list needs an upgrade.
The Equatorial Mount
This is the most critical piece of kit. An equatorial mount (or star tracker) compensates for the Earth’s rotation by moving the camera at the exact same speed as the stars. Without this, your stars will trail in seconds.
The Lens Choice
Forget the wide-angle glass. For deepscapes, you want telephoto lenses.
-> 70-200mm: Perfect for large targets like the Orion Molecular Cloud or the Andromeda Galaxy.
-> 300-500mm: Ideal for smaller nebulae or “compressing” the moon/planets against distant mountains.
The Camera
While a standard DSLR or mirrorless camera works, astromodified cameras are the gold standard. These have the internal IR-cut filter removed to allow the deep red light of Hydrogen-alpha (H\alpha)—the stuff nebulae are made of—to reach the sensor.
2. The Planning: Aligning the Heavens
You can’t just show up and hope for the best. Deepscapes require “celestial alignment”. You need to know exactly where a galaxy will set behind a specific mountain peak.
Essential Tools
PhotoPills or Stellarium: These apps allow you to simulate the night sky at any date and location. You can use the “Night Augmented Reality” mode to see exactly where the Lagoon Nebula will be at 3:00 AM.
The Bortle Scale: You need dark skies. Aim for a Bortle 1-3 location. In a Bortle 8 city, the faint dust of a nebula will be drowned out by the orange glow of streetlights.
The Moon Phase
Unlike wide-field photography where a little moonlight can illuminate the landscape, deep-space objects are easily washed out. Schedule your shoot during the New Moon phase or after the moon has set.
3. The Technical Execution: A Tale of Two Exposures
Because you are using a tracker, you face a physical paradox: if the camera moves to follow the stars, the ground will be blurred. If the camera stays still for the ground, the stars will trail.
The solution? The Composite Method.
Step A: The Sky Frames (Tracked)
Once your mount is polar-aligned, take multiple long exposures of your chosen DSO.
Settings: f/2.8 or f/4, ISO 800-1600, and exposure times of 60–120 seconds.
Stacking: Don’t just take one photo. Take 20 or 30. By “stacking” these images in software, you improve the Signal-to-Noise Ratio (SNR).
You’ll have to try this multiple times in order to find the perfect exposure balance and optimise SNR.
Step B: The Foreground Frames (Untracked)
Turn off your tracker. You need a rock-solid, sharp landscape.
Blue Hour Secret: The best deepscapes often use foregrounds shot during “Blue Hour” (just after sunset or before sunrise). This allows you to capture detail, texture, and colour in the landscape that is impossible to get in pitch blackness.
Long Exposure: If you must shoot at night, take a 5–10 minute exposure at a lower ISO to keep the foreground clean.
Having experience with landscape photography helps a bunch here, and you can practise this a bunch in daylight.
4. The Challenges of Long Focal Lengths
As you increase your focal length, two enemies emerge: Atmospheric Turbulence and Flexure.
Seeing Conditions: On hot nights, the heat rising from the ground creates “shimmering” (atmospheric seeing). This ruins deep-space detail. Aim for cold, stable nights. You can mitigate this by researching the place and weather conditions to make sure the temperature is low and winds are calm.
Wind: At 400mm, a light breeze acts like an earthquake. Use a heavy-duty tripod and hang your gear bag from the centre column for stability.
5. Post-Processing: Bringing the Nebula to Life
This is where the magic (and the hard work) happens. You will likely use software like Adobe Photoshop, PixInsight, or DeepSkyStacker.
The Masking Process
You must carefully mask the tracked sky and blend it with the static foreground. The goal is “believable transitions”. If you see a hard, glowing line around the mountain, the illusion is broken. Use a soft brush and match the colour temperature of the sky’s glow to the light hitting the landscape.
Colour Balancing
Deep space isn’t just black. It’s filled with colourful gases.
Oxygen III: Blue/Green
Hydrogen Alpha: Deep Red
Sulfur II: Deep Orange/Red
Avoid over-saturating. The most breathtaking deepscapes feel like a window into a reality we can’t see with the naked eye, rather than a neon light show.
6. The Ethics of “Faking It”
There is a healthy debate in the community about deepscapes. Is it “real”?
The Rule of Realism: Most pro photographers insist that the DSO must have actually been in that position at that time. Taking a photo of the Andromeda Galaxy in the North and pasting it over a South-facing mountain is generally considered a “digital art piece” rather than a photograph.
The Focal Length Match: Ensure your foreground and sky are shot at the same focal length. If you shoot a mountain at 35mm and a nebula at 400mm and combine them, the scale will look “uncanny” and wrong to the human eye.
Final Say
Capturing a deepscape is an exercise in patience. It is a hobby of failures—forgotten batteries, foggy lenses, and alignment errors—which is bread & butter for landscape and astrophotography—and the only thing you can do to avoid mishaps is practice.
But when you finally align your tracker, wait out the cold, and see the spiral arms of a galaxy hovering over a familiar mountain range, the perspective shift is profound. You aren’t just taking a picture of a rock; you’re capturing the Earth’s place in an infinite, glowing neighbourhood, now frozen in time.
