Tag Archives: astrophotography lens

How to capture Deep-Space Objects with Breathtaking Landscapes

For decades, astrophotography was split into two camps. On one side, you had the landscape photographers capturing the Milky Way arching over a lonely pine tree with a wide-angle lens. On the other hand, you had the deep-space specialists – the “faint photon hunters” – who used massive telescopes to track nebulae and galaxies from their backyards. But recently, a new discipline has emerged that bridges the two: The Deepscape.

A deepscape is a photograph that pairs a distant, high-detail deep-space object (DSO) – like the Orion Nebula, the Andromeda Galaxy, or the Pleiades – with a terrestrial foreground. It is the “final boss” of night photography. It requires the precision of an astronomer and the eye of a landscape artist.  

Here is your comprehensive guide to capturing the universe without losing the Earth.

1. The Gear: Moving Beyond the Tripod

When you’re shooting at 14mm, the Earth’s rotation is a minor nuisance. When you’re zooming into a nebula at 200mm or 400mm, the Earth’s rotation is a violent blur. To bridge this gap, your gear list needs an upgrade.

The Equatorial Mount

This is the most critical piece of kit. An equatorial mount (or star tracker) compensates for the Earth’s rotation by moving the camera at the exact same speed as the stars. Without this, your stars will trail in seconds.

The Lens Choice

Forget the wide-angle glass. For deepscapes, you want telephoto lenses.

-> 70-200mm: Perfect for large targets like the Orion Molecular Cloud or the Andromeda Galaxy.

-> 300-500mm: Ideal for smaller nebulae or “compressing” the moon/planets against distant mountains.

The Camera

While a standard DSLR or mirrorless camera works, astromodified cameras are the gold standard. These have the internal IR-cut filter removed to allow the deep red light of Hydrogen-alpha (H\alpha)—the stuff nebulae are made of—to reach the sensor.

Photo: Matteo Strassera

2. The Planning: Aligning the Heavens

You can’t just show up and hope for the best. Deepscapes require “celestial alignment”. You need to know exactly where a galaxy will set behind a specific mountain peak.

Essential Tools

PhotoPills or Stellarium: These apps allow you to simulate the night sky at any date and location. You can use the “Night Augmented Reality” mode to see exactly where the Lagoon Nebula will be at 3:00 AM.  

The Bortle Scale: You need dark skies. Aim for a Bortle 1-3 location. In a Bortle 8 city, the faint dust of a nebula will be drowned out by the orange glow of streetlights.

The Moon Phase

Unlike wide-field photography where a little moonlight can illuminate the landscape, deep-space objects are easily washed out. Schedule your shoot during the New Moon phase or after the moon has set.

3. The Technical Execution: A Tale of Two Exposures

Because you are using a tracker, you face a physical paradox: if the camera moves to follow the stars, the ground will be blurred. If the camera stays still for the ground, the stars will trail.

The solution? The Composite Method.

Step A: The Sky Frames (Tracked)

Once your mount is polar-aligned, take multiple long exposures of your chosen DSO.

Settings: f/2.8 or f/4, ISO 800-1600, and exposure times of 60–120 seconds.

Stacking: Don’t just take one photo. Take 20 or 30. By “stacking” these images in software, you improve the Signal-to-Noise Ratio (SNR).

You’ll have to try this multiple times in order to find the perfect exposure balance and optimise SNR.

Step B: The Foreground Frames (Untracked)

Turn off your tracker. You need a rock-solid, sharp landscape.

Blue Hour Secret: The best deepscapes often use foregrounds shot during “Blue Hour” (just after sunset or before sunrise). This allows you to capture detail, texture, and colour in the landscape that is impossible to get in pitch blackness.

Long Exposure: If you must shoot at night, take a 5–10 minute exposure at a lower ISO to keep the foreground clean.

Having experience with landscape photography helps a bunch here, and you can practise this a bunch in daylight.

4. The Challenges of Long Focal Lengths

As you increase your focal length, two enemies emerge: Atmospheric Turbulence and Flexure.

Seeing Conditions: On hot nights, the heat rising from the ground creates “shimmering” (atmospheric seeing). This ruins deep-space detail. Aim for cold, stable nights. You can mitigate this by researching the place and weather conditions to make sure the temperature is low and winds are calm.

Wind: At 400mm, a light breeze acts like an earthquake. Use a heavy-duty tripod and hang your gear bag from the centre column for stability.

5. Post-Processing: Bringing the Nebula to Life

This is where the magic (and the hard work) happens. You will likely use software like Adobe Photoshop, PixInsight, or DeepSkyStacker.

The Masking Process

You must carefully mask the tracked sky and blend it with the static foreground. The goal is “believable transitions”. If you see a hard, glowing line around the mountain, the illusion is broken. Use a soft brush and match the colour temperature of the sky’s glow to the light hitting the landscape.

Colour Balancing

Deep space isn’t just black. It’s filled with colourful gases.

Oxygen III: Blue/Green

Hydrogen Alpha: Deep Red  

Sulfur II: Deep Orange/Red

Avoid over-saturating. The most breathtaking deepscapes feel like a window into a reality we can’t see with the naked eye, rather than a neon light show.

6. The Ethics of “Faking It”

There is a healthy debate in the community about deepscapes. Is it “real”?

The Rule of Realism: Most pro photographers insist that the DSO must have actually been in that position at that time. Taking a photo of the Andromeda Galaxy in the North and pasting it over a South-facing mountain is generally considered a “digital art piece” rather than a photograph.

The Focal Length Match: Ensure your foreground and sky are shot at the same focal length. If you shoot a mountain at 35mm and a nebula at 400mm and combine them, the scale will look “uncanny” and wrong to the human eye.

Final Say

Capturing a deepscape is an exercise in patience. It is a hobby of failures—forgotten batteries, foggy lenses, and alignment errors—which is bread & butter for landscape and astrophotography—and the only thing you can do to avoid mishaps is practice.

But when you finally align your tracker, wait out the cold, and see the spiral arms of a galaxy hovering over a familiar mountain range, the perspective shift is profound. You aren’t just taking a picture of a rock; you’re capturing the Earth’s place in an infinite, glowing neighbourhood, now frozen in time.

Astronomical Events in 2026 & How to Photograph Them

The night sky is a dynamic arena, a celestial ballet that has captivated humanity since we first looked upward. While every year offers its share of planetary alignments and meteor showers, some years stand out for hosting truly spectacular, once-in-a-lifetime astronomical phenomena. The year 2026 is poised to be one such year, offering enthusiastic amateurs to seasoned professional photographers incredible opportunities to capture the cosmos.

However, the modern world presents a significant hurdle to astrophotography: light pollution. The encroaching glow of urban sprawl has washed out the heavens for much of the global population. Therefore, planning for the events of 2026 isn’t just about knowing when to look, but where to look. This guide explores the key astronomical events of the upcoming year and weaves in essential techniques for capturing them, emphasising the crucial role of certified Dark Sky locations in achieving breathtaking results.  

The Foundation: Seeking True Darkness

Before diving into specific dates, it is essential to establish the importance of location. You cannot photograph faint celestial objects if the atmosphere is glowing with artificial light. For the best possible imagery in 2026, you must seek out true darkness.

This is where International Dark Sky Reserves play a pivotal role. Designated by DarkSky International (formerly the IDA), these are regions surrounded by populated areas that possess an exceptional quality of starry nights and a nocturnal environment that is specifically protected for its scientific, natural, educational, and cultural value.  

Visiting a Dark Sky Reserve—such as Aoraki Mackenzie in New Zealand, NamibRand in Namibia, or regions in the American Southwest and rural Europe—does more than just let you see more stars with the naked eye. For a camera sensor, it means a significantly better signal-to-noise ratio. The absence of artificial light allows you to use higher ISO settings and longer exposures without washing out the image frame with orange or grey haze. When planning your 2026 celestial travels, prioritising proximity to a Dark Sky Reserve will exponentially improve your photographic output, especially for faint targets like meteors or the Milky Way’s galactic core.

The Main Event: The Great European Total Solar Eclipse (August 12, 2026)

Without question, the anchor event of 2026 is the total solar eclipse on August 12th. While total eclipses happen somewhere on Earth roughly every 18 months, they often occur over inaccessible oceans or remote tundras. The 2026 path of totality is unique because it crosses highly accessible areas of the Northern Hemisphere during peak travel season, specifically touching eastern Greenland, western Iceland, and cutting a swath across northern Spain.  

A total solar eclipse is perhaps the most dramatic natural event a photographer can witness. The moon completely blocks the sun’s brilliant photosphere, plunging day into an eerie twilight, dropping temperatures, and revealing the sun’s magnificent, wispy corona.

Photographing the Eclipse

Capturing an eclipse requires preparation and, crucially, safety equipment. You cannot point your camera at the sun during the partial phases without a certified solar filter; doing so will destroy your camera’s sensor and can instantly blind you if you look through an optical viewfinder.

The photographic workflow involves two distinct stages. During the partial phases, where the moon slowly takes a “bite” out of the sun, a solar filter must be on your lens. You will need a telephoto lens, ideally 400mm or longer, to get a detailed disk size. Spot metering on the sun itself will usually yield a correct exposure, resulting in an orange or white sun against a black sky.

The magic happens during the brief minutes of totality. As the final sliver of sunlight disappears—creating the brilliant “diamond ring” effect—you must swiftly remove the solar filter. This is the only time it is safe to view and photograph the sun naked. During totality, you are photographing the faint solar corona. You will need to drastically change your settings, opening your aperture and slowing your shutter speed. Because the corona’s brightness varies significantly from its inner edge to its outer wisps, the best technique is “bracketing”. Take a rapid sequence of photos at different shutter speeds (ranging from perhaps 1/1000th of a second down to 1 or 2 full seconds) to ensure you capture the full dynamic range of the sun’s atmosphere. As soon as the diamond ring reappears on the opposite side, the filter must go back on immediately.

For those targeting Spain, the eclipse occurs very late in the day, near sunset. This offers a unique, albeit challenging, photographic opportunity to capture the eclipsed sun just above the horizon, potentially incorporating landscape elements—a rare composition in eclipse photography.

The Summer Spectacle: The Perseid Meteor Shower (August 2026)

August 2026 is a powerhouse month for astronomy. Just days around the solar eclipse, the annual Perseid meteor shower will reach its peak. The Perseids are beloved for being bright, frequent, and often producing dramatic fireballs.

Crucially, the moon phase for the 2026 Perseids is incredibly favourable. Because the new moon occurs on August 12th for the eclipse, the peak nights of the Perseids (around August 12th-14th) will feature moonless skies for most of the night. This is the ideal scenario for meteor photography.

Photographing Meteors

Unlike the eclipse, which requires telephoto precision, meteor showers are about wide perspectives and patience. You need a camera with good high-ISO performance and your widest, fastest lens (ideally f/2.8 or faster).

The technique involves setting up your camera on a sturdy tripod in the darkest location you can find—again, a Dark Sky Reserve is the gold standard here. Set your lens to its widest aperture and manually focus on infinity using a bright star. Your ISO will likely need to be between 1600 and 3200, depending on your camera’s noise handling.

You want to take continuous long exposures. A typical exposure time is between 15 and 25 seconds. If you expose longer than that, the stars will begin to trail noticeably due to the Earth’s rotation (unless you are using a star tracker). Use an intervalometer (either built-in or an external remote) to lock the shutter down, taking back-to-back photos for hours.

Compositionally, while the meteors radiate from the constellation Perseus, they can appear anywhere in the sky. It is often best to compose a shot that includes an interesting foreground element—a mountain range, an interesting tree, or an old barn—and point the camera generally toward the radiant point, but including a vast expanse of sky. The goal is to capture as many frames as possible in hopes that a bright meteor streaks through one of them.

Planetary Giants: Jupiter and Saturn at Opposition

Throughout late summer and autumn of 2026, the gas giants Jupiter and Saturn will reach opposition. This means they are opposite the sun in our sky, rising at sunset, staying visible all night, and appearing at their brightest and largest for the year.

While dedicated planetary cameras and large telescopes provide the best views, impressive photographs can be taken with standard DSLR or mirrorless gear. A long telephoto lens (even a 70-200mm with a teleconverter) can resolve Jupiter as a distinct disc and easily capture its four Galilean moons as tiny pinpricks of light lined up beside it. Saturn’s rings are also resolvable with sufficient focal length.

The key challenge here is exposure. The planets are much brighter than the surrounding stars. If you expose the stars, the planets will be blown-out white blobs. You must use a fast shutter speed and low ISO, spot-metering specifically on the planet to capture surface bands on Jupiter or the definition of Saturn’s rings.

The Lunar Finale: Supermoons in 2026

While the year begins with a flurry of celestial activity, it saves a double-header of lunar brilliance for the winter months. In 2026, after the initial supermoon in January, the final two major lunar events occur back-to-back in November and December.

1. The Beaver Supermoon (November 24, 2026)

This moon marks the time of year when beavers traditionally prepare for winter. As a supermoon, it will appear roughly 14% larger and 30% brighter than a standard “micro-moon” (when the moon is at its farthest).

2. The Christmas Eve Cold Supermoon (December 24, 2026)

The final supermoon of the year is particularly poetic, occurring on Christmas Eve. Known as the Cold Moon, it will be the closest full moon of the entire year, reaching its absolute peak brightness against the crisp, clear winter sky.

How to Photograph the 2026 Supermoons

The primary challenge in supermoon photography is the sheer intensity of its light. To the naked eye, it looks massive and detailed; to a camera, it often looks like a glowing white hole in the sky. To get a professional result, you must take full control of your exposure.

The Technical Recipe

  • Manual Mode is Mandatory: Switch your camera to ‘M’. The moon is essentially a giant rock illuminated by direct sunlight, so it requires settings more akin to daylight photography than night photography.
  • Low ISO: Keep your ISO as low as possible to preserve the fine details of lunar craters and “seas” (maria).
  • Narrow Aperture (f/5.6 to f/11): This range is typically the “sweet spot” for lens sharpness. Using a narrower aperture also ensures that if you have distant landscape elements, they remain relatively sharp. But you can use as wide as F/5.6 to let in more light while keeping the entire moon in focus.
  • Fast Shutter Speeds (1/125s to 1/250s): Surprisingly, the moon moves quite fast across the sky. A common mistake is using a long exposure (e.g., 5 seconds), which results in a blurry, oblong moon. Use a fast shutter to “freeze” the moon and capture its texture.

Conclusion: Preparation Meets Opportunity

The year 2026 offers a compelling itinerary for the astrophotographer. From the high-stakes drama of the Spanish or Icelandic eclipse to the serene, all-night vigils for Perseid meteors, the opportunities are vast. Success in astrophotography, however, rarely happens by accident. It is the result of meticulous planning—scouting locations, understanding the specific phases of the event, practicing with your gear in the dark beforehand, and crucially, respecting the need for true darkness. By aligning your travel plans with certified Dark Sky locations and mastering the techniques required for these varying phenomena, you can ensure that 2026 is the year you capture the universe in all its glory.

Canon India Announces RF 20mm F/1.4 L VCM

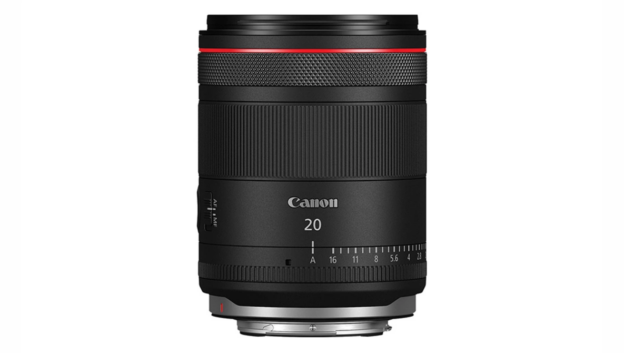
Canon has also expanded its RF Hybrid Primes line up with the RF 20 mm f/1.4 L VCM lens. Joining the 24 mm, 35 mm, and 50 mm f/1.4 lenses, this ultra-wide-angle lens offers smooth autofocus, minimal focus breathing, and a physical iris ring for video shooters. Weighing 519g, it has a 67 mm filter thread, a rear filter holder, and is dust-resistant. 

Designed for both stills and video, the lens features built-in focus breathing reduction for stable compositions, smooth subject tracking, and silent operation. Its high-thrust VCM ensures precise, rapid autofocus, while a clickless iris ring allows seamless aperture adjustments during filming. The lens shares consistent size, weight, and controls with Canon’s other f/1.4L VCM primes, reducing the need for rebalancing when swapping lenses.

Optically, the RF 20mm F1.4L VCM introduces BR optics to minimize chromatic aberration, along with aspherical elements that correct distortions like sagittal coma flare—perfect for astrophotography. ASC and SWC coatings reduce flare and ghosting, ensuring crisp, high-resolution images even in challenging lighting. With its outstanding image quality and future-proof design for 8K imaging, this lens is a must-have for professionals seeking both precision and versatility.

The Canon RF 20mm F/1.4 L VCM is priced at ₹1,58,995.