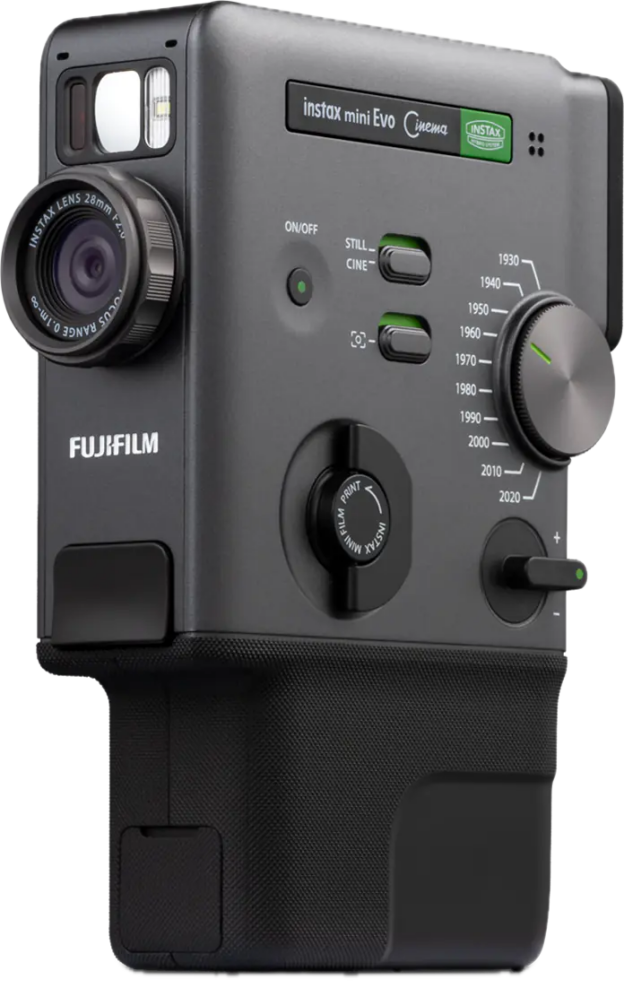
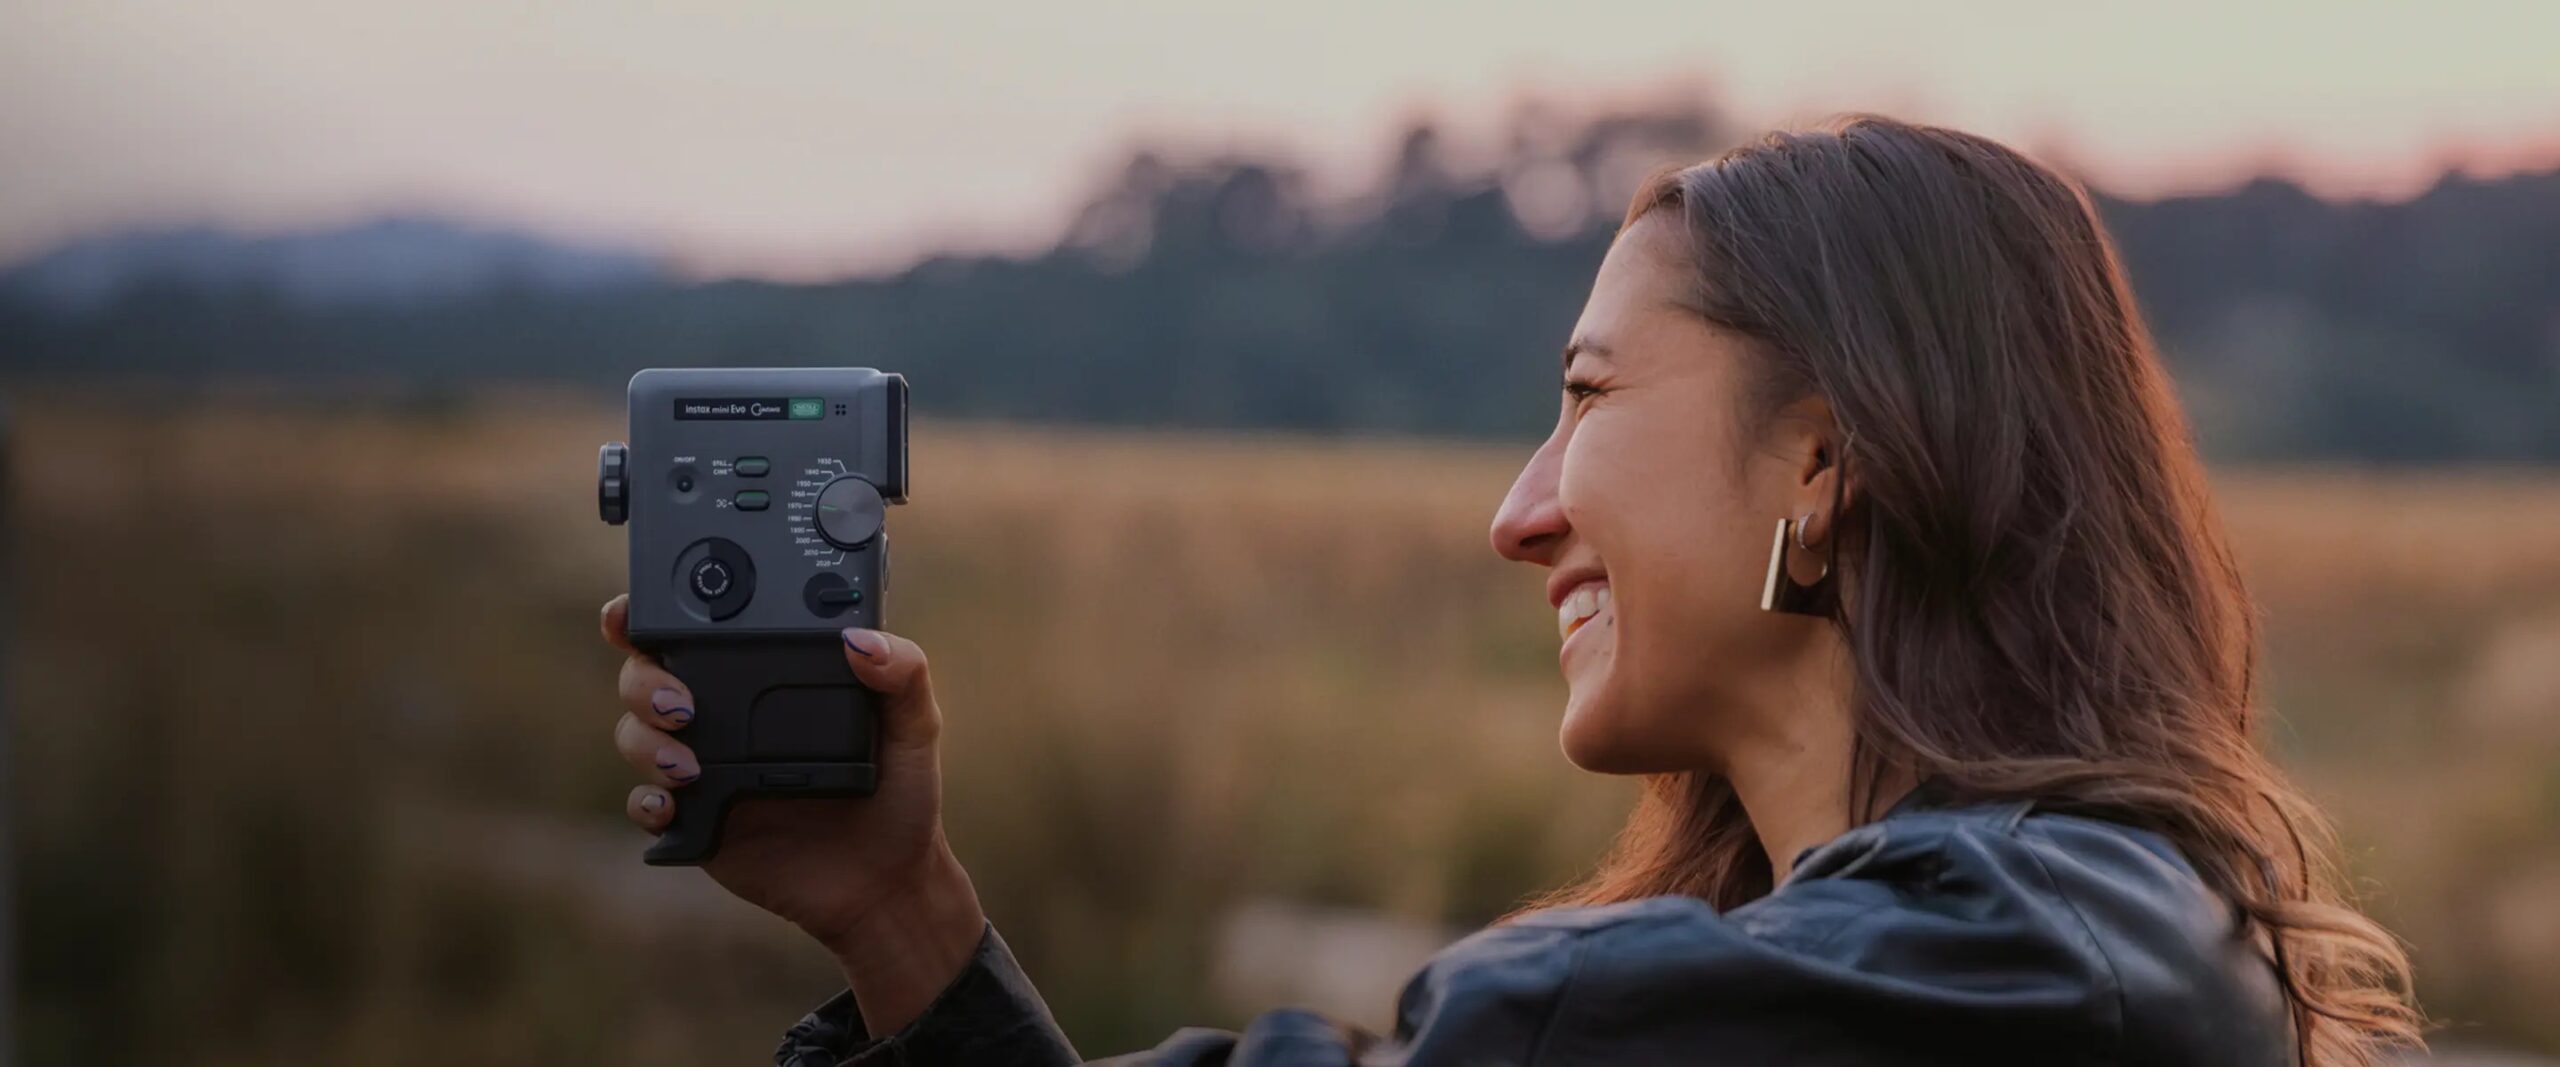
Fujifilm India has launched the Instax mini Evo Cinema, the latest addition to its instax hybrid instant camera Evo series. Designed to combine cinematic expression with instant photography, the camera allows users to capture both still images and short videos, which can be transformed into physical instax prints.
In India, the instax mini Evo Cinema Premium Edition will be available in a Combo Box priced at INR 47,999. The package includes the camera and two packs of instax mini glossy film. Pre-bookings will be open till the 27th of January 2026 on their website, with customers receiving two additional film packs as a pre-booking benefit. The product will be available for purchase from 28 January 2026.
The camera introduces video-to-print functionality, enabling users to convert up to 15-second videos into instax prints embedded with QR codes. Scanning the QR code allows the video to be replayed or shared digitally. A key feature is the new Eras Dial, offering 10 effects inspired by different time periods from 1930s all the way to 2020, each with adjustable levels for varied creative expression.
The design draws inspiration from Fujifilm’s 1960s-era FUJICA Single-8 camera, featuring a vertical grip and analog-style controls. A dedicated smartphone app supports video editing, clip combination, and direct printing from mobile devices.
According to FUJIFILM India, the instax mini Evo Cinema aims to offer a hybrid photography experience that blends digital creativity with the emotional appeal of instant prints.
Competition doesn’t sleep, and 2025 was no exception for the quote. The imaging industry went through a makeover of sorts, as we saw a shift of priority from companies, which led to them making cameras which were more hybrid in nature. This year we saw the Nikon-RED merger further fruitioning into a compact, competitive cinema camera and Canon releasing one in a similar form factor but with different capabilities and priority. In this round up, we list the cameras that brought something new to the table. Just like last year, we aren’t including lenses, drones or action cameras or cinema cameras, even though they’ve got so much in common now with their mirrorless cousins.
Canon EOS R6 Mark III
The definitive enthusiast hybrid, now featuring a 32.5MP sensor and the revolutionary “Face Registration” AF found in the flagship R1. It stands out by introducing an asymmetrical card setup (CFexpress Type B + SD), enabling professional burst speeds and 7K open gate and oversampled 4K video at an enthusiast price point.
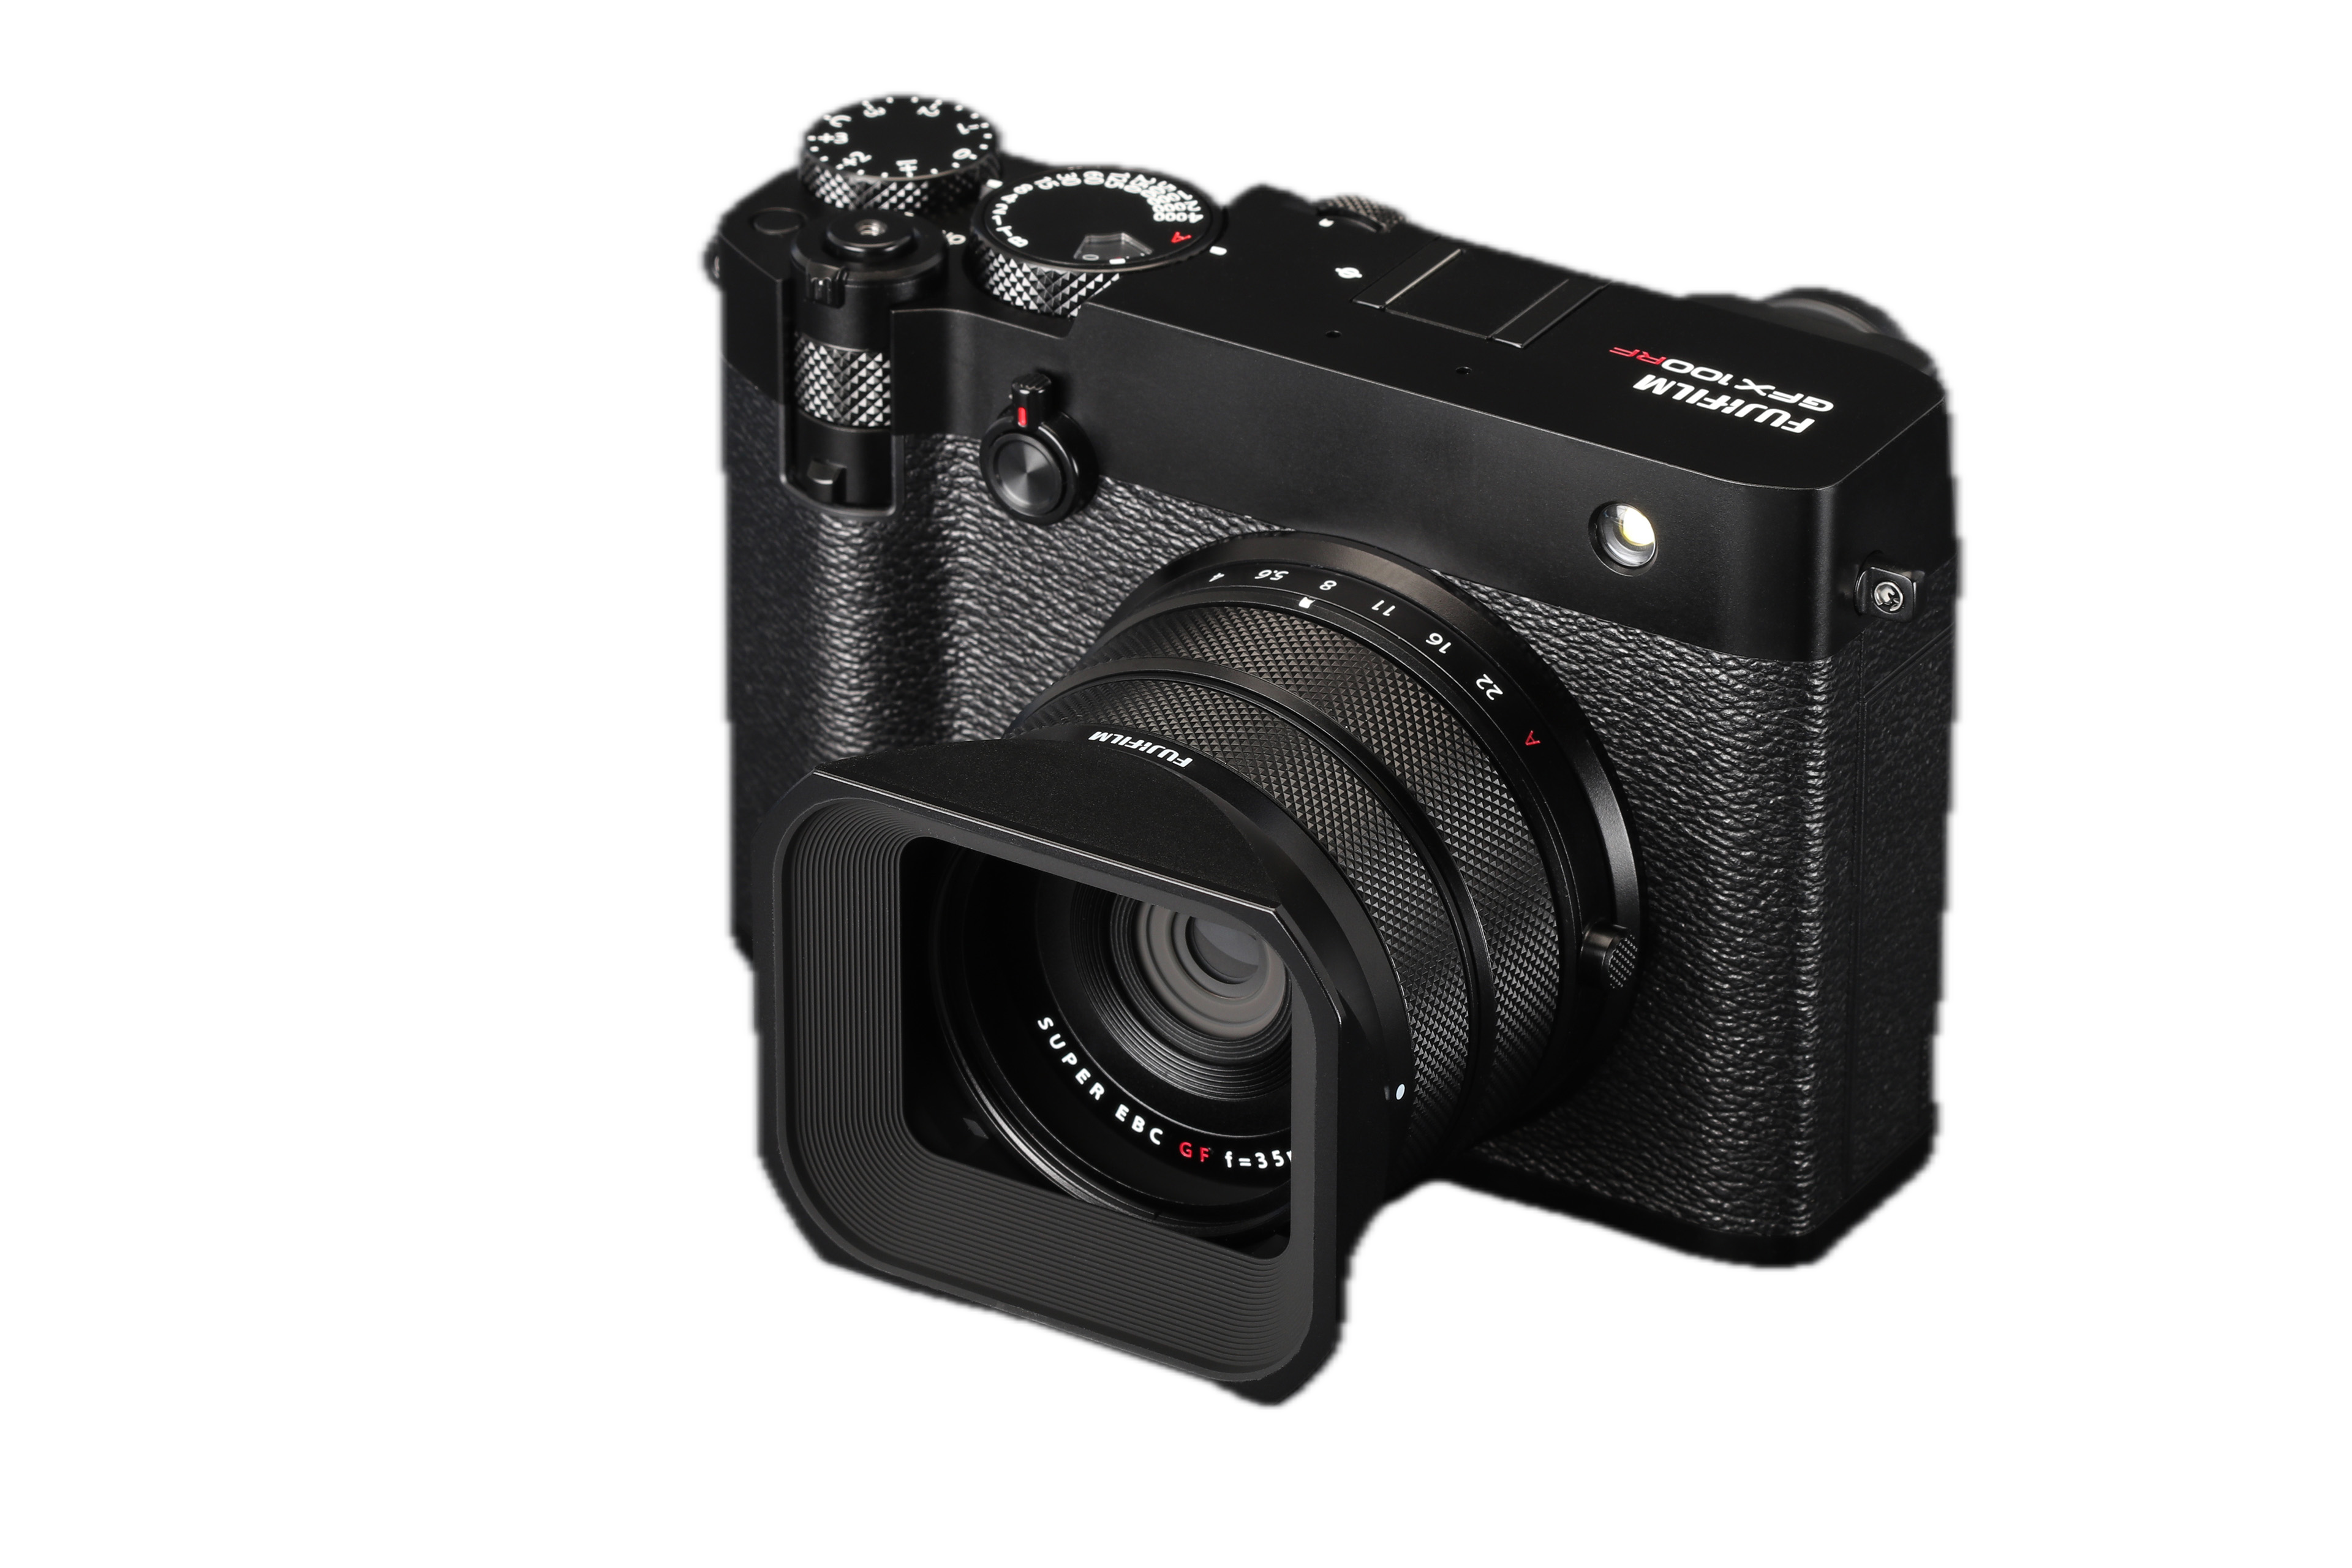
Fujifilm GFX 100RF
The world’s first 100MP fixed-lens medium format camera, designed with a sleek, rangefinder-style body. Its standout feature is the physical “Aspect Ratio Dial” on the top plate, allowing photographers to instantly switch between nine legendary film formats, including the iconic 65:24 panoramic mode.
Fujifilm X-E5
The long-awaited return of the minimalist rangefinder, finally updated with a 40MP sensor, capable of 6.2K video and 7 stops of In-Body Image Stabilization (IBIS). It is the only camera in its class to feature a dedicated “Film Simulation Dial”, giving users tactile, analogue-style control over Fujifilm’s colour science without digging into menus.
Hasselblad X2D II
An evolution of the medium format flagship X2D featuring a 100MP sensor and a 1TB internal SSD, that adds “LiDAR-assisted” autofocus for nearly instantaneous locking in pitch-black conditions. It is the first Hasselblad to support a true end-to-end HDR workflow, capturing a massive 15.3 stops of dynamic range that maps directly to HDR displays.
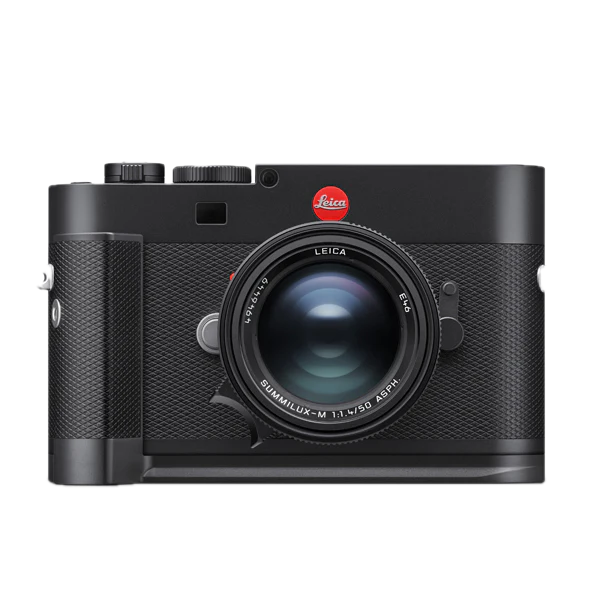
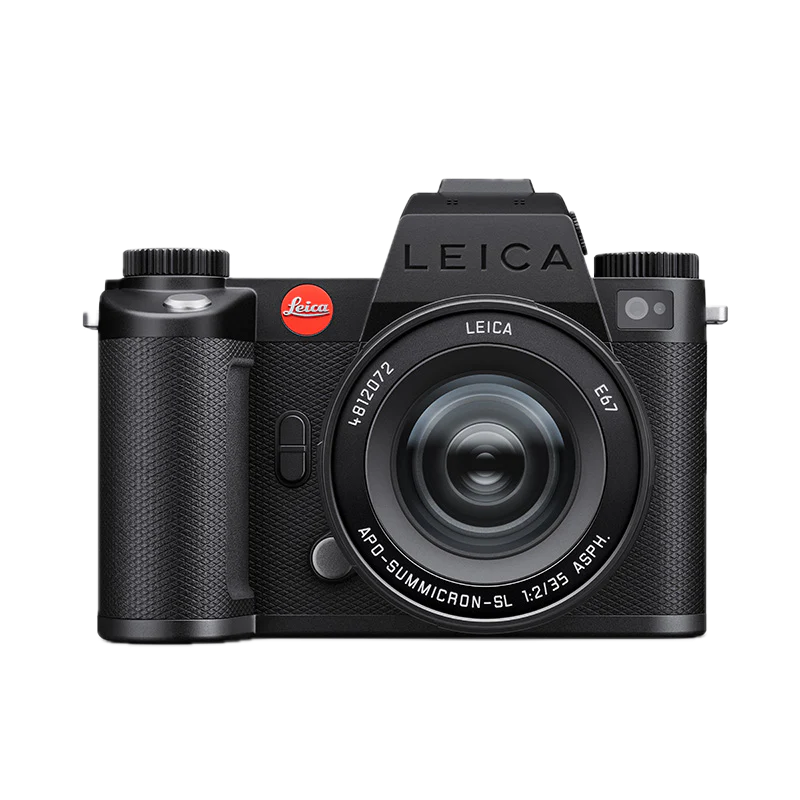
Leica M EV1
The first M-series camera in history to replace the traditional optical rangefinder with a built-in, high-resolution Electronic Viewfinder. This allows M-mount purists to use ultra-fast lenses or telephotos with the accuracy of focus peaking and real-time exposure preview for the first time.
Leica SL3S
The video-focused, 24MP sibling of the SL3, optimised for high-speed readouts and superior low-light performance. It is unique for its direct-to-SSD recording via USB-C and native “Frame.io Camera to Cloud” integration, allowing editors to begin working on footage while the shooter is still on set.
Lumix S1 II/S1R II
Panasonic’s flagship duo featuring the “Phase Hybrid AF” system and “DR Boost” technology for 15+ stops of dynamic range. The S1R II stands out as the first Lumix to record 8K video, while both models feature a “Real-Time LUT” button to bake professional colour grades directly into the footage.
Nikon Z5 II
A massive “value” hit of 2025, this budget full-frame king that redefines entry-level by also incorporating the flagship EXPEED 7 processor and a class-leading 3,000-nit EVF. Its uniqueness lies in being the first—and till now, only—camera in its price bracket to support internal 12-bit N-RAW recording and AI-driven subject detection that can lock onto targets in near-total darkness.
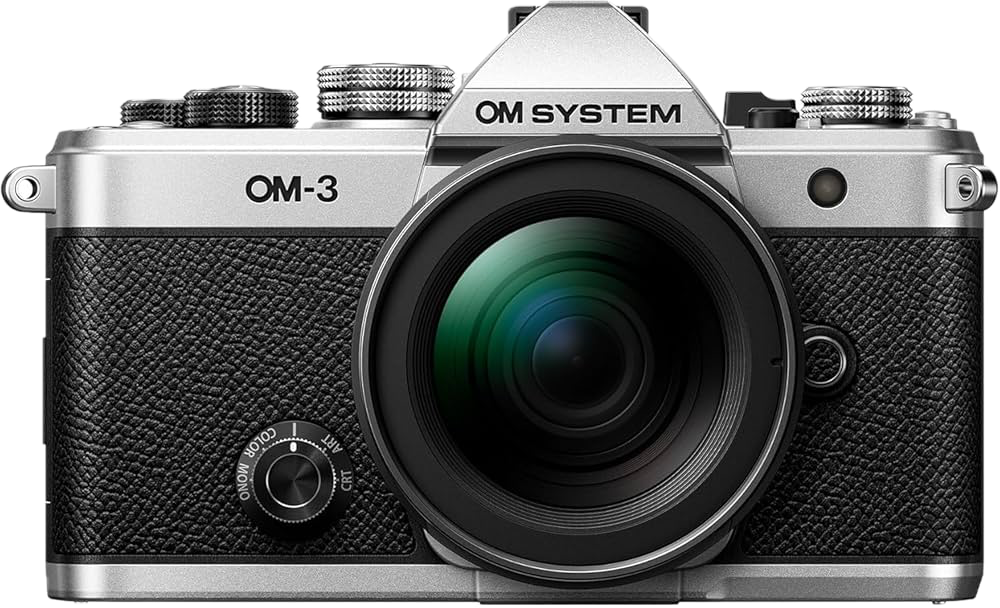
OM SYSTEM OM-3
A “tough” Micro Four Thirds camera that packs a high-speed stacked sensor into a body smaller than the OM-1. It is unique for its dedicated “Computational Photography” dial, providing one-touch access to Live ND, Focus Stacking, and the new “Starry Sky AF” for astrophotographers.
OM SYSTEM OM-5 II
The ultimate ultra-light adventure camera, featuring IP53-certified weather sealing that allows it to operate in torrential rain. Its uniqueness is its extreme portability (only 418g) combined with “Sync IS” that provides up to 7.5 stops of stabilisation, allowing for handheld long exposures in the wilderness.
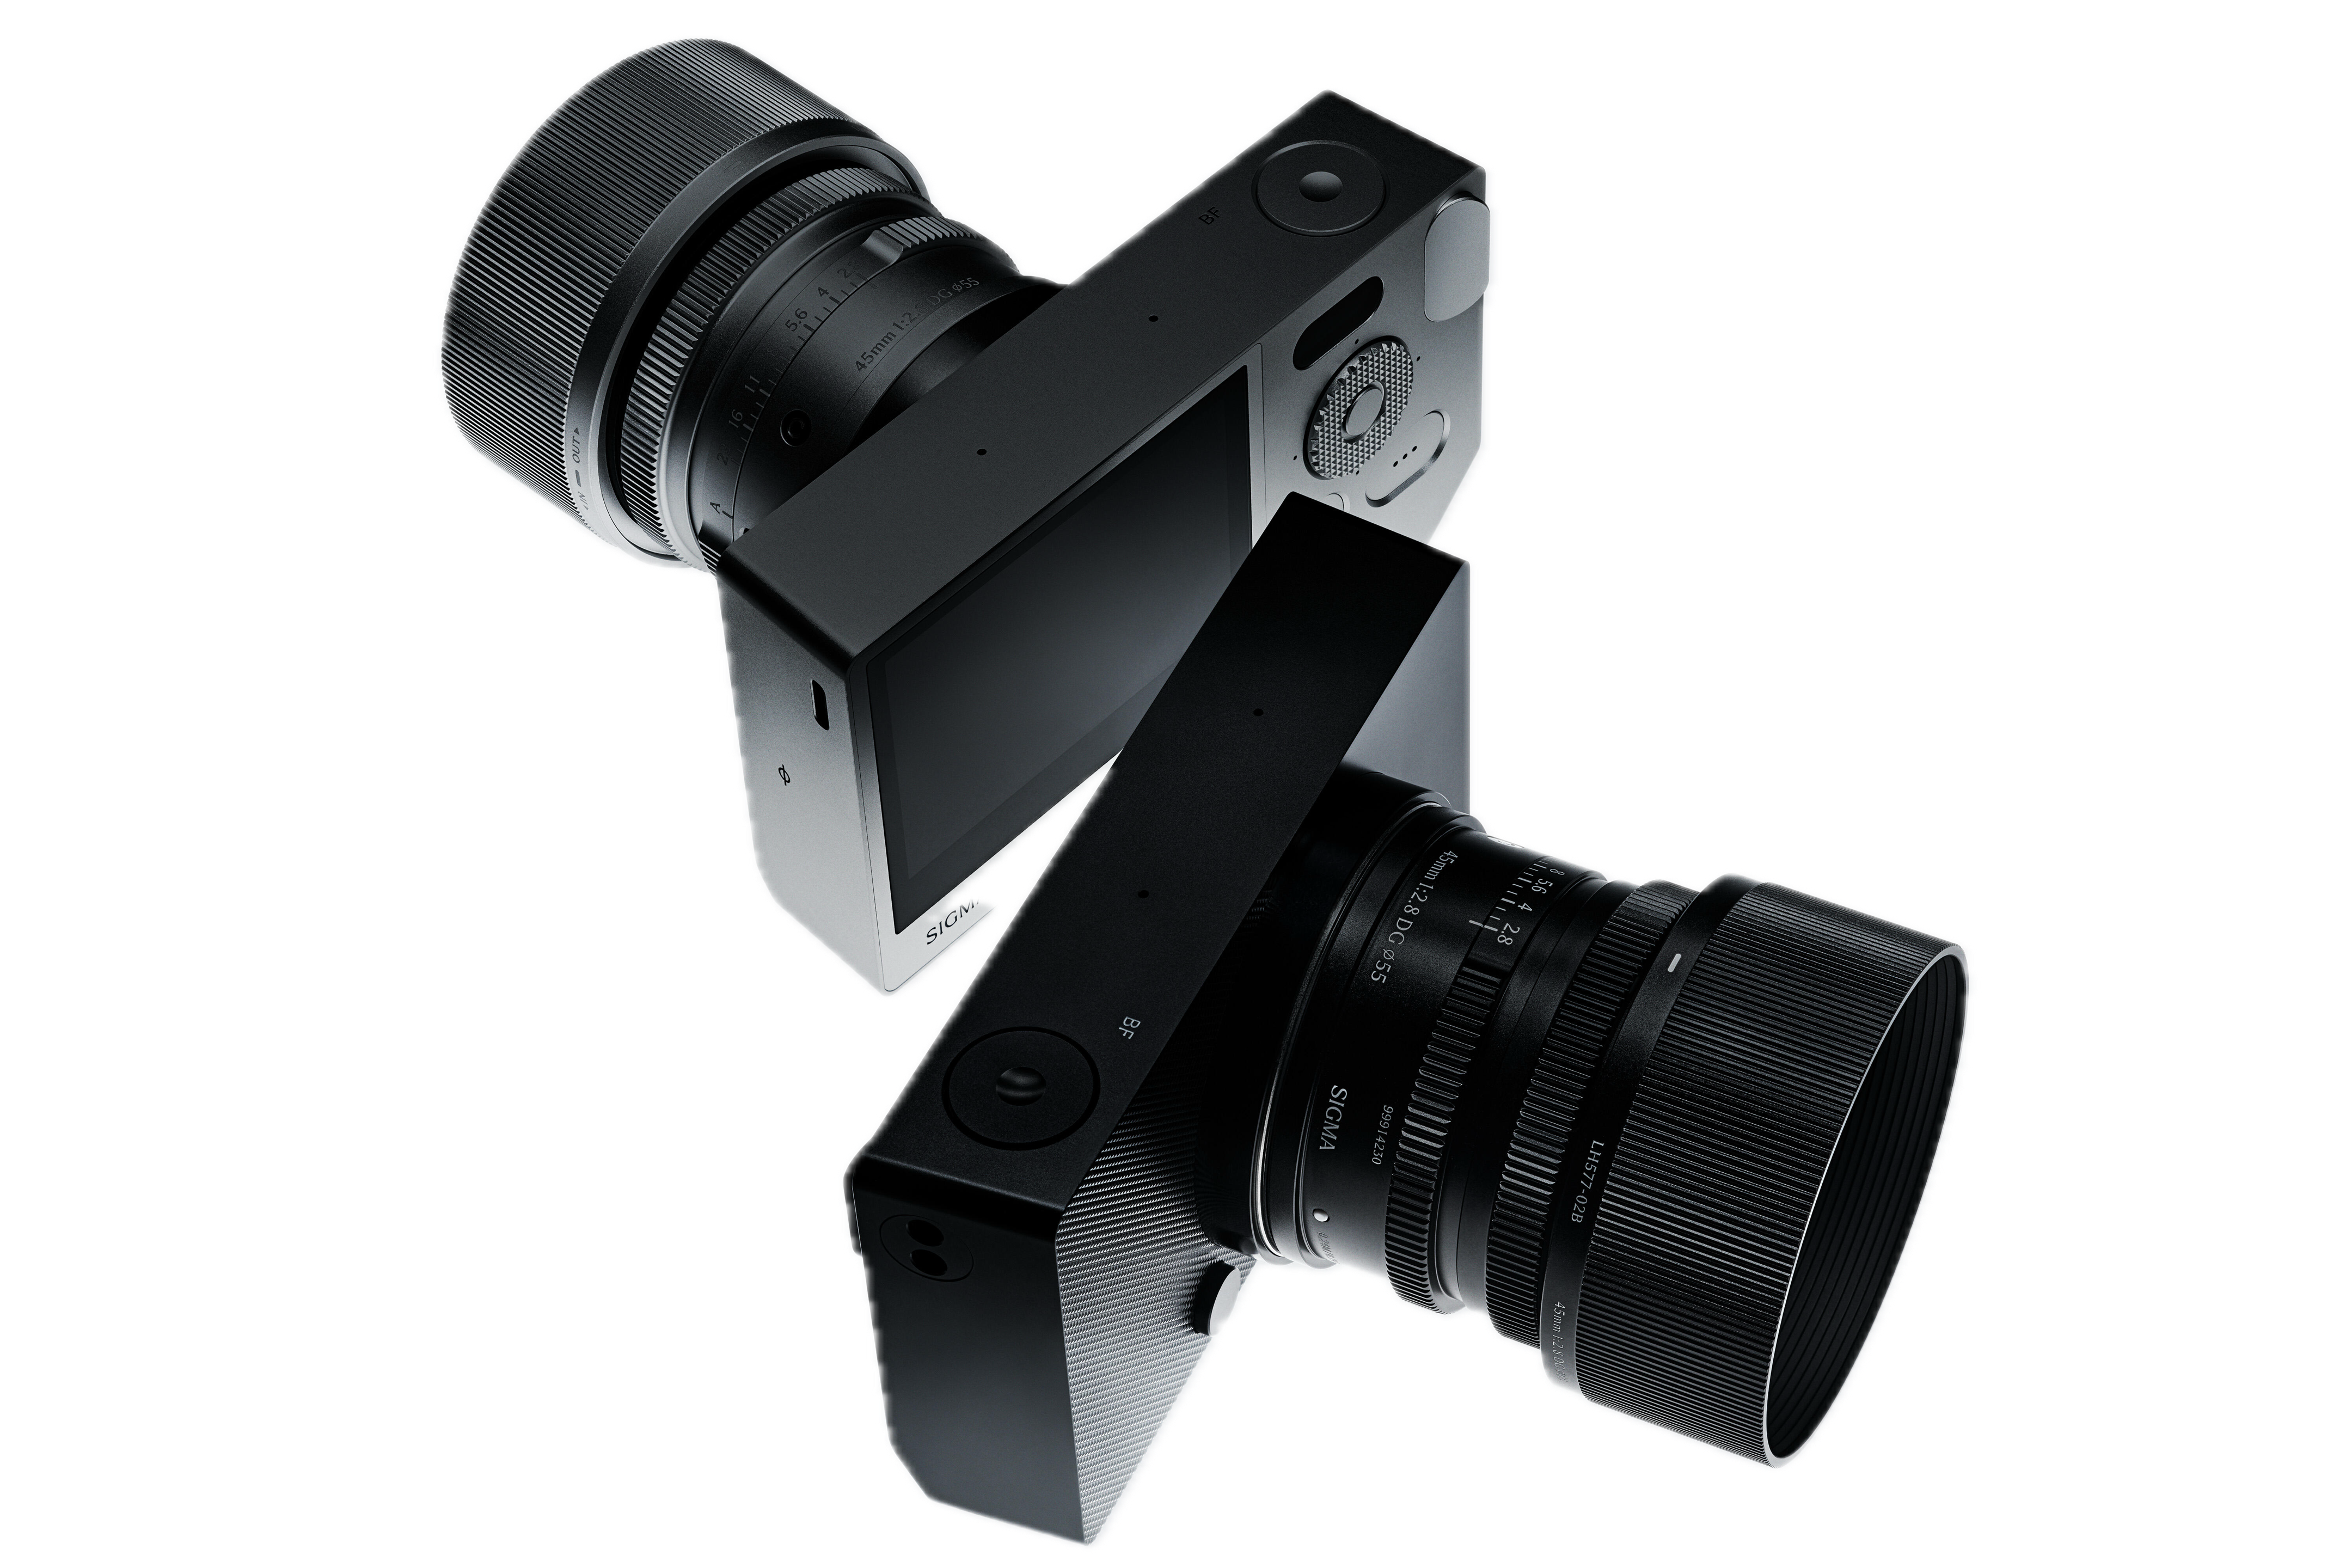
Sigma Bf
Famed as “the camera if Apple made it”, this L-mount camera features a minimalist, single-block aluminum chassis with only three buttons. It stands out for its gesture-based interface and “Beautifully Foolish” philosophy, focusing on the joy of photography over technical spec-chasing.
Sony A7 V
The fifth generation of the “industry standard” all-rounder, now featuring a dedicated AI processing chip for human pose estimation. Its uniqueness is the “4-Axis Multi-Angle” LCD screen that combines a tilt-screen and a flip-out screen, solving the long-standing debate between photographers and videographers. Combine that with the new semi-stacked 33MP sensor, this camera can shoot at higher burst rates and with faster readout speeds.
Sony RX1R III
The long-awaited return of the full-frame compact rangefinder, now packing a 61MP sensor into a body that fits in a jacket pocket. It is the only camera of its size to feature a “Variable Optical Low-Pass Filter”, allowing users to choose between maximum sharpness or moiré control for every shot.
2025 was no stranger to human experiences of turmoil, despair, salvation and hope. And through these months, just like every year, photographers have told stories through their photographs that left a lasting impression. This list is a curation of pictures from different genres, showcasing different themes, and in no particular order like always, is also celebrating the work of photographers in capturing key moments of time. Here’s to hoping 2026 is filled with more fruition for all even in the face of growing threats.
Air India AI 171 Crash
Source: PTI
On the 12th of June, an Air India Boeing 787-8 Dreamliner plane codename AI 171 carrying 242 souls on board crashed immediately after takeoff in Ahmedabad on a medical college building, leaving only one survivor. An additional 19 people died on the ground—mostly students of the college—and 67 more were left seriously injured. The news devastated the nation, and this photograph shows India’s Prime Minister Narendra Modi at the crash site taking stock of the situation, underscoring the gravity of the disaster. The image captures both the scale of destruction and the intense official scrutiny as investigators work to understand what went wrong.
Pahalgam Attack
Source: PTI
A photograph from the Pahalgam attack captures the gut-wrenching moment as a newly-wed woman sits on the ground beside her deceased husband, an expression marked by shock, emptiness, disbelief and grief. The image reflects the human cost of the violence, away from headlines and official statements. Adding to the horror—the scene is set against a stark, open and beautiful landscape, underscoring the vulnerability of those caught in it. Sourced through Press Trust of India, we were unable to identify the photographer, but the image seems to be shot on a phone. India responded in kind by targeting and neutralising terrorist depots with Operation Sindoor, an ode to the Vermillion erased and spilled, and the post operation briefing righteously led by women officers.
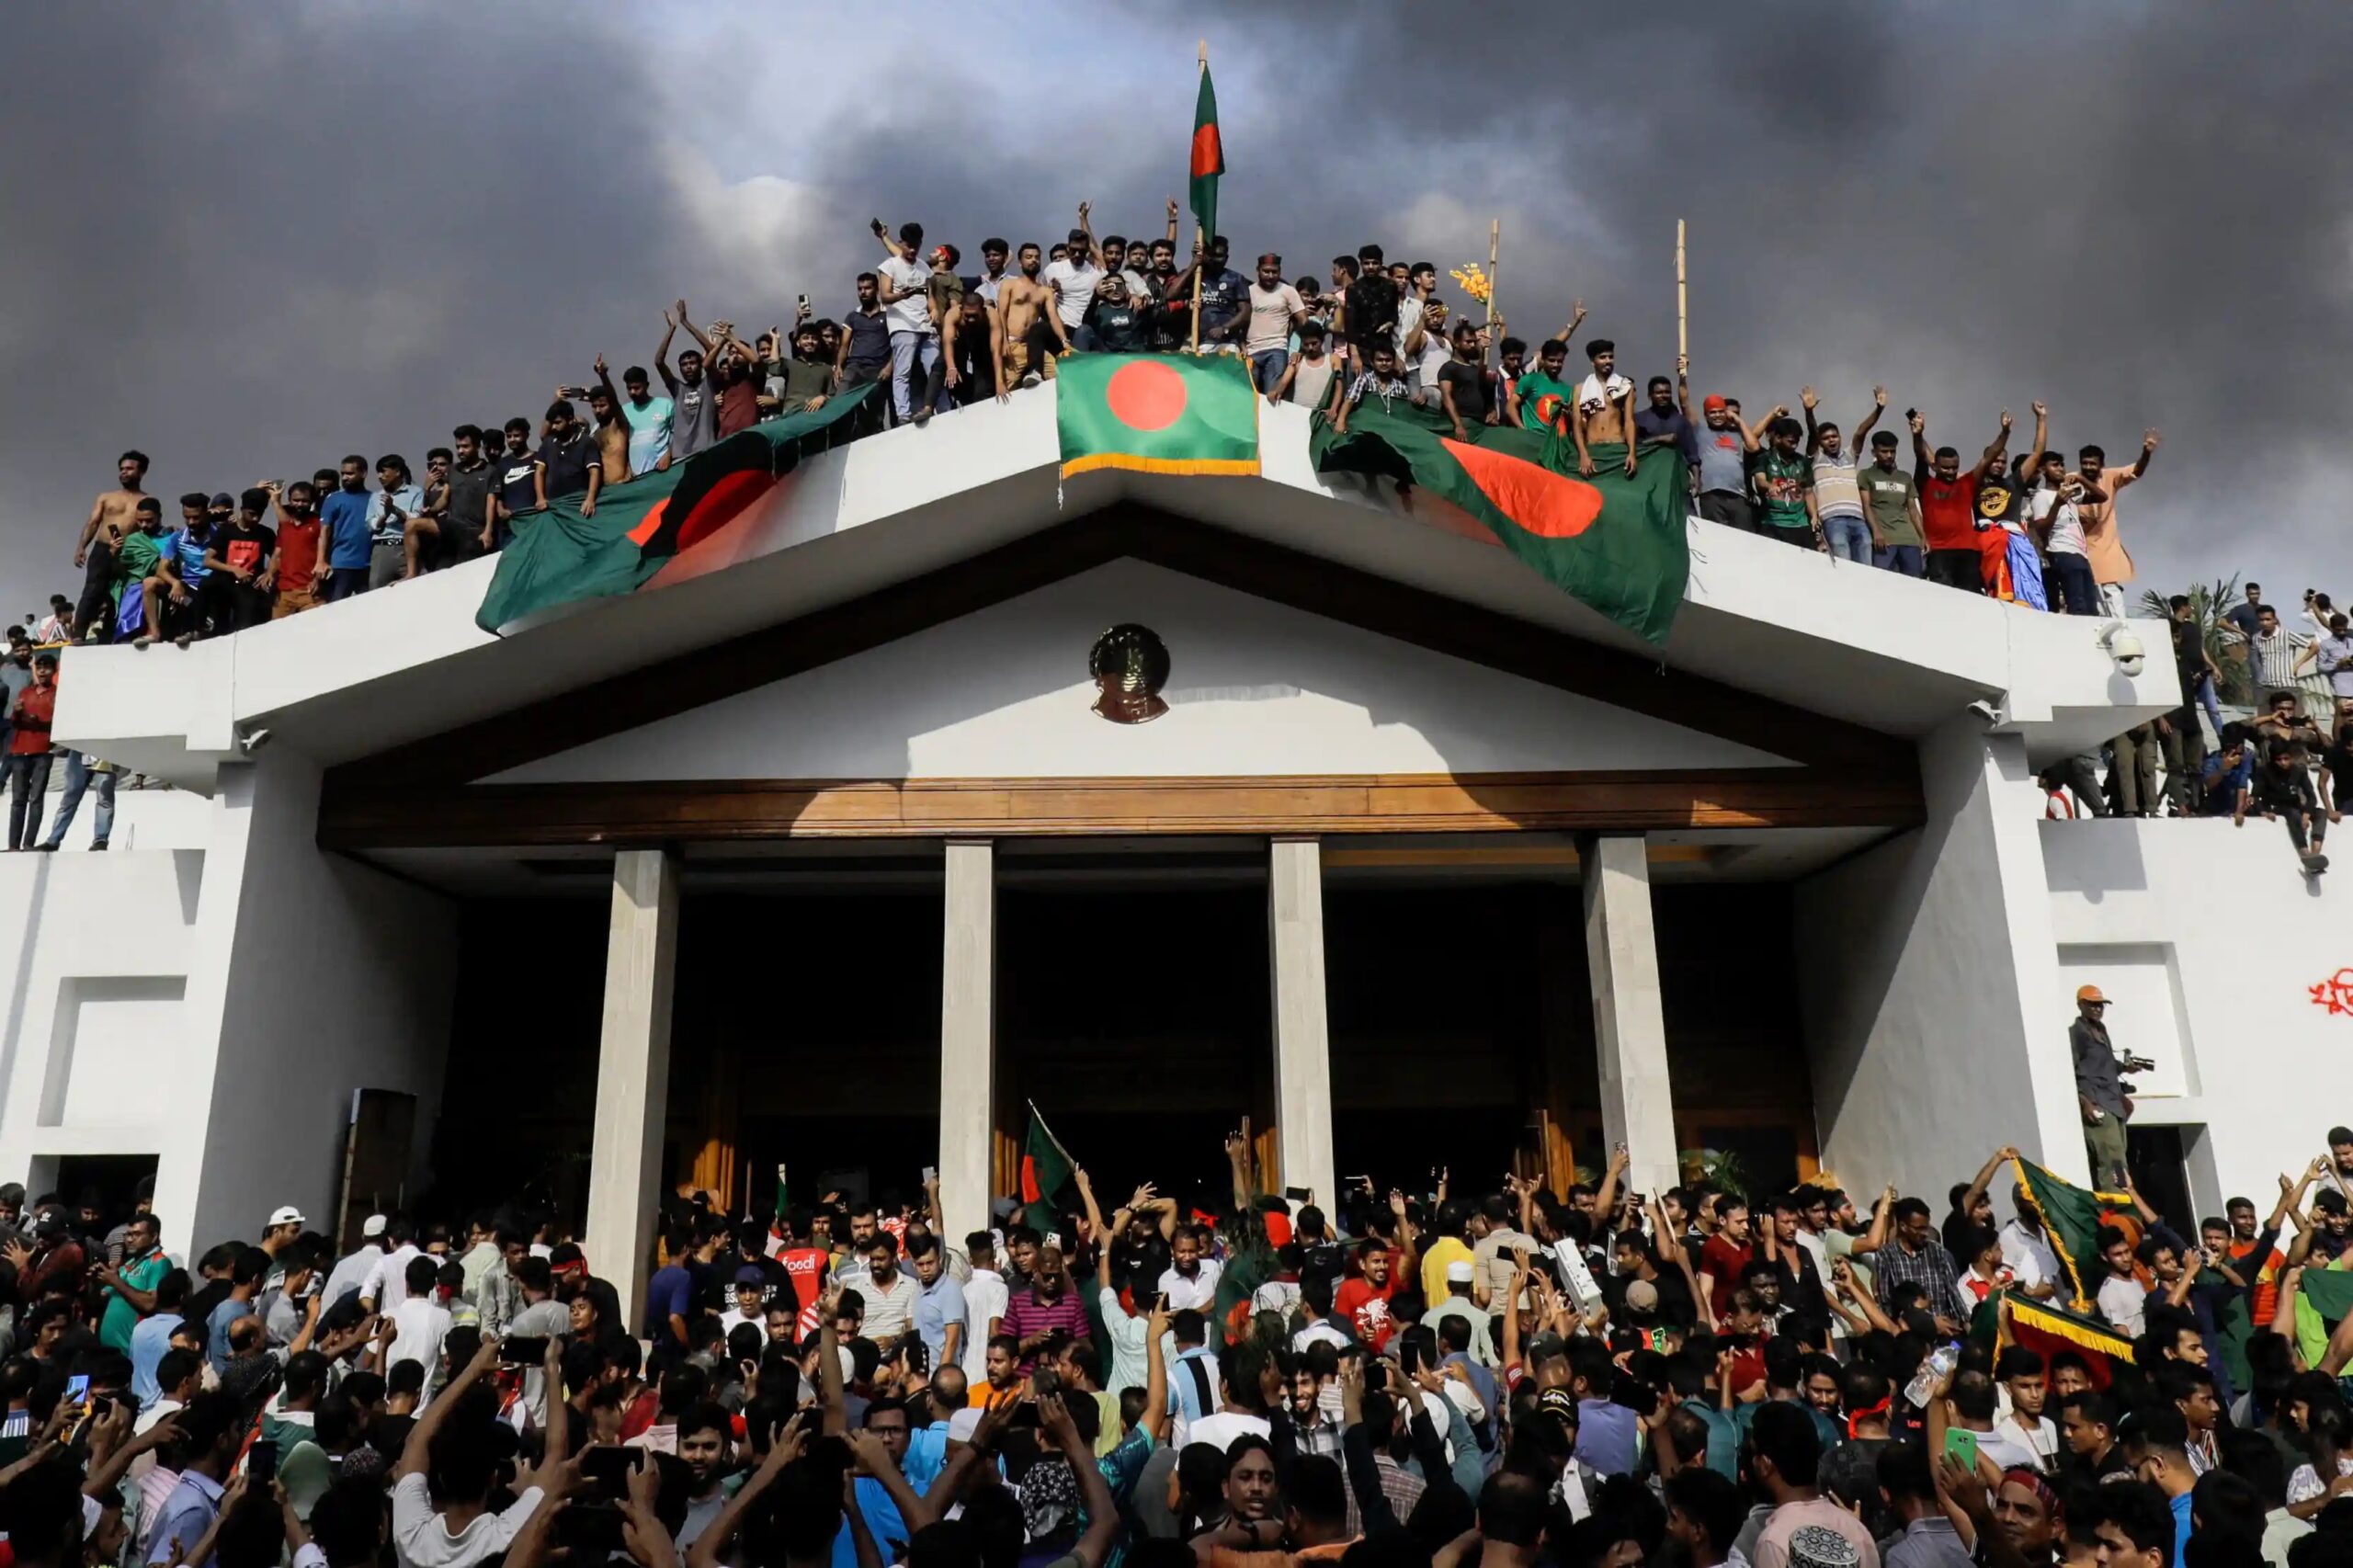
Gen Z-led Revolutions in Nepal and Bangladesh, Governments Overthrown
Credit: K M Asad / Agence France-Presse / Getty Images
South Asia has recently been reshaped by a wave of youth-led uprisings, first in Bangladesh in 2024 and then in Nepal in September 2025. This image illustrates the height of the Bangladesh revolution on August 5, 2024, where a sea of jubilant protesters swarmed the Jatiya Sangsad Bhaban in Dhaka, waving flags and climbing the parliament’s walls to celebrate the ouster of Sheikh Hasina. This momentum echoed through the region, inspiring Nepal’s Gen Z to launch their own “anti-corruption movement” in 2025 following a controversial social media ban. Mirroring the scenes in Dhaka, thousands of Nepali students and young professionals marched on the Federal Parliament in Kathmandu, eventually forcing the resignation of Prime Minister K.P. Sharma Oli and the appointment of Sushila Karki as the country’s first female Prime Minister. Together, these movements mark a historic era where the region’s youth have successfully dismantled long-standing political establishments to demand digital freedom and governmental accountability.
Donald Trump’s Presidential Portrait
Credit: Daniel Torok
What about a United States Presidential portrait makes it powerful enough to make it to the list? Well, in this case, everything. The mood, the tone, and overall, what geopolitical implications could the new President of the United States bring to the world. Shot by Chief White House Photographer Daniel Torok, the usually well-lit background is plunged into a darkened state, with the president’s face being lit from underneath adding might to his grim expression, foreshadowing an uncompromising regime.
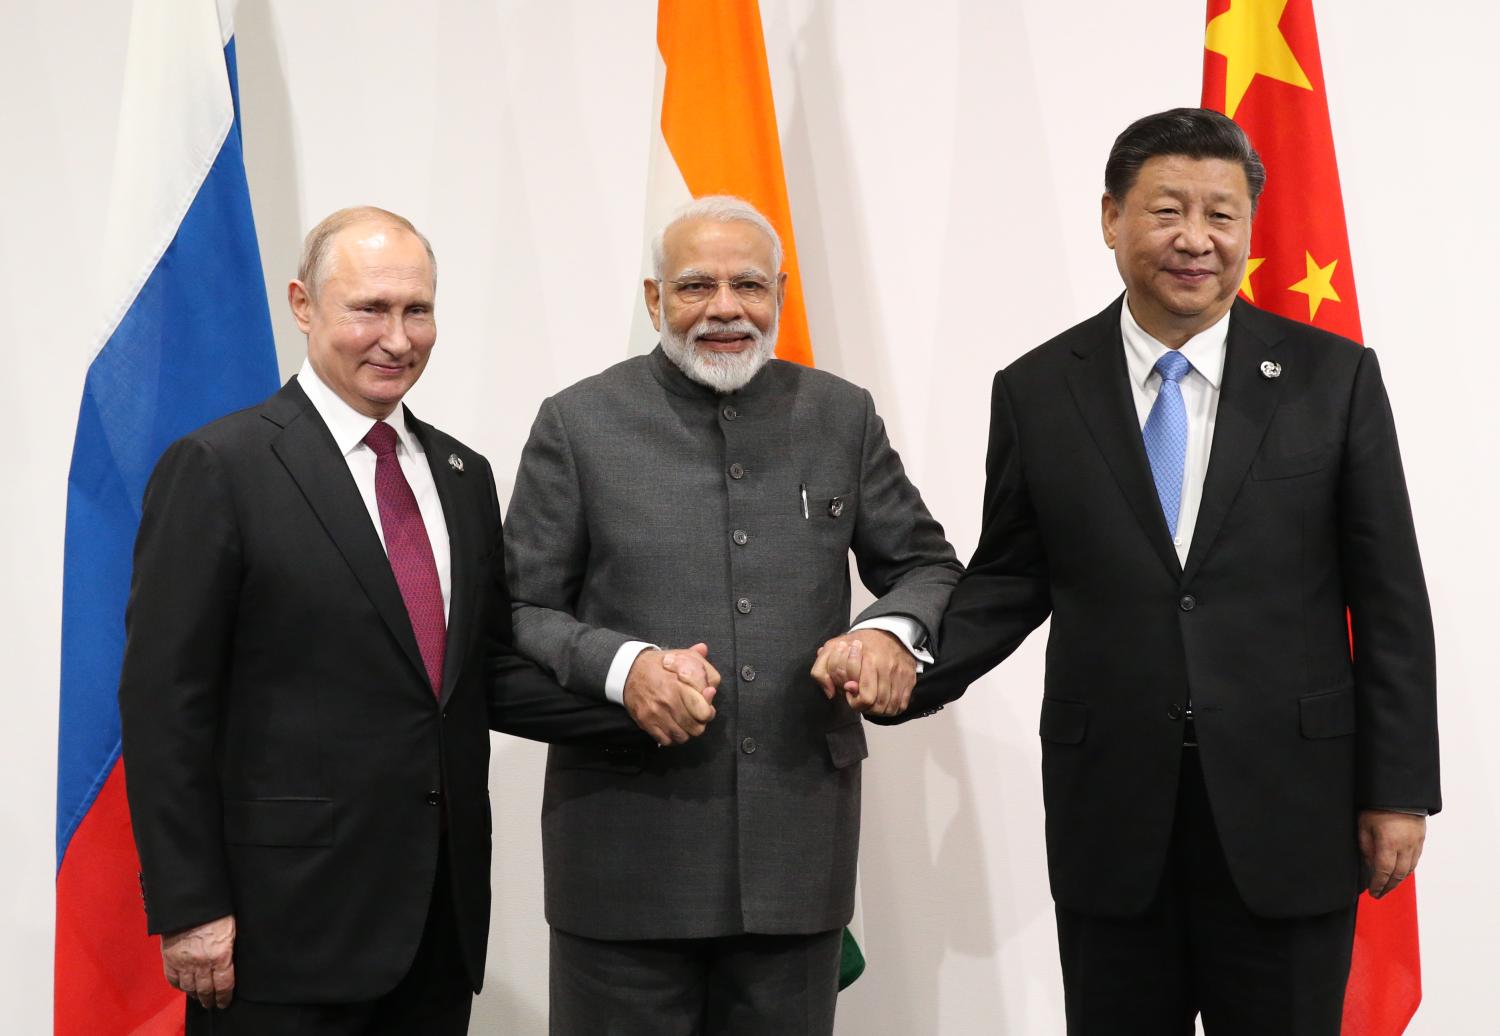
Modi-Putin-Xi Meet
Source: Mikhail Svetlov / Getty Images
In a striking display of diplomatic choreography at the 2025 Shanghai Cooperation Organization (SCO) Summit in Tianjin, Prime Minister Narendra Modi acted as a central bridge between two of the world’s most powerful figures. As the leaders gathered for the official group photograph, Modi—known for his tactile and personal style of diplomacy—reached out to grasp President Vladimir Putin’s hand with a warm, firm gesture. With a practiced ease that cut through the rigid atmosphere of international protocol, he guided the Russian leader toward President Xi Jinping for a high-profile greeting. This orchestrated moment of connection, punctuated by Modi’s characteristic smile, served as a potent visual metaphor for India’s unique position in the global order: a confident Vishwa Mitra (friend to the world) capable of navigating the complex friction between Moscow and Beijing while ensuring all parties remain at the table.
Indian Astronaut Back in Space
Source: Axiom Space
In a historic leap that ended a 41-year hiatus, Indian Air Force test pilot Group Captain Shubhanshu Shukla became the face of India’s triumphant return to human spaceflight during the Axiom Mission 4 (Ax-4) in mid-2025. Serving as the mission pilot, Shukla launched from the Kennedy Space Center aboard a SpaceX Dragon capsule, making history as the first Indian to ever board the International Space Station (ISS). While orbiting 400 kilometres above Earth, he conducted critical microgravity experiments ranging from cancer research to life-support studies on cyanobacteria that bridge the gap between India’s legendary past and its future. This mission serves as a vital operational rehearsal for ISRO’s indigenous Gaganyaan programme, signalling to the world that India is no longer just a satellite launcher, but a premier space faring nation ready to establish its own permanent presence among the stars.
Ethiopian Volcano Erupts, Causing Flight Disruptions Around The World
Source: AP
In November 2025, the Hayli Gubbi volcano in Ethiopia’s Afar region, believed to be long-dormant, erupted for the first time in nearly 12,000 years, sending a massive plume of ash approximately 14 kilometres (45,000 feet) into the atmosphere. The eruption triggered widespread disruption to international aviation as high-altitude winds carried the abrasive ash cloud across the Red Sea, the Arabian Peninsula, and eventually into the airspace of Pakistan and Northern India. Major carriers, including Air India, Akasa Air, and IndiGo, were forced to cancel or reroute dozens of flights to avoid engine damage, with particular impact on routes between India and the Middle East. While the ash remained in the upper troposphere and did not significantly affect ground-level air quality, the event served as a stark reminder of how a remote geological event can paralyse global transport corridors within hours. This eruption was not an isolated event in a year of intense geological activity; Mount Etna in Italy also dominated headlines with a series of spectacular eruptions throughout 2025.
Indian Women Winning Cricket World Cup
Credit: Rafiq Maqbool/AP
In a historic “1983 moment” for the women’s game, the Indian women’s cricket team clinched their maiden ICC Women’s Cricket World Cup title on November 2, 2025, defeating South Africa by 52 runs in a high-octane final at the DY Patil Stadium in Navi Mumbai. Under the seasoned leadership of Harmanpreet Kaur, the “Women in Blue” posted a formidable 298/7, powered by a brilliant 87 from Shafali Verma and a steady 58 from Deepti Sharma. Despite a heroic century by captain Laura Wolvaardt, India’s bowling attack proved relentless; Deepti Sharma capped off a legendary tournament with a 5-wicket haul, securing her title as the ‘Player of the Tournament’. The victory not only shattered the “final hurdle” jinx after heartbreaks in 2005 and 2017, but also ignited a nationwide celebration, marking India’s arrival as a dominant, world-beating force in women’s international cricket. This wasn’t just a win for the cricket team, but for women all over India.
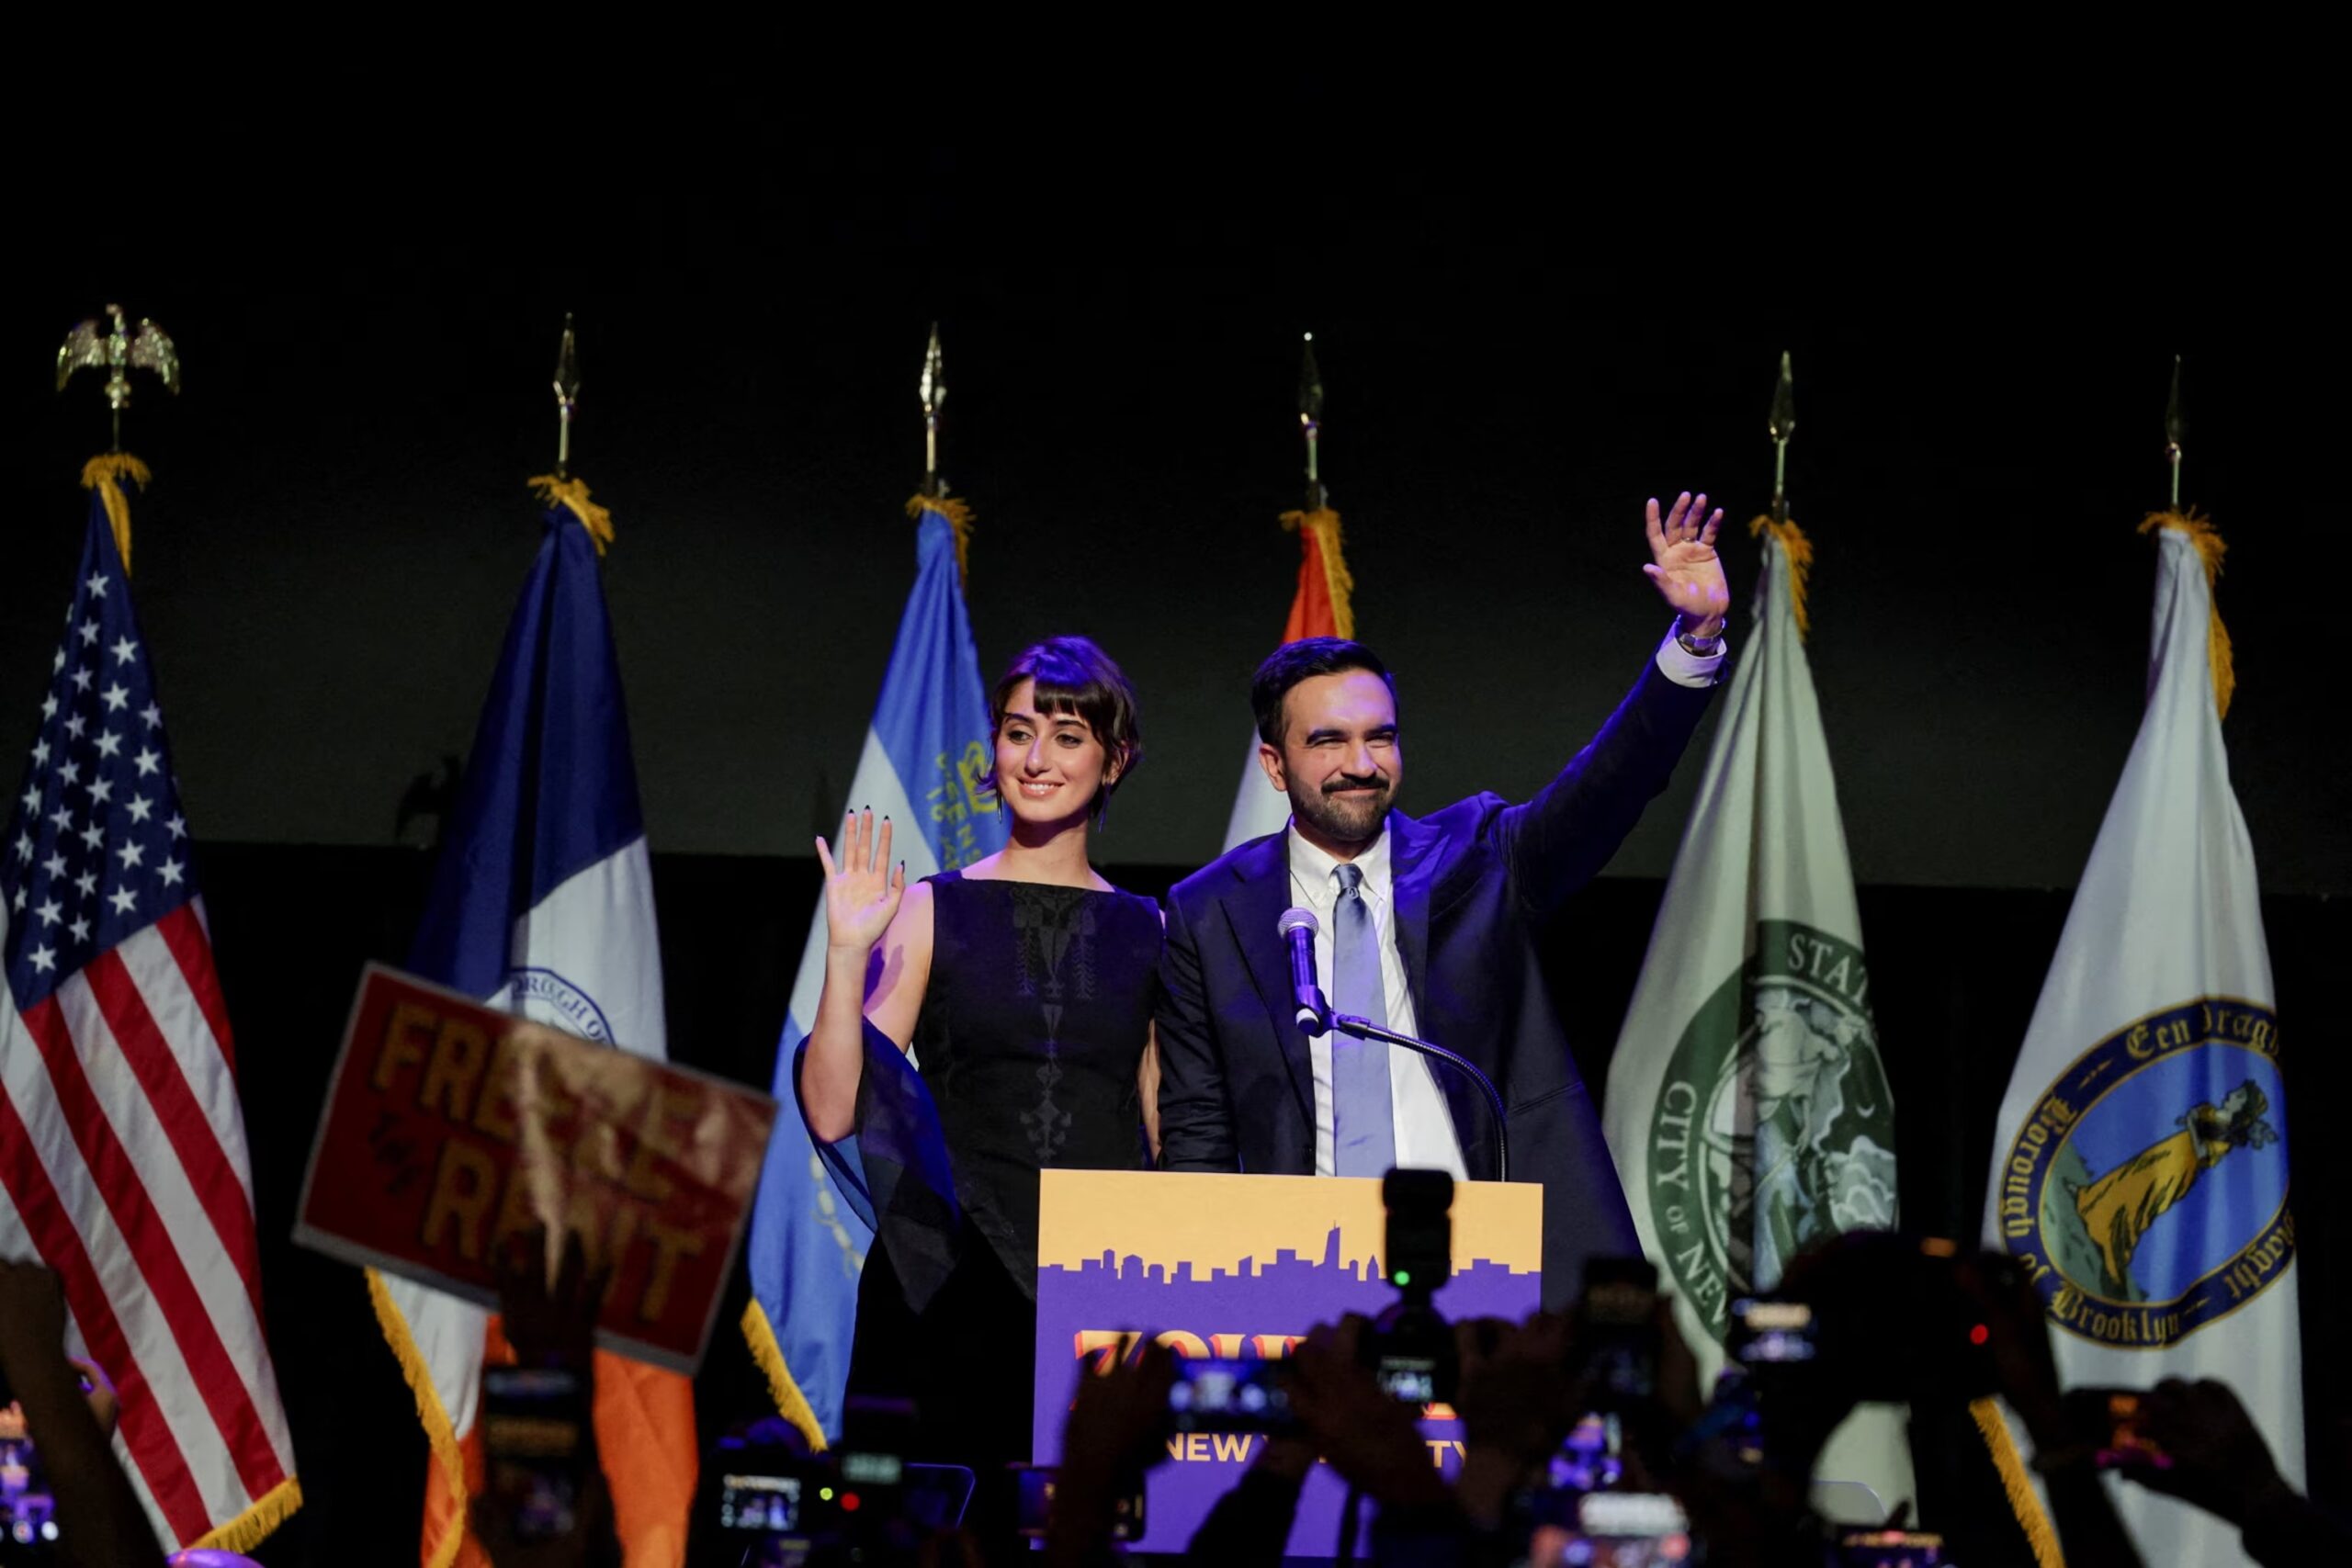
Zohran Mamdani Wins NYC Mayoral Election
Source: Reuters
In a historic shift for New York City politics, Zohran Kwame Mamdani secured a landmark victory in the New York City mayoral election, becoming the first South Asian and socialist leader to helm the city. Born in Uganda and son of acclaimed Indian filmmaker Mira Nair, Mamdani’s grassroots, working-class agenda won over the hearts of NYC residents, giving him the democratic nominee over Eric Adams and Andrew Cuomo. His victory speech was followed by the Hindi song “Dhoom machale”, as he greeted the crowd alongside his wife, creating a viral moment. Before his inauguration, he also met POTUS Trump which was described as “surprisingly friendly” where they spoke about working together and making NYC better.
Historic: Japan Elects First Female PM
Credit: Eugene Hoshiko/AP
In a landmark shift for one of the world’s most traditional democracies, Sanae Takaichi made history on October 21, 2025, by becoming Japan’s first female Prime Minister. A self-proclaimed admirer of Margaret Thatcher and a protégé of the late Shinzo Abe, the 64-year-old “Iron Lady” of Japan secured the premiership after winning a fierce Liberal Democratic Party (LDP) leadership race and forging a crucial coalition with the Japan Innovation Party. While her election shattered a decades-old glass ceiling in a nation often ranked low for gender equality, Takaichi’s platform is rooted in “Abenomics” and staunchly conservative values—including a hawkish stance on national security and a commitment to maintaining male-only imperial succession. Her ascent marks a new, more assertive era for Tokyo as she navigates a fragile majority and a complex geopolitical landscape involving China and the United States.
RIP Pope Francis
Credit: Martin Mejia /AP
The Catholic world underwent a profound transition in 2025 following the passing of Pope Francis, who died on Easter Monday, April 21, 2025, at the age of 88. After a twelve-year papacy defined by his “culture of encounter” and advocacy for the marginalised, his funeral on April 26 drew millions of pilgrims to Rome, marking the end of a transformative era for the Church. On May 8, 2025, the College of Cardinals elected Cardinal Robert Francis Prevost as the 267th Bishop of Rome. Taking the name Pope Leo XIV, the Chicago-born Augustinian missionary made history as the first-ever Pope from the United States. Since his election, Pope Leo XIV has signalled a commitment to continuing the synodal reforms of his predecessor while placing a renewed emphasis on Catholic social teaching and navigating the ethical challenges of the burgeoning artificial intelligence revolution.
Monumental: Private Company Moon Landing
Source: Firefly Aerospace
In a historic milestone for commercial space exploration, Firefly Aerospace’s Blue Ghost Mission 1 successfully touched down on the Moon on March 2, 2025, at 08:34 UTC. Landing in the Mare Crisium basin near the volcanic feature Mons Latreille, Blue Ghost became the first private spacecraft to achieve a 100% successful soft landing and upright operation on the lunar surface. Part of NASA’s Commercial Lunar Payload Services (CLPS) initiative, the lander delivered ten scientific instruments that conducted groundbreaking research during its 14-day mission. Highlights included tracking GPS signals on the Moon for the first time, robotically drilling into the regolith, and capturing a stunning “diamond ring” photo of a solar eclipse from the lunar perspective on March 14. The mission concluded on March 16, 2025, as the lunar sunset drained the lander’s solar batteries, leaving behind a wealth of data—approximately 119 GB—that will pave the way for future Artemis human missions.
Each Dive a Battle, Each Ascent A Quiet Victory – Mark Smith
Special Features
38 Best Covers of Asian Photography Magazine
Most Powerful Images of 2025
Best Mirrorless Cameras of 2025
Best Camera Phones of 2025
Best Reader Images of 2025
Photography Trends in 2026
Reviews
Canon EOS R6 Mark III Camera Review
iPhone 17 Pro vs vivo X300 Pro – Flagships Face Off
OPPO Find X9 Review – The Benchmark
38 Years. Millions of Frames. One Enduring Legacy – Bhavya Desai, Editor in Chief
Thirty-eight years ago, when this magazine first went to print, photography was a far more deliberate craft. Film rolls were precious, deadlines were slower and every published image carried the weight of intention. What began as a modest platform for photographers has, over nearly four decades, evolved into a living archive of the industry itself—documenting its shifts, shaping its conversations and often, quietly, influencing its future. This Anniversary is not just about longevity. It is about legacy, heritage and responsibility. Over the last 38 years, the magazine has mirrored the journey of photography in India and beyond—from darkrooms to digital, from DSLRs to mirrorless, from prints to pixels, and now from images to immersive visual storytelling. We have chronicled not just technology, but the people behind the cameras—the artists, technicians, editors, educators, and entrepreneurs who built this industry brick by brick.
Our pages have carried those defining moments.
We have published landmark cover stories that captured turning points in visual culture, reported on industry-defining technologies before they became mainstream, and debated trends long before they turned into hashtags. From wedding photography’s transformation into a global business to wildlife photography’s growing role in conservation; from photojournalism’s ethical challenges to the rise of creator-led visual economies—this magazine has never merely observed change, it has engaged with it. And to celebrate that we’ve featured a Special article on our Best Covers of Asian Photography. These archival issues document our and India’s history in its pages and what better way to celebrate an Anniversary issue by featuring global legends such as Rick Smolan and Mark Smith. As Editors and Publishers, we’ve believed that a magazine’s role goes beyond reporting—it must archive truth, provoke thought and inspire progress. That belief has guided us through industry disruptions, economic cycles and seismic technological change. Even today, as algorithms compete with authorship and speed often overtakes substance, our commitment remains unchanged: to value credibility over virality, depth over noise and craft over convenience.
None of this—absolutely none—would have been possible without YOU.
To our readers, who trusted us month after month.To photographers, who shared their work, their stories, and their vulnerabilities.To advertisers and partners, who believed in the power of a serious, credible platform.To editors, writers, designers, and contributors—past and present—who poured their thinking into every issue.And to the industry itself, which grew alongside us and allowed us to be both witness and participant in its evolution. As we celebrate 38 years, we do so with gratitude, humility and renewed purpose. The future of photography will look very different from its past—but if there’s one lesson our journey has taught us, it’s this: tools may change, but vision, integrity, and storytelling endure. Here’s to the legacy we’ve built.Here’s to the industry we’ve helped grow.And here’s to the many frames, stories, and decades still to come.
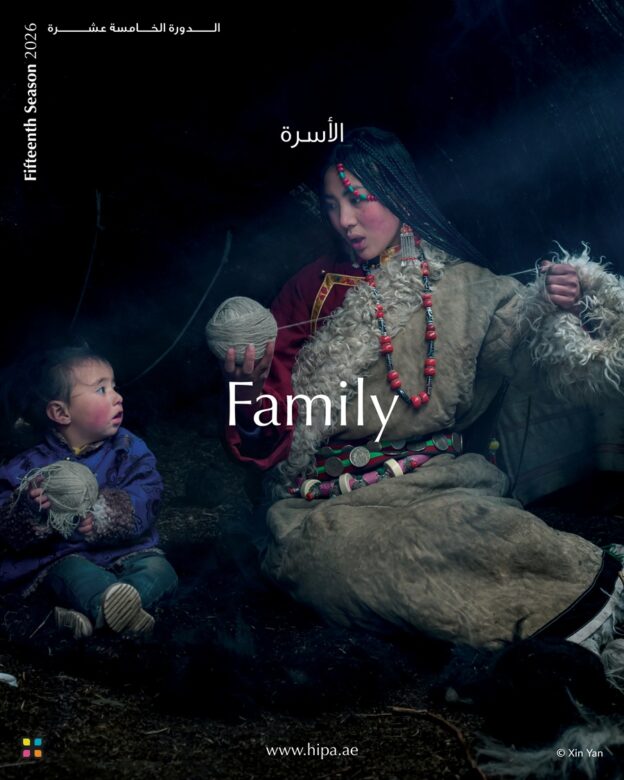
The Hamdan bin Mohammed bin Rashid Al Maktoum International Photography Award (HIPA) has announced “Family” as the main theme for its Fifteenth season competition, which launched on 13 January 2026 and will run until 31 May 2026.
This season includes five main categories: Family, Sports Photography, General (Black & White and Colour), Portfolio (Story-Telling), and a new category titled Dreams Through AI. Submissions must be made through HIPA’s official website, www.hipa.ae, by 11:59 pm (UAE time) on 31 May 2026.
According to HIPA Secretary General Ali Bin Thalith, the Family theme aligns with the UAE leadership’s designation of 2026 as the “Year of the Family,” highlighting the role of family in social stability, cohesion and quality of life. The theme is open to broad interpretation, encouraging photographers to explore family both in its human sense and as a wider concept of connection and belonging.
The Sports Photography category continues to focus on capturing athletic performance and emotion, while the General category offers creative freedom across black and white and colour photography. The Portfolio category invites photographers to present a cohesive visual story through a series of images.
The newly introduced “Dreams Through AI” category combines traditional photography with artificial intelligence. Participants are required to submit an original photograph alongside an AI-generated image that represents a dream-like interpretation of the original work.
HIPA will also present its Photographer of the Year award, alongside special awards given by invitation only.
Nikon India has announced the NIKKOR Z 24–105mm f/4–7.1, a compact zoom lens designed for a wide range of everyday photography needs. Covering focal lengths from 24mm wide-angle to 105mm medium telephoto, the lens is suited for landscapes, travel, close-ups, and portraits.
Weighing approximately 350 grams, the lens is designed for portability, making it practical for extended shoots and travel. It offers a minimum focus distance of 0.2m at 24mm and 0.28 m at 105mm, enabling close-up shooting with a maximum reproduction ratio of 0.5× between 70mm and 105mm.
The lens uses a stepping motor (STM) for fast and quiet autofocus, supporting both stills and video recording. It also features a customisable control ring that can be assigned to functions such as focus, aperture, ISO, or exposure compensation. The lens comes with dust and drip resistant construction.
The NIKKOR Z 24–105mm f/4–7.1 will be available in India from mid-January 2026, priced at ₹49,995.
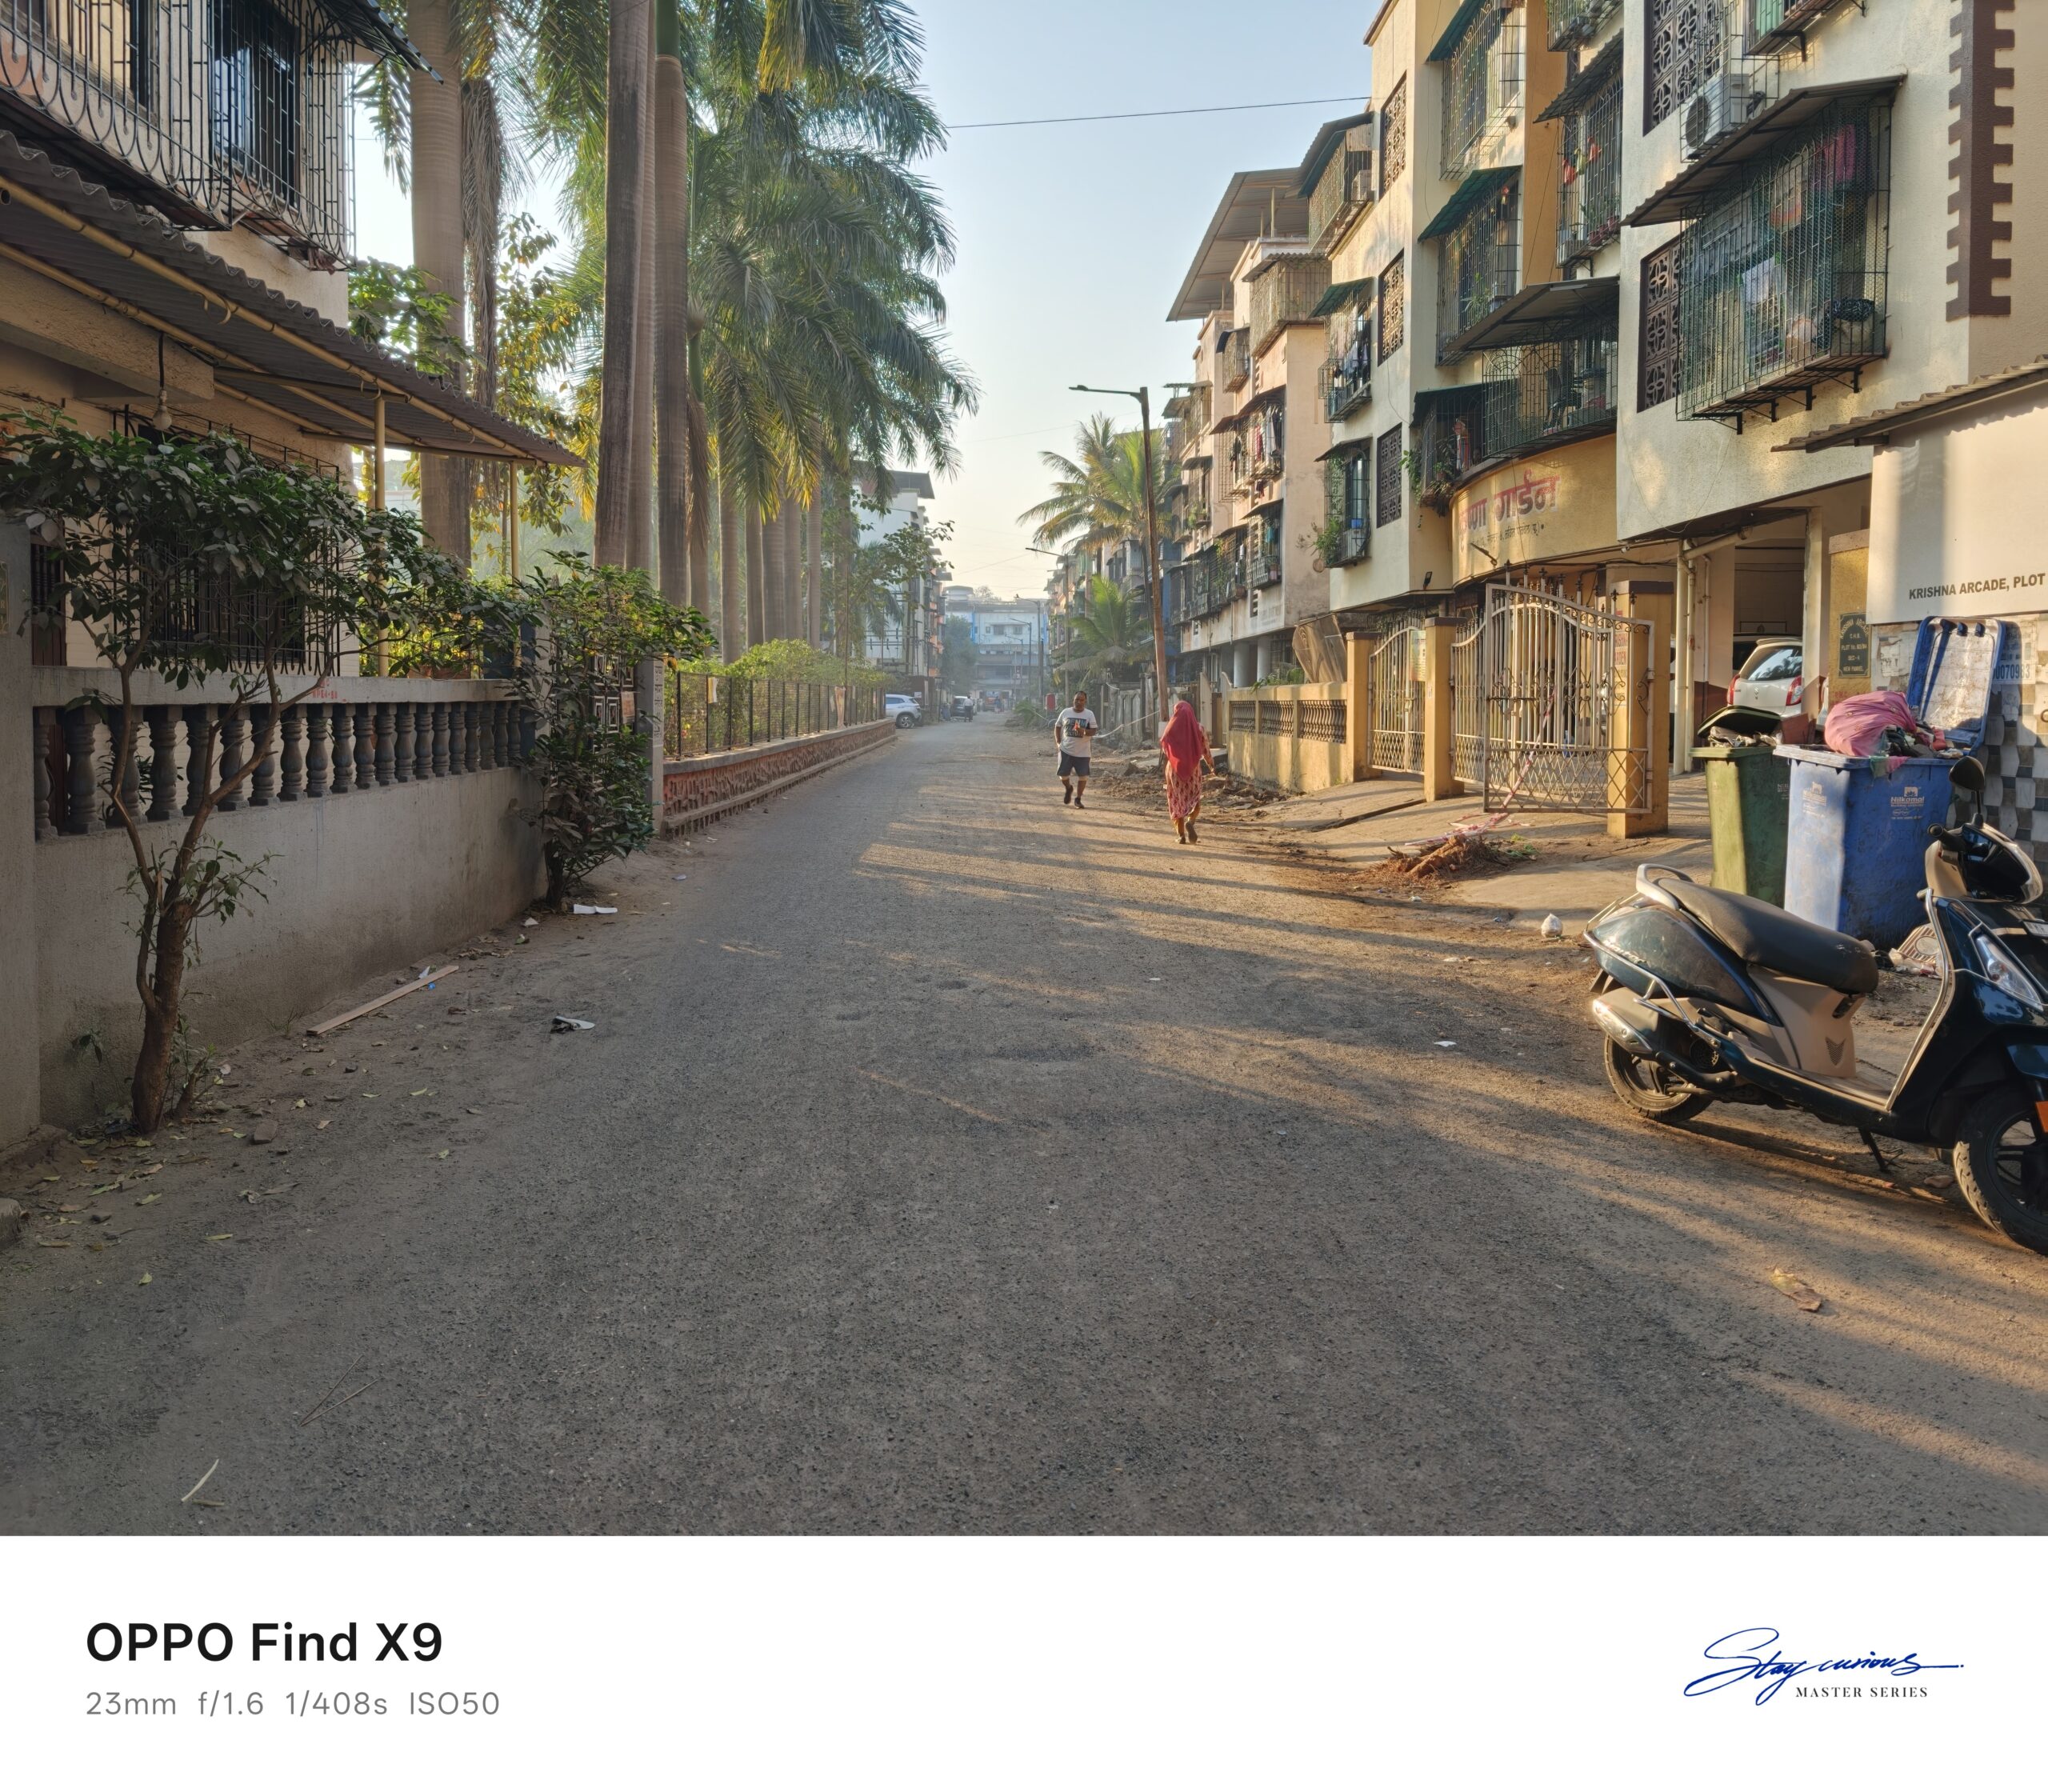
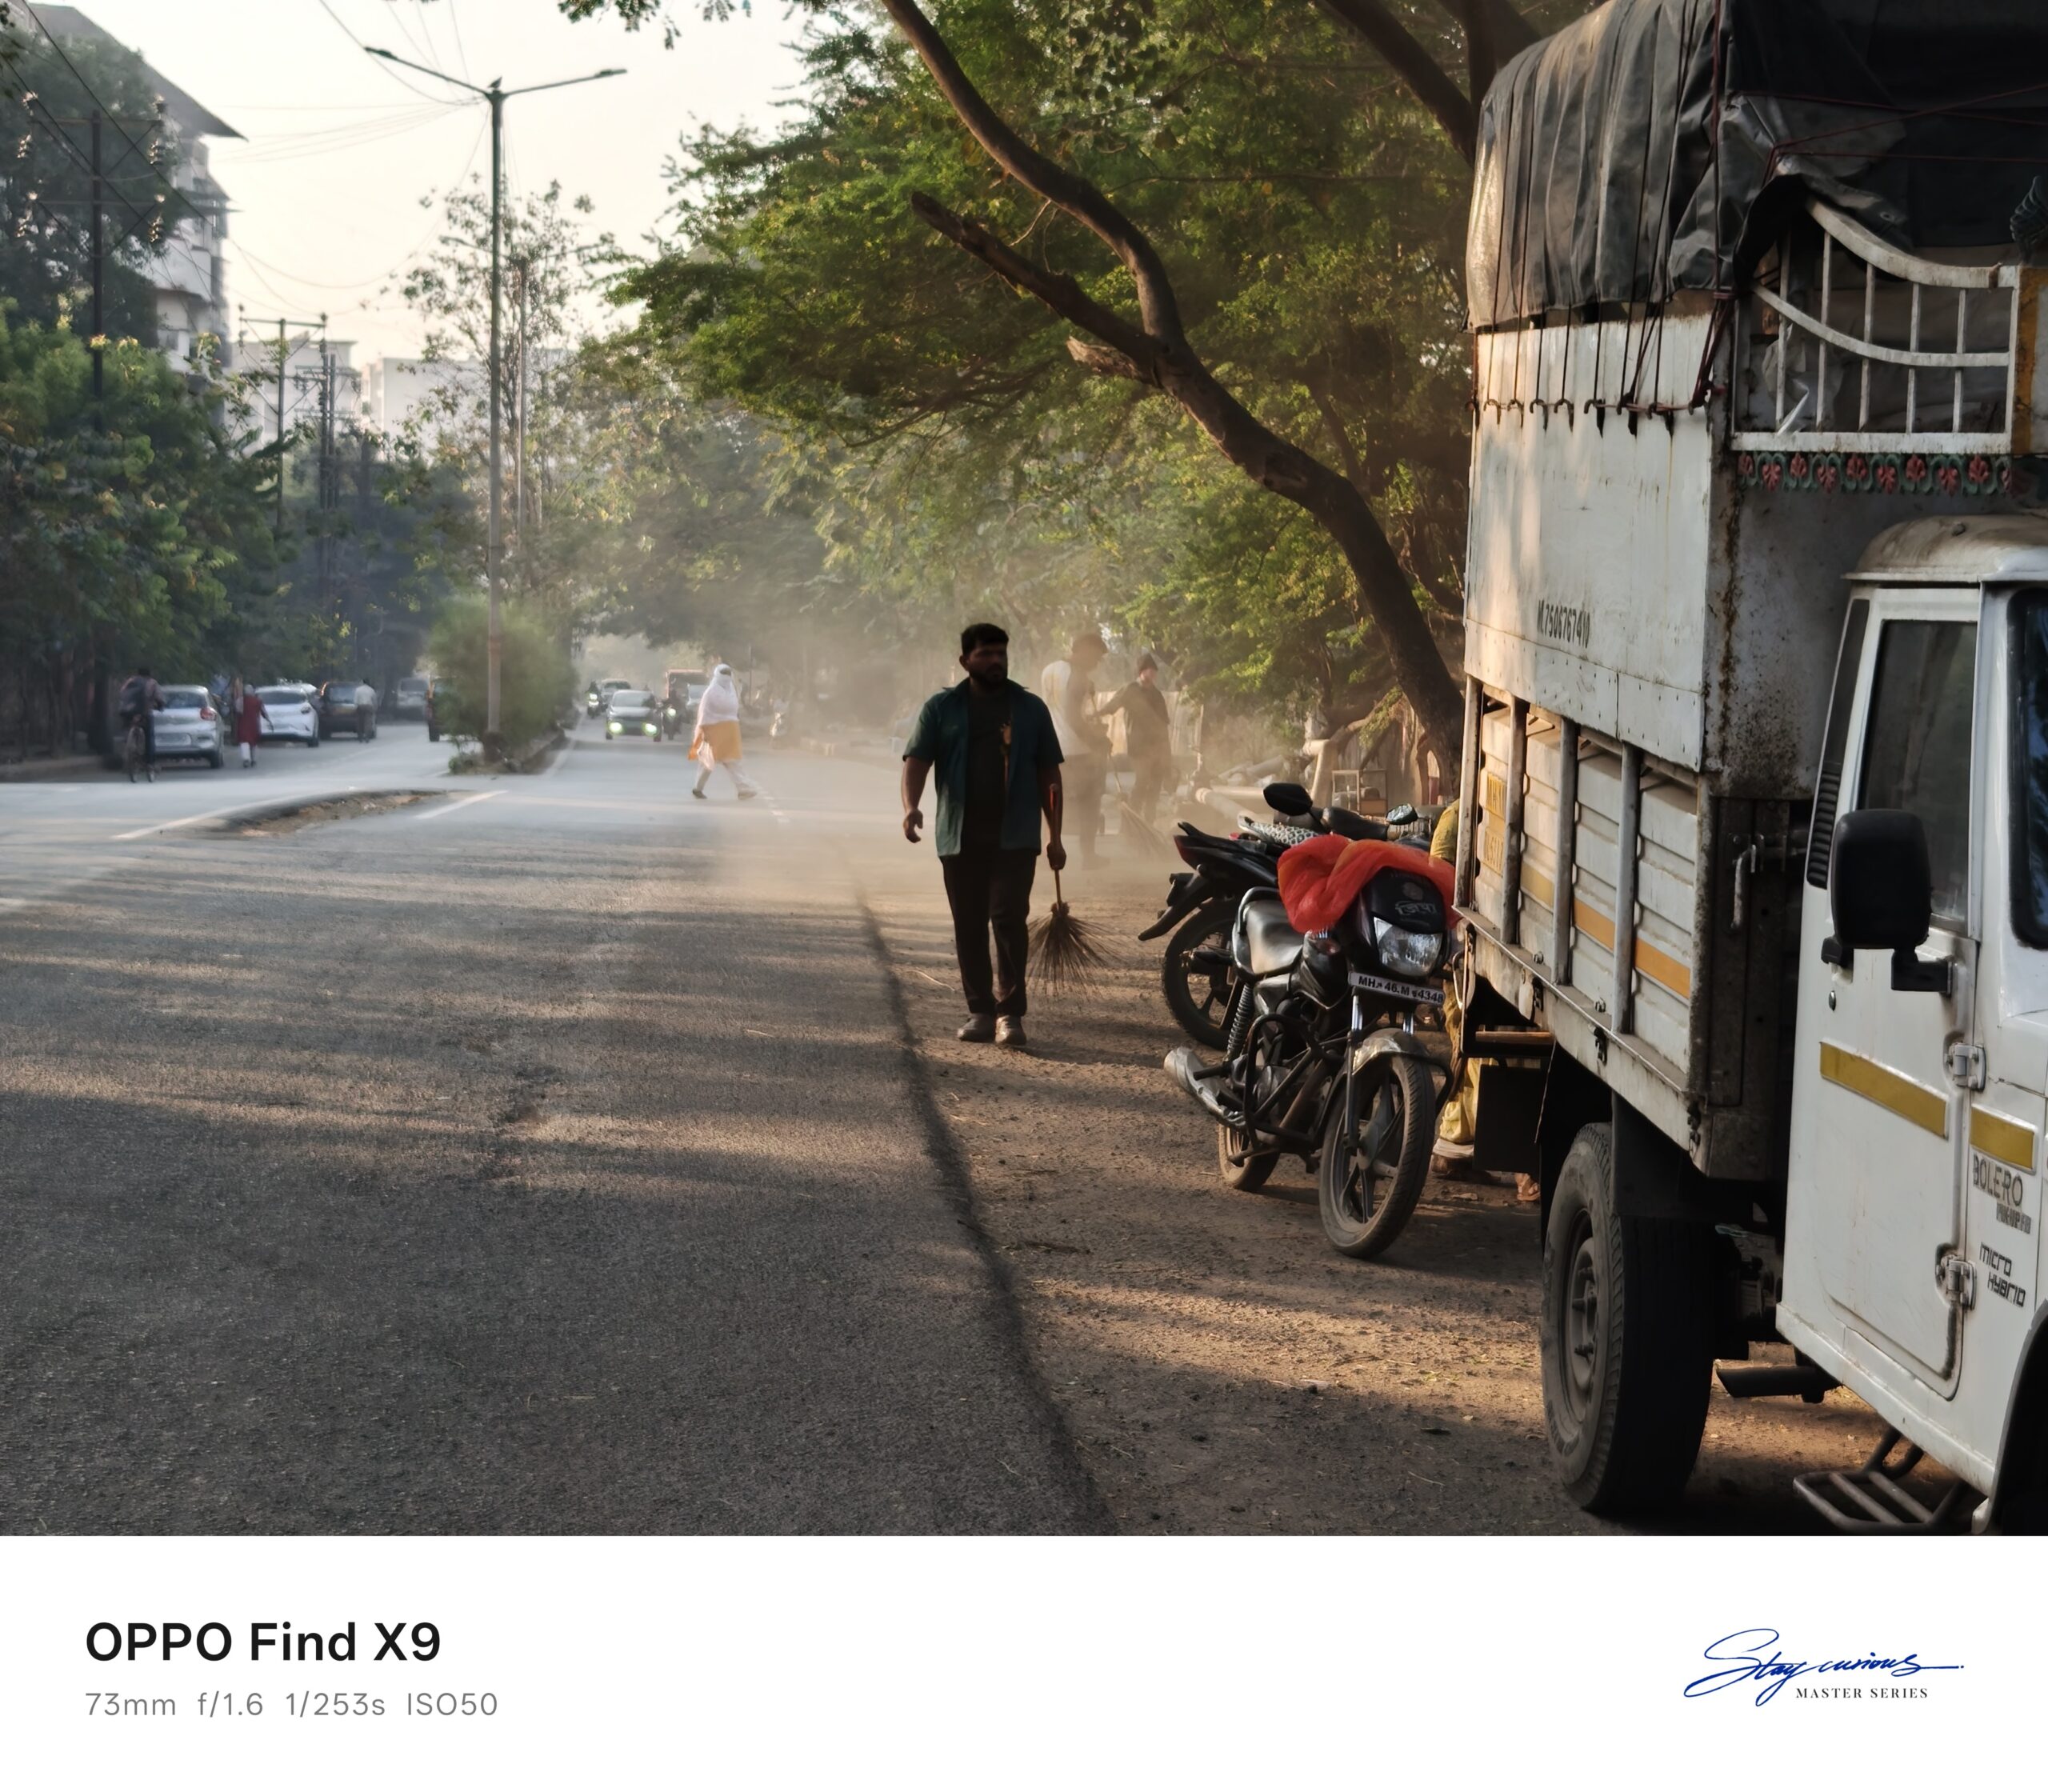
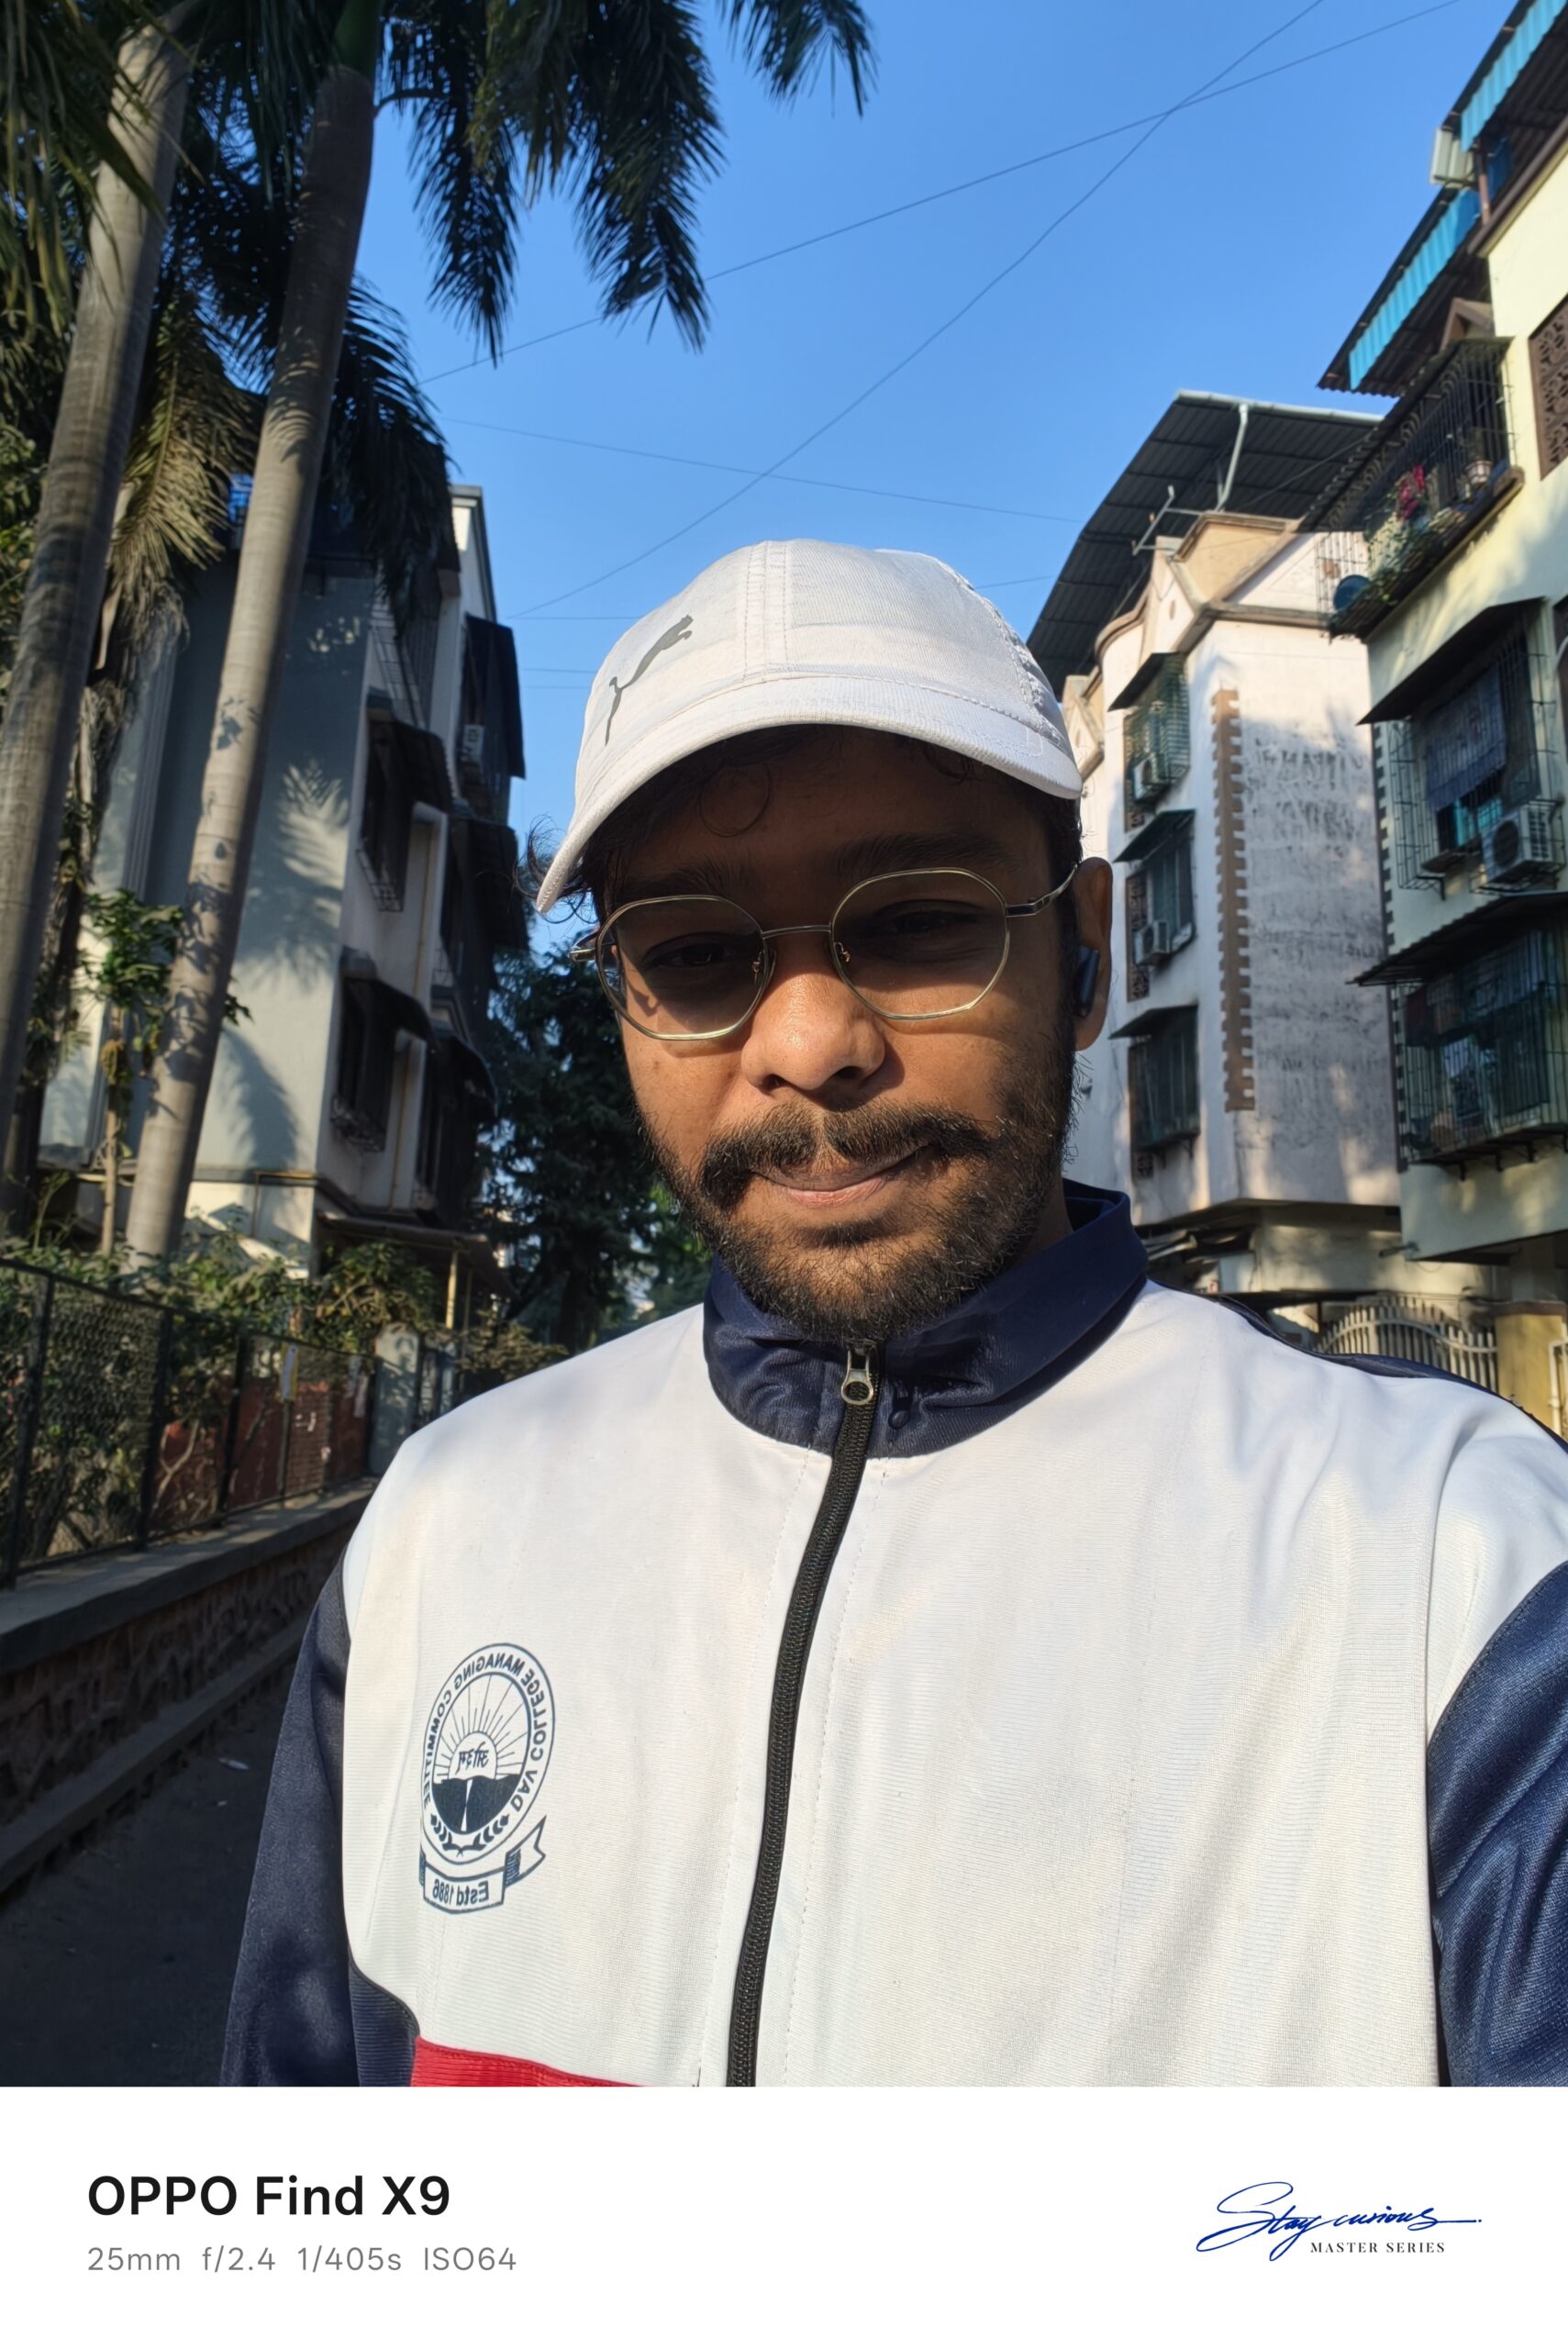
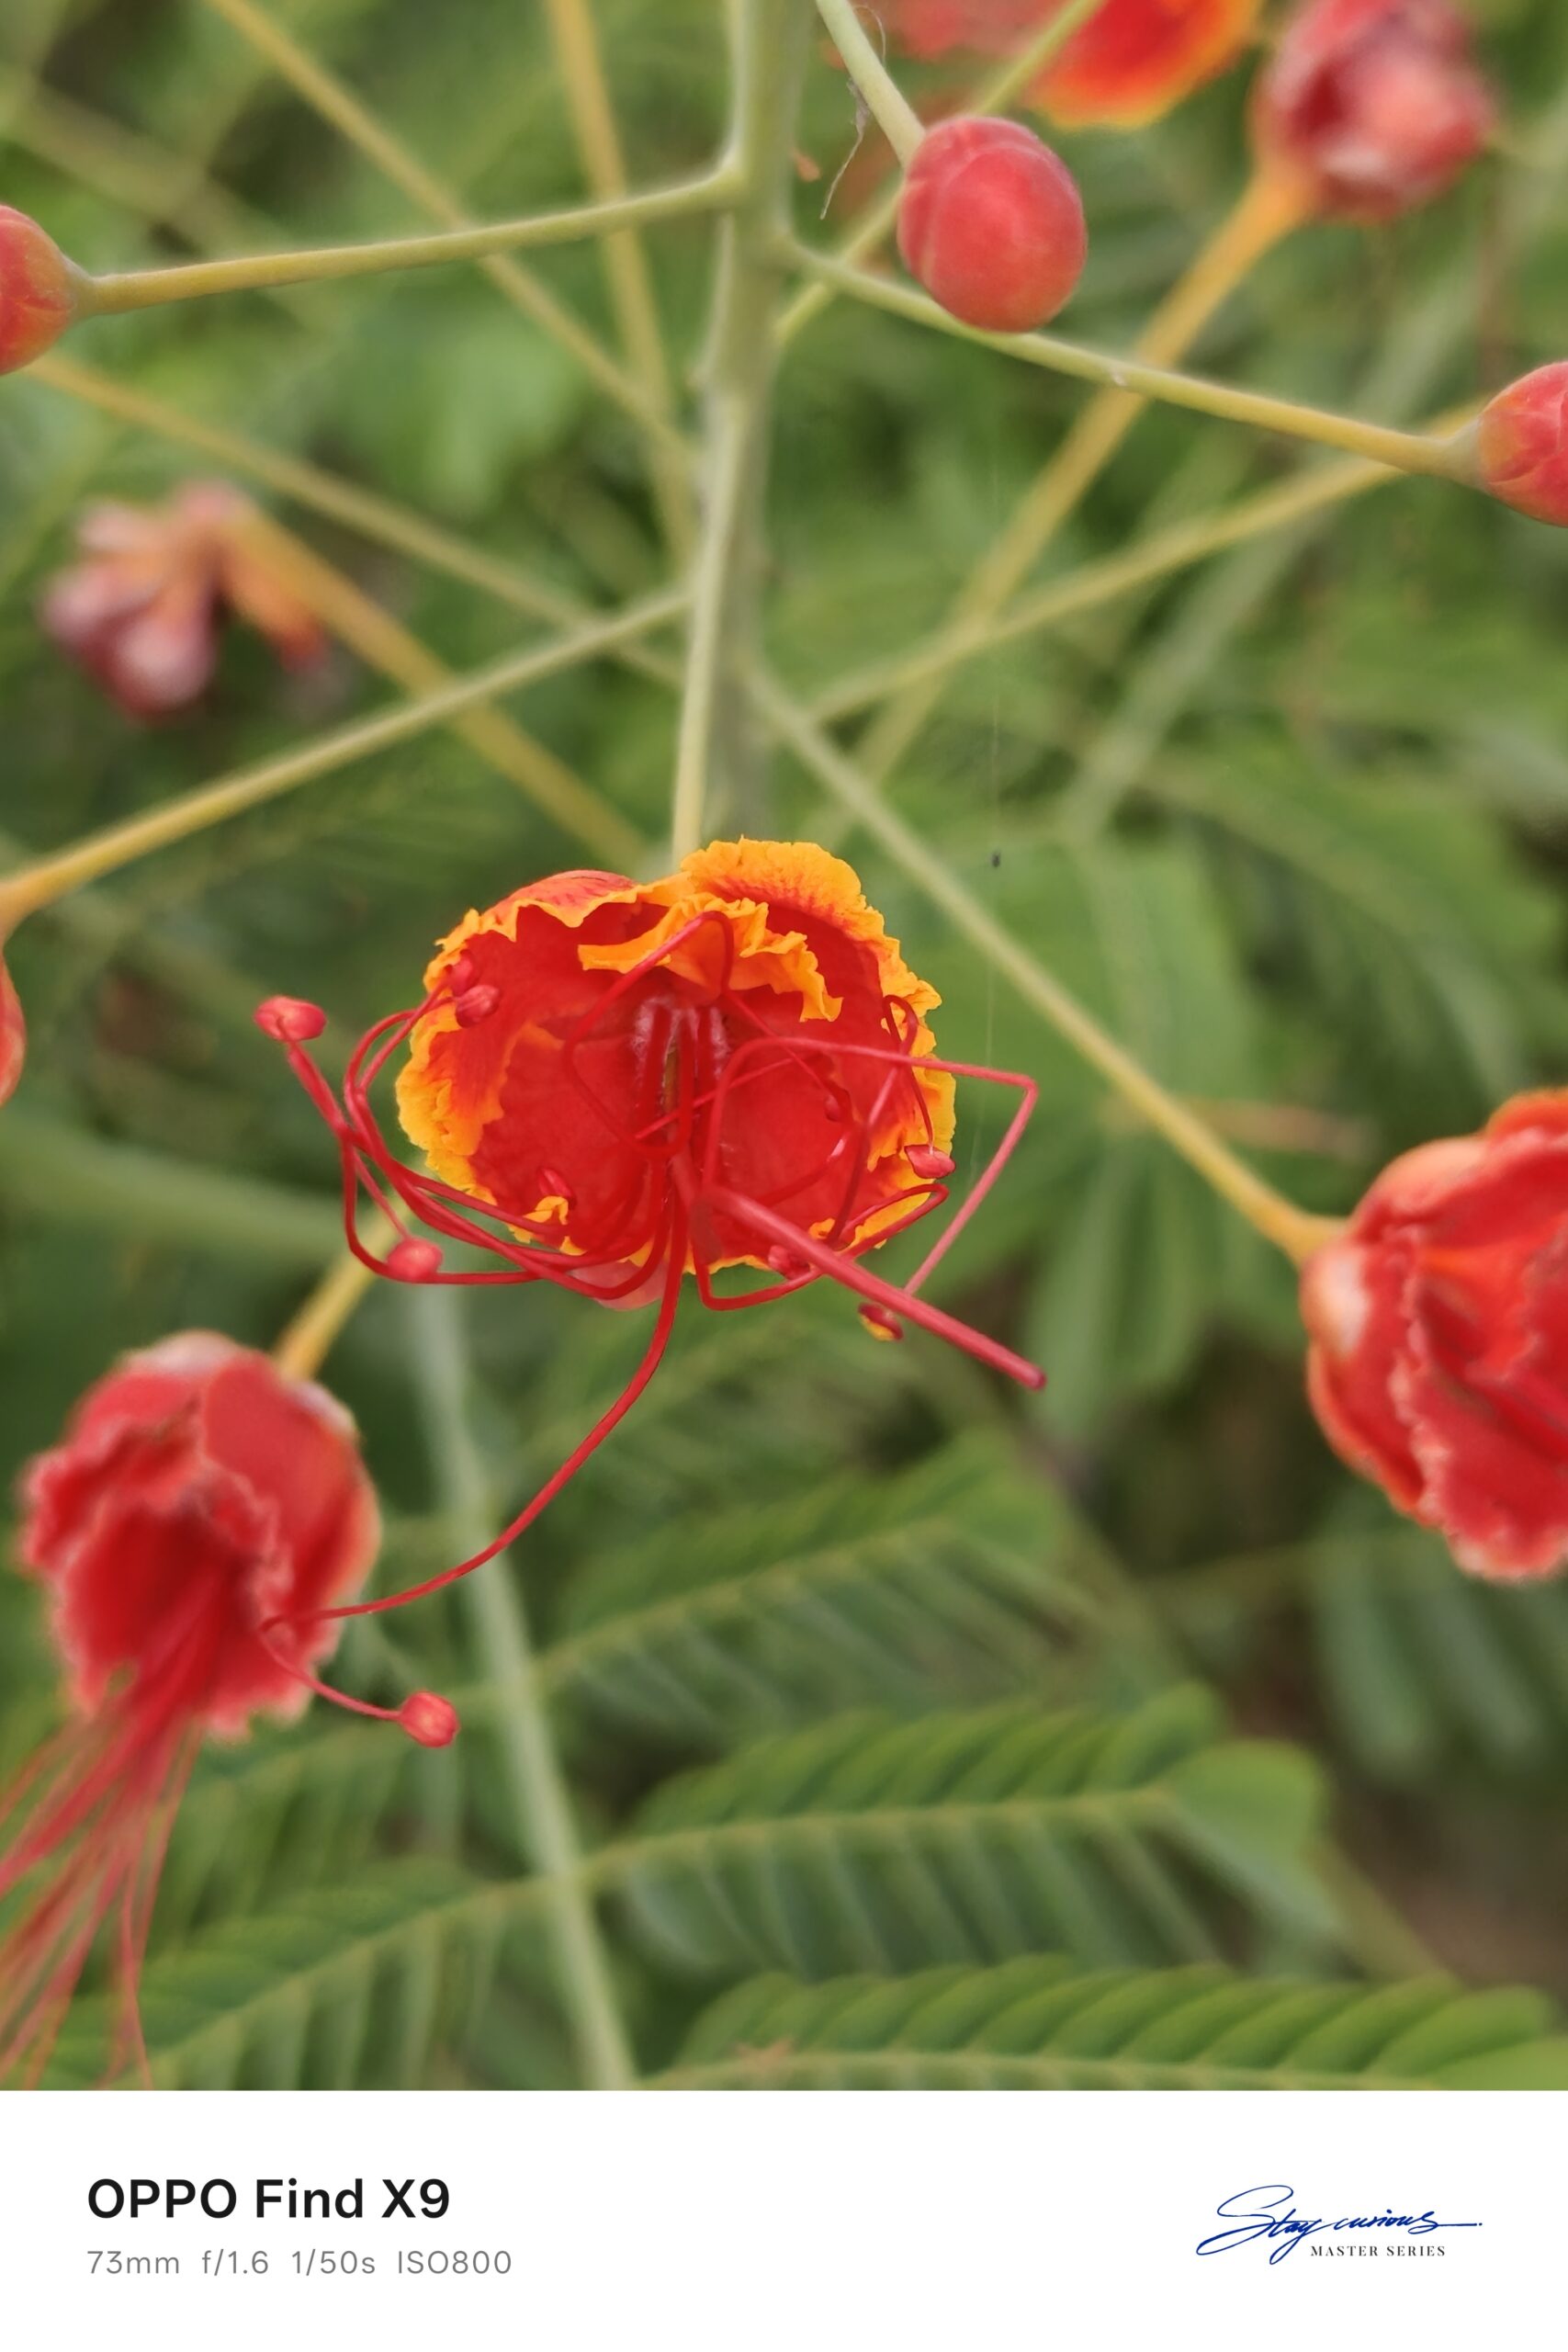
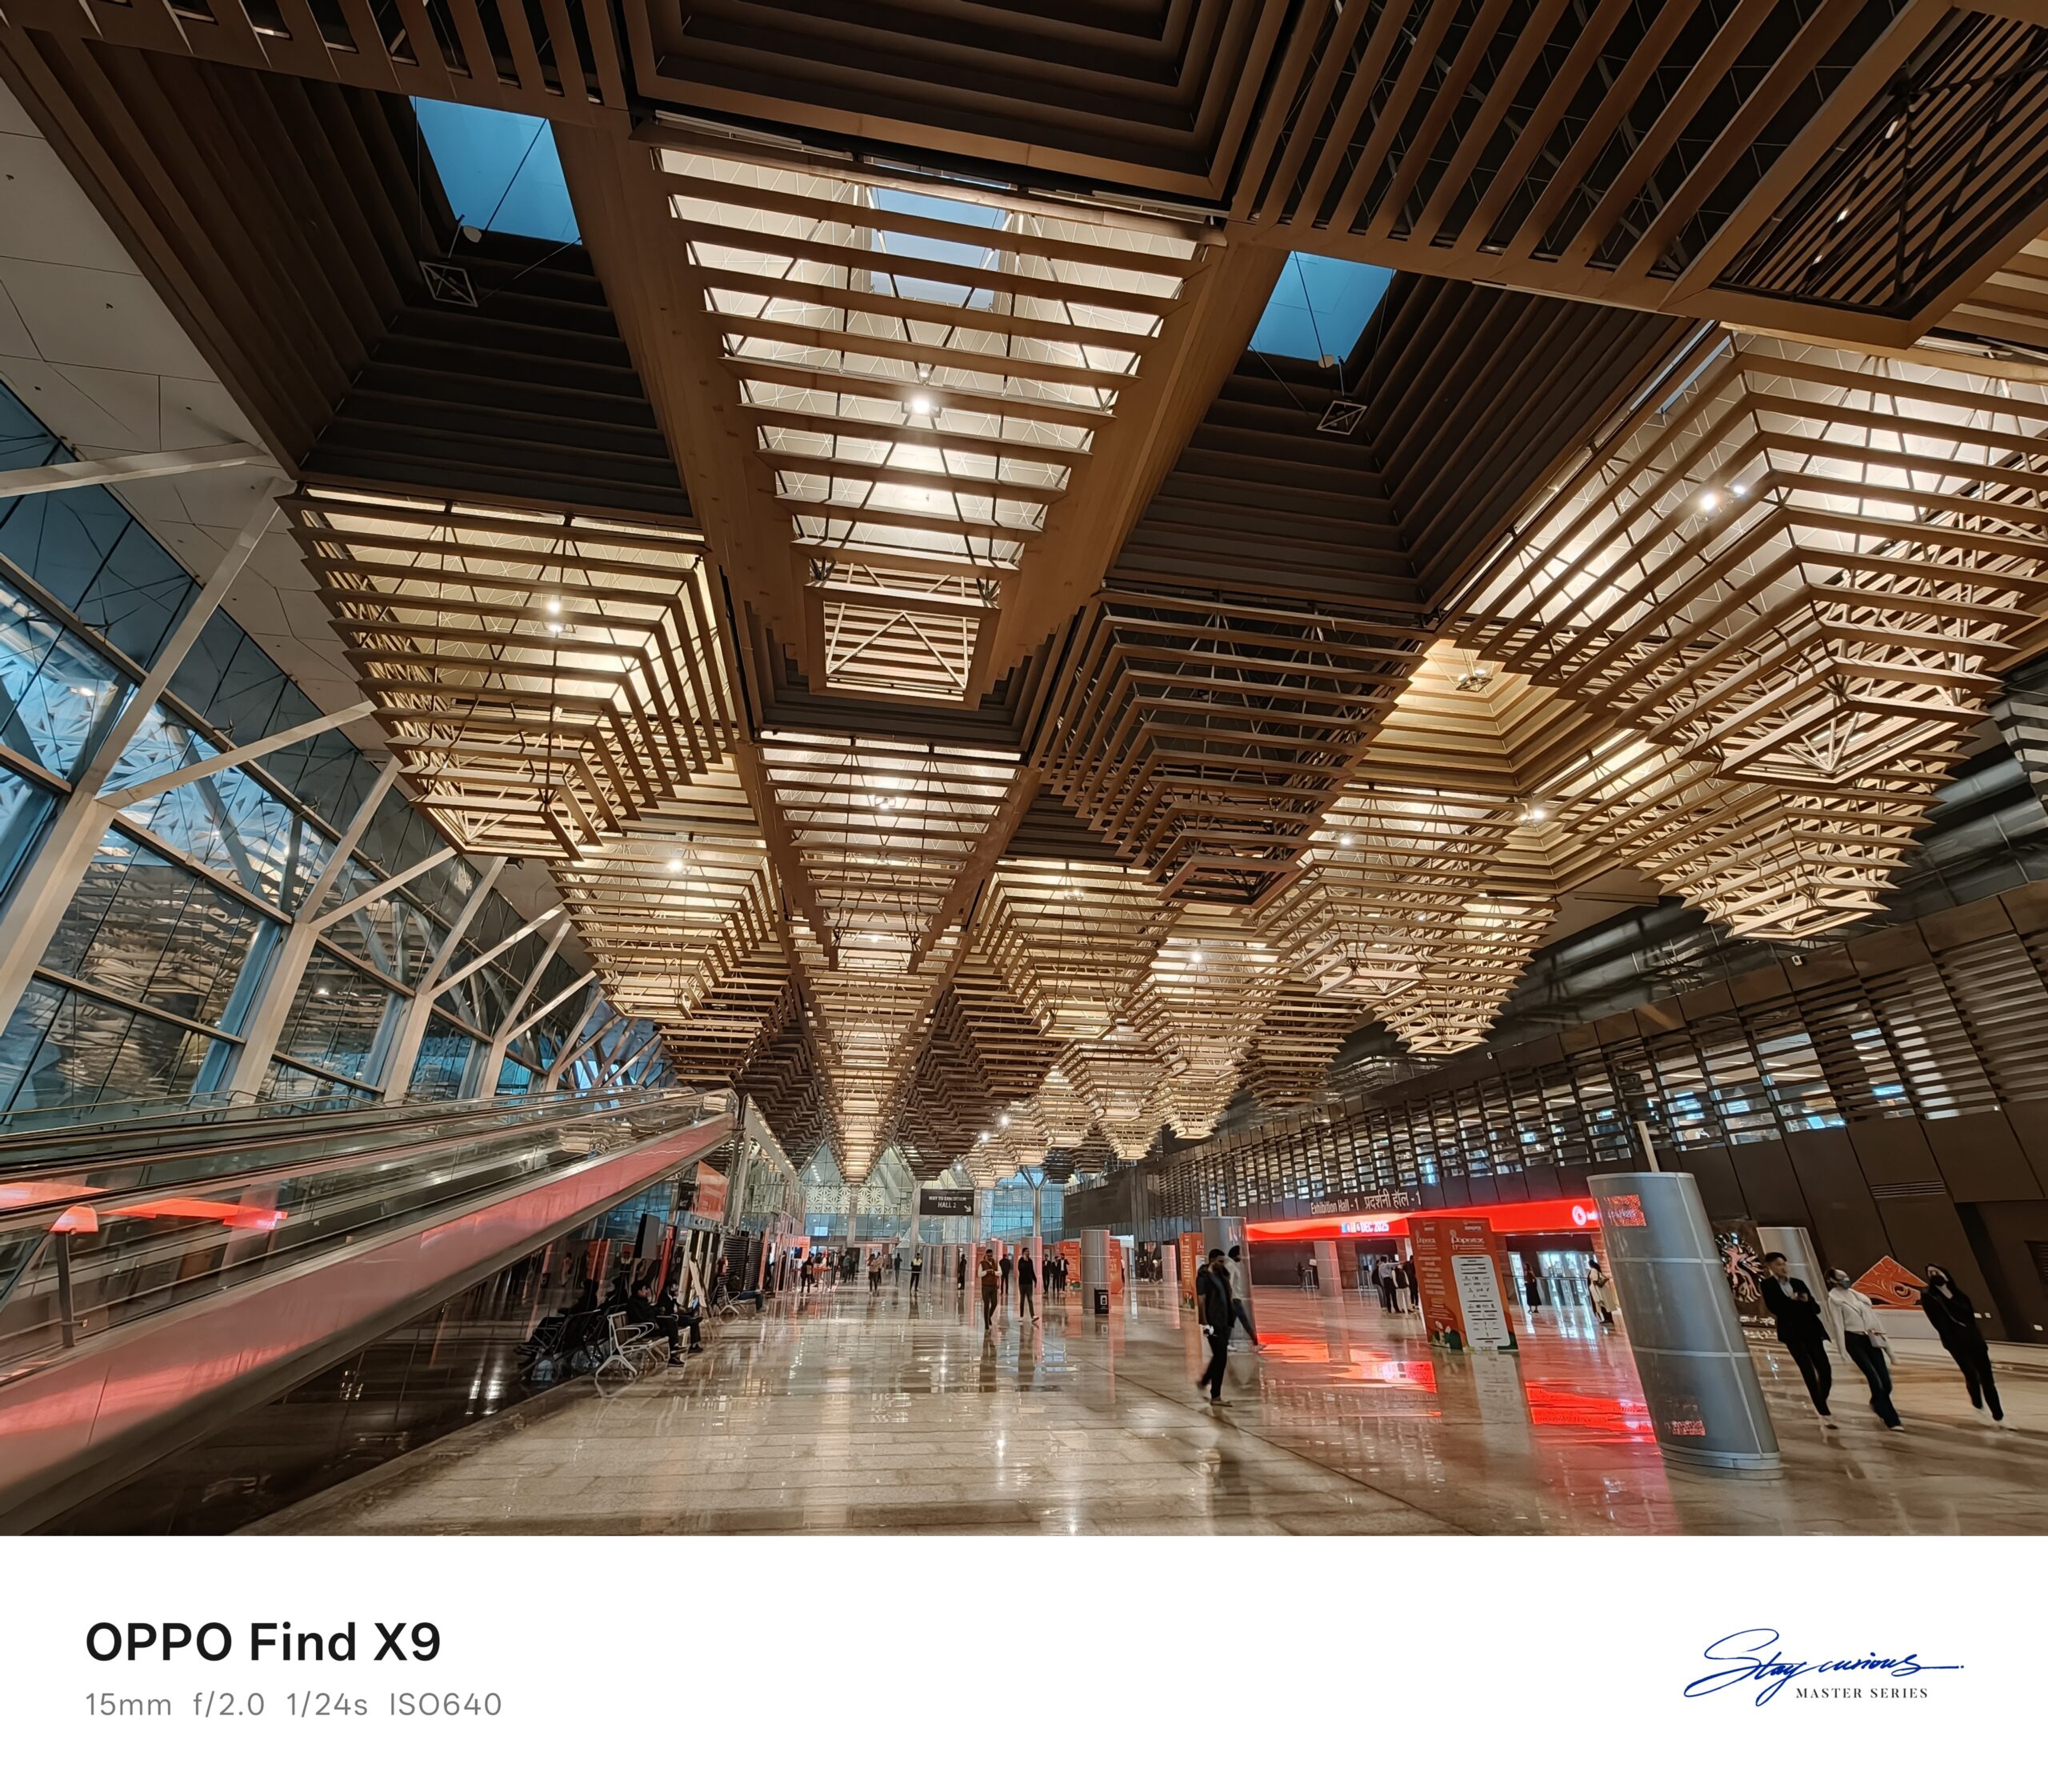
When we reviewed the OPPO Find X8 Pro last year, it impressed us by punching well above its weight. This year, Oppo sent over its younger sibling, the OPPO Find X9, placing it in a crowded mid-range flagship segment filled with stiff competition. Like its predecessor, the Find X9’s cameras are co-engineered with Hasselblad, setting expectations high, especially on the camera front.
Here’s our detailed look at what the OPPO Find X9 cameras bring to the table.
Look, Body & Feel
The design of the OPPO Find X9 is a noticeable departure from the Find X8. It now looks more in line with other smartphones in this segment. The camera bump resembles older iPhone designs and features the Hasselblad logo at the centre of the flash module. The biggest visual differentiator is the camera layout itself, with the ultrawide lens sporting a pill-shaped design.
The phone features a 6.59-inch “ProXDR” display and weighs 203 grams. In daily use, it feels compact and manageable, something users with smaller hands will appreciate. On the left side, there’s a programmable action button that can be assigned to various tasks, including launching the camera. Within the camera app, this button can also be used to capture photos.
Camera & Hardware Overview
The OPPO Find X9 comes with a familiar triple-camera setup featuring a:
50MP main camera (14MP output)
50MP ultra-wide camera (14MP output)
50MP telephoto camera (14MP output)
32MP front camera (12MP output)
Powered by MediaTek Dimensity 9500 processor
Backed up by a 7025mAh battery
One thing that’s peculiar about this phone is that it enables you to get 25-50 MP photos without enabling a high-res mode, depending on the amount of light in the scene. But just to be clear, there is a separate “Hasselblad Hi-res” mode available that works on all three cameras on the optical lenses only (0.6x, 1x & 3x).
There’s also the Hasselblad Xpan mode which has an updated UI and allows you to shoot in the Xpan ratio – photographers will know exactly what this is.
Daylight Performance
Main Camera
The main camera uses a 50MP Sony LYT-808 sensor with a default 12MP output. It supports shooting at 1x, 1.3x, 1.5x, and 2x zoom levels.
Images are sharp, crisp, and detailed, especially when zooming in. However, they tend to look oversaturated and overly vibrant, which some users may enjoy. Dynamic range is good, with decent highlight and shadow handling.
That said, in several shots, human subjects appeared slightly underexposed despite adequate lighting. This feels like something that could potentially be addressed through a software update.
Ultra-Wide Camera
The ultra-wide camera uses a Samsung JN5 sensor with a 12MP output and performs impressively. In fact, it’s better than many ultra-wide cameras we’ve seen in this category.
Compared to the main camera, images from the ultra-wide tend to be brighter than the actual scene. While the main camera sometimes underexposes, the wide camera compensates by lifting brightness. Images remain sharp and detailed but share the same vibrant, slightly oversaturated look, often pushing skin tones toward a reddish hue.
Highlights and shadows are handled reasonably well, though occasional flaring and aggressive processing are visible. Overall, it’s a solid ultra-wide shooter.
Telephoto Camera
The telephoto setup uses a 50MP Sony LYT-600 periscope sensor, offering 3x optical and 6x lossless quality options with a maximum digital zoom of 120x.
Results here are mixed. In some cases, images appear underexposed, while in others they’re slightly overexposed. Sharpness and detail are generally good, especially up to 6x.
Visible processing is present, and some shots show a reddish color tone. However, color consistency at higher zoom levels is commendable, with very little color shifting, something many zoom cameras struggle with. At extreme zoom levels, color fringing becomes noticeable.
Low-Light Performance
In low light, the OPPO Find X9 delivers vibrant, well-saturated images. In fact, saturation sometimes feels excessive. Heavy processing is evident across all cameras, though many users may still like the end result.
Detail loss becomes visible when zooming in, which is expected. The ultra-wide camera stays relatively true to the scene, but ghosting and halo effects appear around strong light sources.
Telephoto images in low light are softer and show noticeable processing, along with some flaring and ghosting. On the positive side, color shifting is minimal. High zoom in low light, however, isn’t recommended.
Front Camera
The front camera uses a 32MP sensor with a default 14MP output. Like the rear cameras, it supports automatic high-resolution capture, delivering full 32MP images when lighting allows.
There are two focal options: 0.8x and 1x. In practice, the 0.8x option feels more useful, making the 1x option somewhat redundant.
Image quality is strong, with natural skin tones and good detail retention. Front camera portraits benefit from the auto high-resolution feature as well, producing detailed images. Edge detection is good, but subject separation can look inconsistent on close inspection, especially around complex areas.
Skin smoothing is minimal, which is welcome, but some images show uneven processing where certain areas appear discolored. This doesn’t happen consistently, but it’s noticeable when it does.
The front camera supports 4K video recording at up to 60fps using both focal options. Front camera video is one of the best performing cameras we’ve seen so far, with colour rendition very true to scene and close to reality. Skin tones are preserved well and the image is very well-exposed.
Portrait Mode
Portraits can be shot using three focal lengths. The results are generally pleasing, with good sharpness, accurate edge detection, and natural-looking bokeh.
Skin smoothing is minimal, but the phone tends to slightly brighten skin tones, particularly in low light, where a reddish tint becomes more pronounced.
Daylight portrait
Lowlight portrait
Video Performance
The OPPO Find X9 supports 4K video recording at up to 120fps, an upgrade over last year’s 4K 60fps limit. At 120fps, only the 1x, 2x, and 3x lenses are available. Shooting at 4K 60fps unlocks the 0.8x and 6x lenses as well.
Optical image stabilization is available on two of the three cameras, excluding the ultra-wide, which is typical. Video quality is good and consistent with last year’s performance. Colors are slightly punchy, stabilization works well, and autofocus is reliable.
The camera app remains largely unchanged and is easy to navigate. For advanced users, LOG recording is available in the Pro video mode providing wider dynamic range and post-production flexibility.
Macro Mode
The super macro mode returns with a minimum focusing distance of approximately 10cm. Results are mixed but improved compared to last year. Some shots show impressive detail and convincing background blur, mimicking a dedicated macro lens.
What We Liked
Battery: The 7025mAh battery is a major upgrade over last generation’s 5900mAh in the pro unit. It easily lasts up to two days with balanced use and offers excellent standby time. Fast charging support includes 80W wired and 50W wireless charging, making this a strong selling point.
Display: The Find X9 features a 6.3-inch 120Hz LTPS AMOLED display with peak local brightness of 3600 nits and 1800 nits in high brightness mode. Visibility outdoors is excellent, and HDR content looks great.
UI: The phone came with ColorOS 16 out of the box and has received multiple updates since launch, including camera improvements. The UI remains smooth and functional, borrowing minimalist elements from OnePlus. Whether users like it or not will come down to personal preference, but is a definite plus point in terms of usability.
What We Didn’t Like
Camera Preview Accuracy: The biggest issue is the camera preview. Images often look overexposed and blown out on the preview screen, even though the final photo turns out fine. In some cases, when the phone detects people in the frame, it overexposes the preview entirely. Despite multiple software updates, this issue hasn’t been fixed and can be misleading while shooting.
Verdict
So, how do the cameras on the OPPO Find X9 hold up?
Overall, the answer is yes, with some caveats. The cameras deliver sharp, detailed images, and the automatic high-resolution mode is genuinely useful, adding detail to everyday shots without any effort.
However, low-light telephoto performance could be better, and the aggressive processing needs to be toned down. At a price of ₹75,000, the OPPO Find X9 is a solid buy, especially with card offers taken into account. With a few refinements and software improvements, this could easily become an even stronger contender in its segment.
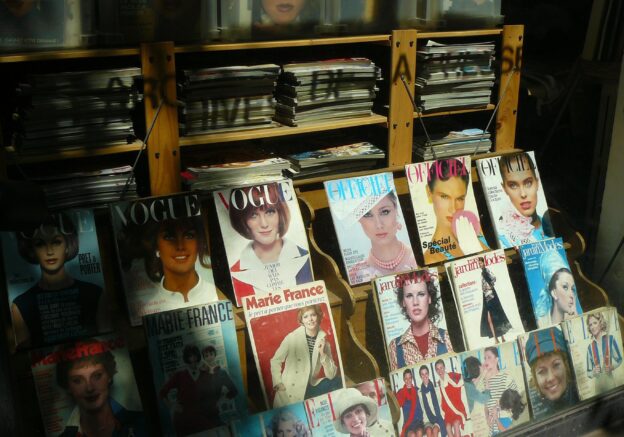
For most of the twentieth century, high fashion depended on print magazines to define taste, launch trends, and build cultural authority. Titles like Vogue, Harper’s Bazaar, W, and Elle shaped the industry’s direction. They controlled the conversation and set the pace. Today the landscape is very different. Digital platforms dominate the flow of information. Social media determines relevance faster than any editorial meeting can. Influencers, creators, and independent photographers distribute ideas at a scale magazines once commanded on their own.
This shift raises an important question. Does high fashion still need print magazines, or have they become relics of a slower, older system? The answer is complicated. While print no longer holds the exclusive power it once had, it still offers unique value that the digital world cannot replace. The real story sits in how these magazines adapt, not whether they disappear.
The Decline of Print’s Dominance
Print magazines lost their monopoly on fashion communication when the internet democratised access to style imagery. Platforms like Instagram and TikTok created instant consumption cycles. Trends now rise and fall within weeks. Audiences expect speed, constant updates, and direct interaction with creators. Print cannot match that pace. A magazine spread planned six months in advance feels distant when viewers scroll through hundreds of fresh looks per day.
Advertising budgets shifted as well. Brands realised they could target audiences more precisely through digital placements and influencer partnerships. A single viral post can outperform a multi page print ad in reach and engagement. As brands moved their money, magazines lost revenue. The once thick issues filled with glossy campaigns became thinner.
Despite these challenges, print refuses to vanish. It simply occupies a different role than before.
Print as a Symbol of Prestige
In the fashion world, physical objects still carry meaning. A magazine is not only content. It is an artifact. It has weight, texture, and permanence. When a model or photographer lands a print cover, it still feels like a milestone. Digital features bring exposure, but print carries cultural status.
High fashion brands recognise this. They often save their most elaborate or artistic campaigns for print because the format invites slower, more attentive viewing. A printed page allows creative work to breathe. It is not interrupted by notifications or sandwiched between unrelated content. This environment elevates both the brand and the artist.
Even younger audiences appreciate this sense of craft. While Gen Z consumes most fashion digitally, many still collect print magazines or subscribe to independent zines. They see print as something special rather than routine.
The Value of Curation
The internet offers infinite choice, but it often lacks structure. Trends collide without context. Good work can drown in the noise. Print magazines solve that problem by offering thoughtful curation. Editors select what matters. They build narratives across pages. They shape a point of view.
This editorial perspective is one of print’s greatest strengths. It turns fashion storytelling into something cohesive. Readers trust the vision behind the selection, not just the images. Digital platforms can offer curation too, but the goals differ. Algorithms prioritise engagement, not artistic coherence. Print prioritises meaning.
Magazines that lean into this strength remain relevant. They become cultural filters rather than trend chasers.
The Evolution of Editorial Photography
High fashion magazines used to be the main stage for ambitious editorial photography. Today, photographers also share their work directly on social platforms. Many build careers without ever shooting for a magazine.
Still, print offers something digital cannot fully replicate. Scale. A double page spread shows detail that a phone screen cannot. Colour accuracy is better. The lighting nuance is clearer. Photographers often say their work feels more complete in print. It lands with greater impact.
This is why many fashion image makers continue to pursue print commissions. They see the format as a place to experiment, push boundaries, and create work that will outlast the fast scroll of digital life.
The Role of Print in Brand Identity
Luxury brands rely on storytelling. They need to feel worldly and thoughtful. Print magazines help them create that atmosphere. A campaign placed in a respected publication carries an air of seriousness. It shows the brand values culture, not just clicks.
Some labels even produce their own print magazines. Acne Studios, Chanel, and Louis Vuitton have all created editorial publications that mix fashion with art and writing. These projects build depth and strengthen brand communities. They also allow designers to control their own narratives rather than rely on external press.
In this sense, print is not a leftover from the past. It is a strategic tool for brand building.
Where Print Falls Short
Print cannot compete with digital when it comes to speed, reach, or interactivity. Fashion conversations now unfold in real time. Memes, commentary, and trend cycles move too fast for monthly issues.
Print also struggles with global accessibility. Shipping costs, limited distribution, and regional pricing make it difficult for international readers to buy magazines regularly. Digital media crosses borders instantly.
Finally, many younger consumers prioritise sustainability. Large scale print production raises concerns about paper use and waste. Some magazines have reduced issue frequency or switched to smaller print runs to address this, but the environmental question remains part of the conversation.
Hybrid Publishing: The Best of Both Worlds
The most successful fashion magazines today understand that the future lies in hybrid publishing. They use digital platforms for speed and conversation. They use print for depth and expression.
Digital content feeds the daily rhythm. It drives engagement, breaks news, and highlights quick reaction work. Print issues act as statements. They anchor the magazine’s identity by offering long form storytelling, big visual ideas, and editorial experimentation.
This balance allows magazines to stay relevant while protecting the qualities that make them unique.
Independent and Niche Magazines
Another important trend is the rise of independent fashion magazines. These smaller publications often focus on specific communities, aesthetics, or philosophies. They thrive because they offer distinct viewpoints. Readers seek them out for their artistic risk taking and cultural insight.
Indie magazines prove that print still holds power when it delivers something rare. They may not reach mainstream audiences, but they influence creative circles and often serve as launching pads for new photographers, stylists, and writers.
So, Does High Fashion Still Need Print?
The industry no longer needs print magazines the way it once did. They are no longer the gatekeepers of style. They do not control influence or set every trend.
But high fashion still benefits from print. It gives weight to ideas, honours craftsmanship, and offers a slower form of consumption that digital cannot match. It supports artistic photography. It strengthens brand identity. It provides curation in a chaotic media landscape.
Print may not be essential for daily communication, but it remains essential for cultural depth. High fashion thrives on meaning, atmosphere, and storytelling. Print supports those values better than any digital format.
The Last, Fine Print
Print magazines are no longer the industry’s dominant force, but they are far from obsolete. Their role has changed. They now complement the speed of digital culture by offering permanence, artistry, and perspective. High fashion still needs that balance.
In a world that moves faster every year, print reminds the industry to slow down, look closely, and appreciate the craft behind the image. That alone makes it worth keeping.
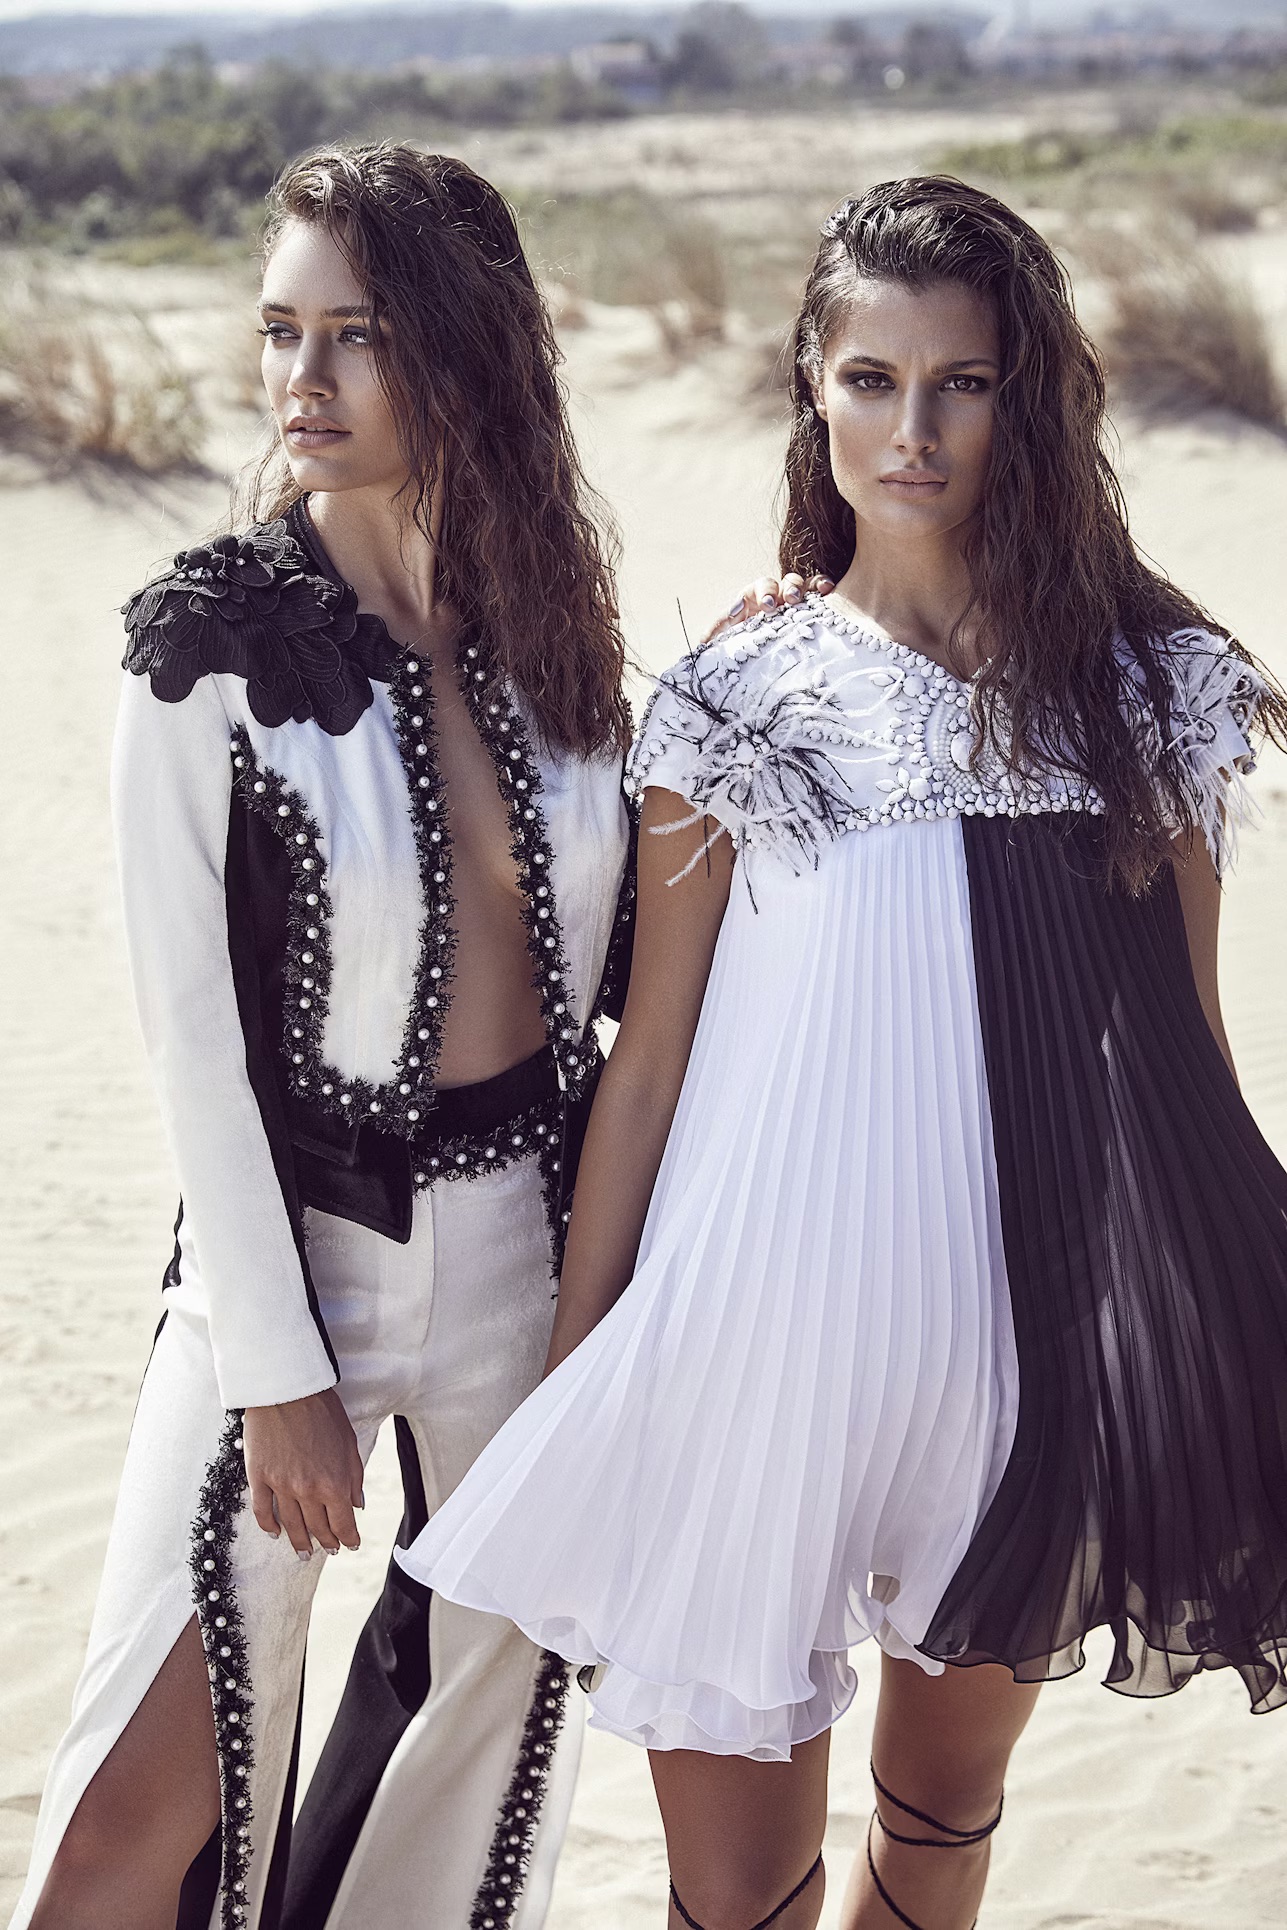
Fashion imagery has always evolved alongside technology and cultural taste. In recent years, one shift has changed the visual language of the industry more than almost anything else. Cinematic lighting has moved from film sets into fashion studios, giving photographers new ways to build mood, shape stories, and create emotional impact. What was once a niche technique used by a handful of experimental artists is now a defining part of modern fashion work. The change is not just aesthetic. It reflects a broader shift in how brands want to communicate and how audiences consume images.
Why Cinematic Lighting Matters
Cinematic lighting is grounded in principles used for decades in film. It guides the viewer’s eye, controls tension, and expresses subtext. In fashion photography, it does something similar. It adds atmosphere and depth. It creates a sense of narrative. It turns a simple pose into a moment that feels part of a larger world.
Traditional fashion lighting often aimed for clarity and polish. Everything was evenly lit. Shadows were controlled. The goal was precision. Cinematic lighting takes a different approach. It uses darkness, contrast, and directional light to add emotion. Instead of showing the clothes in a strict technical way, it shows them in a setting that feels alive. This shift appeals to audiences who want images that stir something, not just document a garment.
The Influence of Film Culture
Film and fashion have always shared ideas, but the connection is stronger today. Streaming platforms have changed viewing habits. People spend more time immersed in visually rich series and films. They get used to dramatic lighting, slow building mood, and expressive shadows. When they see fashion images that echo this style, the work feels familiar and modern.
Brands are aware of this. They want campaigns that feel like stills from a movie. They want a cinematic identity that sets them apart. This is especially true for luxury houses. Cinematic lighting suggests craft and depth. It signals that the brand cares about storytelling, not just promotion.
Key Techniques Behind the Look
Cinematic lighting can take many forms, but a few techniques appear again and again in fashion shoots.
Low key lighting. This style uses strong shadows and limited light to create mystery and intimacy. It adds drama without feeling forced. The viewer pays closer attention because the frame invites curiosity.
Hard directional light: Sharp angles create bold shapes on the model and clothing. This technique can add an edgy or futuristic tone. It also emphasises texture, which helps when shooting pieces like leather, sequins, or structured tailoring.
Backlighting: When the light comes from behind the subject, it creates a glow or halo effect. This adds separation from the background and gives the frame a sense of depth. Backlight can make fabrics look luminous and fluid.
Coloured gels: Warm or cool tones change the emotional temperature of a shot. Deep red suggests intensity. Blue feels calm or surreal. Amber adds nostalgia. Colour is a storytelling tool that turns a simple scene into a mood piece.
Practical lights: These are light sources that appear inside the frame. Neon signs, desk lamps, fluorescent tubes, city lights. Practical lights make the scene feel grounded in a real environment. They also give the photographer a natural reason to shape the shadows in interesting ways.
How Cinematic Lighting helps Tell Stories
Fashion has moved closer to narrative driven imagery. Brands want campaigns that feel like chapters of a larger tale. Cinematic lighting supports this movement by giving photographers the ability to build emotion before the viewer even studies the clothes.
A soft beam of morning light suggests hope or calm. A sharp spotlight creates intensity or performance. A dim environment with glowing highlights feels secretive or romantic. These cues guide the audience’s reading of the image.
This storytelling approach benefits fashion brands in two ways. First, it helps the images stand out in crowded digital spaces. Second, it strengthens the brand’s identity. If every campaign shares a consistent cinematic mood, it becomes part of the brand’s visual DNA.
The Role of Technology
New tools are making cinematic lighting easier to control. LED panels have replaced older, hotter, bulkier lights. They allow quick colour changes and precise dimming. They can mimic sunlight, candlelight, or even reflections from screens. This flexibility saves time on set and opens possibilities that were once limited to film crews with large budgets.
Continuous lighting is also reshaping how photographers work. It allows them to see the final mood as they shoot, similar to how cinematographers operate. This real time feedback encourages experimentation. Instead of waiting to review flash exposures, photographers can adjust instantly.
Modern cameras support this evolution as well. Better dynamic range makes it possible to retain detail in deep shadows and bright highlights. Photographers can push contrast without losing quality. This encourages bolder lighting choices.
Collaboration with Film Professionals
As cinematic styles grow in popularity, fashion teams often bring in talent from the film world. Gaffers, cinematographers, and lighting technicians collaborate with photographers to create complex setups that feel sculpted rather than staged.
This cross discipline approach expands what is possible. Film lighting experts understand how to use practical lights, reflectors, and modifiers to create subtle transitions between bright and dark areas. They know how to mimic natural sunlight in a studio or build a night scene at noon. The collaboration raises the quality of the final images and strengthens the storytelling.
The Challenges of the Style
Cinematic lighting is powerful but demanding. It requires careful planning, patience, and a willingness to embrace unpredictability. Shadows can hide details that clients expect to see. Strong contrast can complicate retouching. Bright coloured gels may distort the true colour of the garments. Photographers must balance mood with clarity.
There is also the risk of overuse. Cinematic lighting can lose its impact if every frame relies on the same tricks. The best photographers use it strategically. They consider the clothing, the location, the model, and the message. They choose lighting that elevates the concept rather than overpowering it.
Why This Shift Is Here to Stay
Cinematic lighting speaks to a cultural shift toward emotional storytelling. People want images that feel like they belong in a narrative, not just in an advertisement. They want mood, intention, and atmosphere.
Fashion brands want to connect in more meaningful ways. Cinematic lighting gives them a visual language that feels sophisticated and modern. It works across stills and video, which is essential for campaigns that span multiple platforms.
As technology continues to expand, the tools will only get better. More control, more nuance, more creative freedom. The combination of artistic ambition and technical possibility ensures that cinematic lighting will remain a major force in fashion shoots for years to come.
Lights, Camera And…
Cinematic lighting has transformed fashion photography by bringing depth, emotion, and narrative power to the frame. It shifts the focus from simple product display to immersive visual storytelling. It blends the artistry of film with the creativity of fashion. Photographers gain a richer toolkit. Brands gain a stronger voice. Audiences gain images that feel memorable.
This evolution shows that fashion imagery is no longer just about showing clothes. It is about building worlds and letting viewers step inside them.
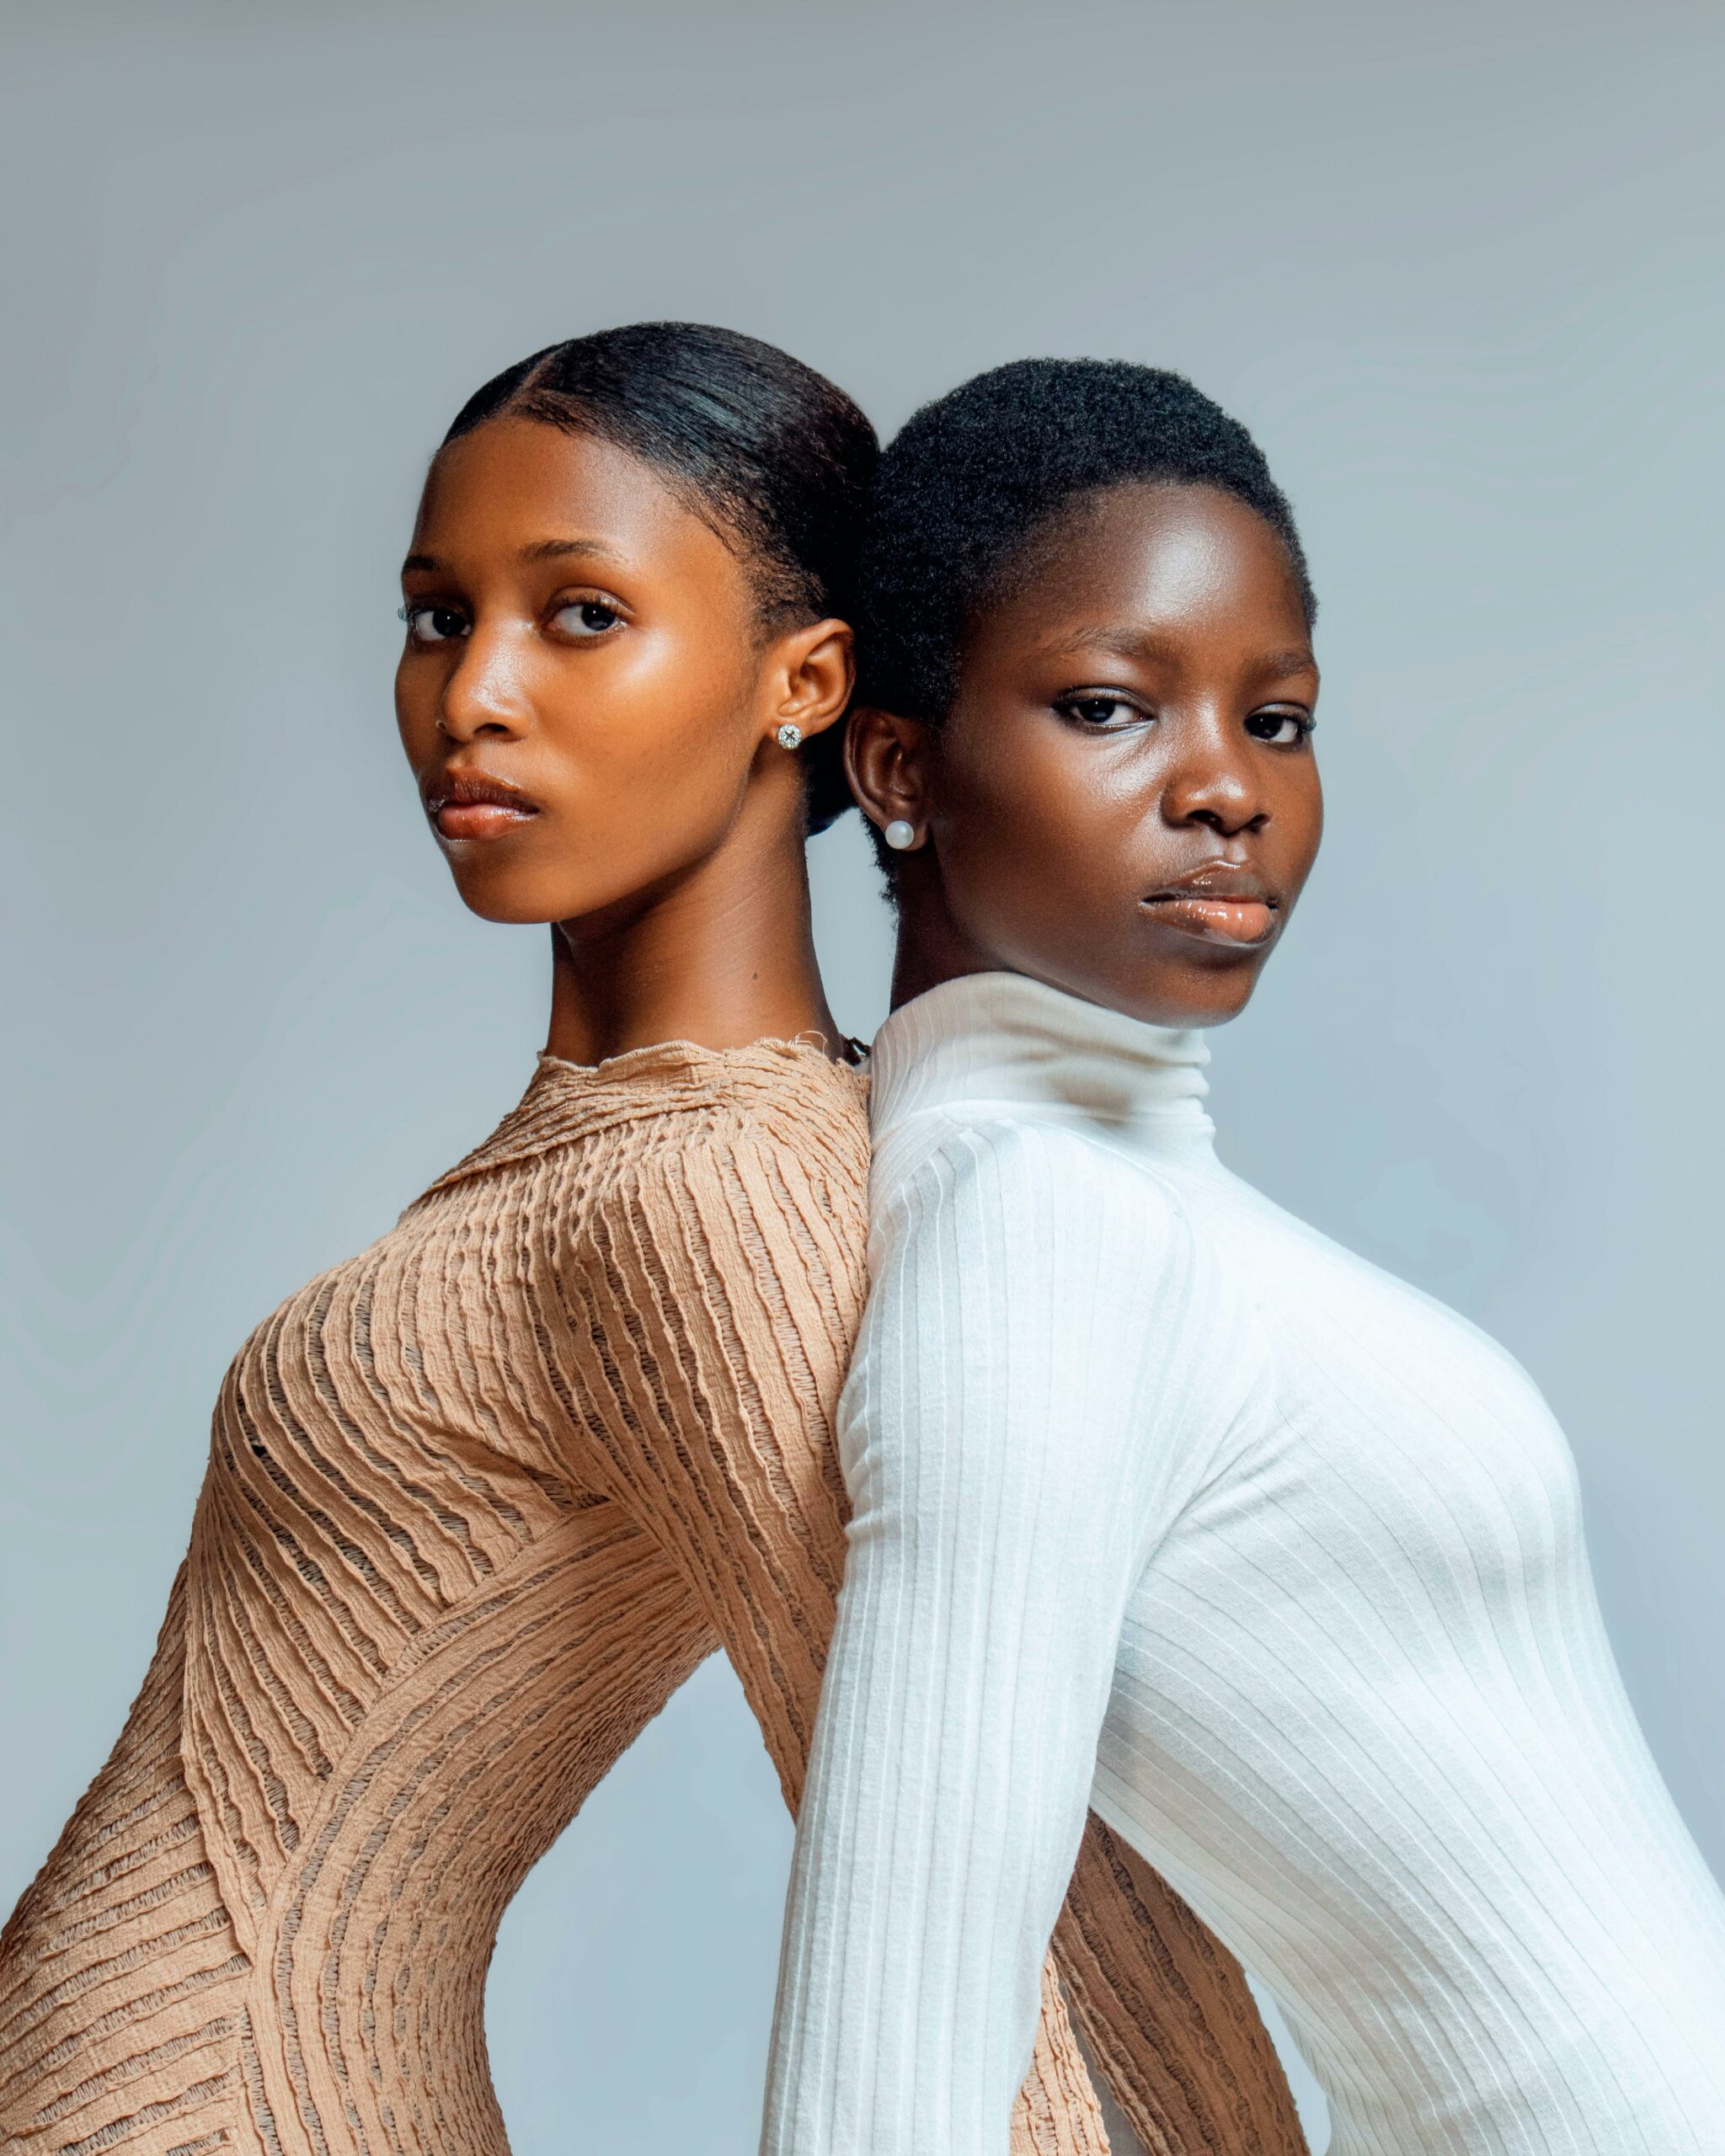
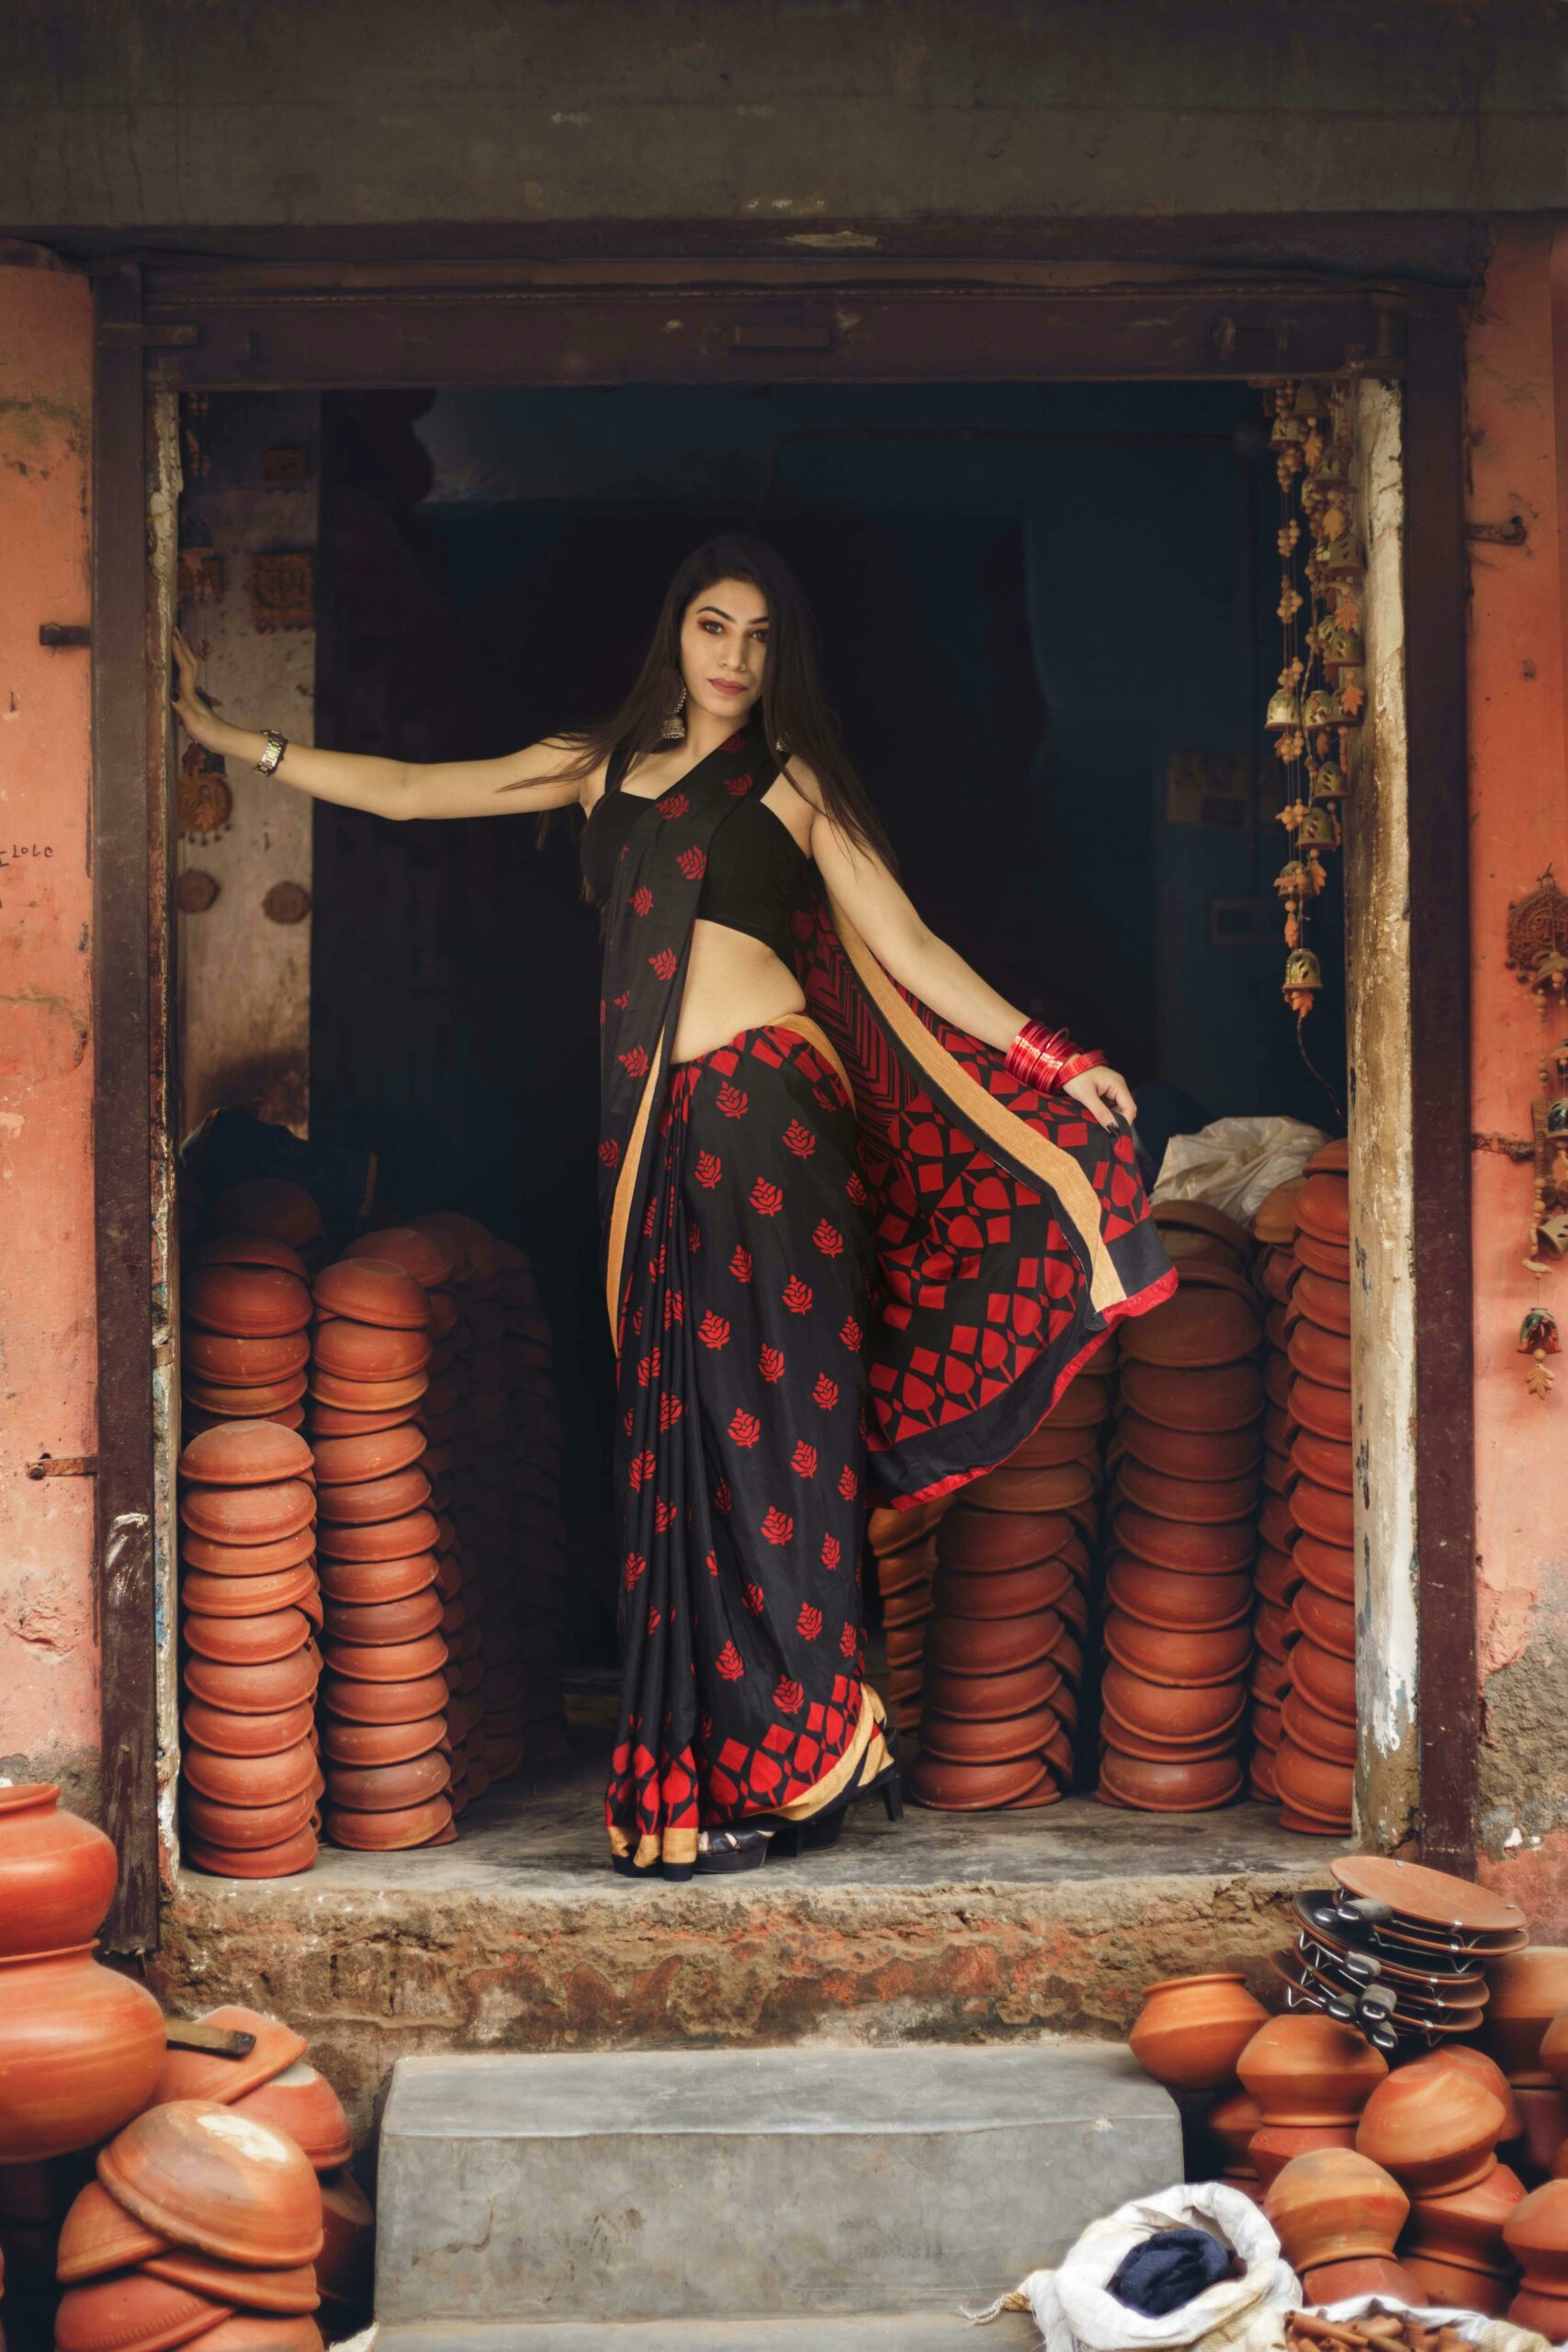
Street couture photography has taken over fashion culture in a way few trends have before. It blends high fashion with real world grit, turning sidewalks into runways and everyday people into style subjects. This shift did not happen overnight. It grew from a mix of social media influence, shifting brand priorities, and a global appetite for authenticity. What used to be a niche style is now a major force shaping how fashion is captured, consumed, and imagined.
Where It All Began
Traditional fashion photography once lived almost entirely inside studios or tightly controlled outdoor sets. Everything was directed. Lighting, poses, and styling followed a clear plan. Early street style photographers began to introduce a new kind of spontaneity. They focused on what people were actually wearing at fashion weeks or in creative neighborhoods. Their images felt unscripted, fast, and honest.
As social platforms grew, these images spread across the world in minutes. Audiences loved the raw energy and immediacy. They felt more connected to the people in the photos than to distant supermodels in curated campaigns. Brands noticed. What began as documentation of personal style became a visual language that designers and marketers wanted to tap into.
What Makes Street Couture Different
Street couture photography is not the same as simple street style. It pairs the freedom of real environments with the sophistication of high fashion. Think luxurious fabrics against worn brick, couture silhouettes moving through subway stations, or bold accessories contrasted with crowded city streets. It is the meeting point of polish and imperfection.
Several elements define the style. First, the environment becomes a character. Weathered textures, city noise, and unusual angles create tension and personality. Second, the models feel more human. Their expressions are often relaxed or mid movement. There is charm in the unpredictability. Third, the clothes are styled for impact but worn in ways that feel lived in. This blend makes the images resonate with audiences who crave fashion that feels both aspirational and reachable.
Why Audiences Connect With It
People respond to street couture photography because it feels alive. There is momentum in the frame. It captures the sense that fashion is part of everyday life, not something reserved for catwalks or glossy magazines.
This style also reflects cultural diversity. Photographers are not restricted to conventional beauty standards or typical fashion settings. They can cast unique talents, work in unconventional locations, and create stories that reflect their own communities. The result is imagery that feels inclusive.
Another factor is transparency. Audiences know the photos were not created in a bubble. They can see the world around the model. It signals honesty at a time when consumers are increasingly skeptical of overproduced campaigns.
The Role of Social Media
Street couture photography thrives on platforms like Instagram, TikTok, and Pinterest. These spaces reward content that feels candid and visually striking. A single image with strong composition and personality can spread quickly.
Short form video has added even more momentum. Behind the scenes clips, styling breakdowns, and location scouting videos build connection between photographers and viewers. They invite people into the process. This sense of shared experience fuels loyalty and engagement.
Social media also allows photographers to develop their own brands. They can show consistent aesthetics, attract new clients, and collaborate with stylists, models, and designers who share their vision. The ecosystem encourages experimentation. A fresh idea can go from concept to global visibility in a day.
How Brands Are Using the Style
Major fashion houses, streetwear labels, and emerging designers have embraced street couture photography. It aligns with a consumer base that values authenticity, individuality, and culture. Instead of staging elaborate studio sets, brands now commission photographers to shoot in markets, parks, rooftops, and residential streets.
Campaigns built around this approach suggest confidence and edge. They also highlight how clothes move in the real world. This is useful for brands aiming to connect with younger shoppers who care about practicality and personality.
Smaller labels gain even more from this style. It allows them to compete visually with bigger players without the cost of traditional production. A strong concept, a compelling model, and a vivid location can achieve a high impact look on a modest budget.
The Skills Behind the Lens
Street couture photography may look spontaneous, but it requires precision. Photographers must adapt to shifting light, unpredictable movement, and crowded environments. They often need quick reflexes and a strong sense of timing.
Composition plays a major role. Since backgrounds are uncontrolled, the photographer must frame the shot in ways that highlight the clothing while using the urban setting as texture instead of distraction. This balance is key.
Communication also matters. Models need direction that keeps them natural while maintaining the energy of the scene. Small changes in posture or movement can transform the shot.
Finally, editing ties everything together. The post processing approach tends to be bold yet grounded. Colours may be rich, shadows deep, and textures sharp. The goal is to amplify the contrast between luxury and street grit without losing authenticity.
Challenges in the Genre
Street couture photography brings unique challenges. Busy locations can lead to interruptions. Lighting can shift quickly. Noise, weather, and crowds require patience and agility. Some cities have strict rules about shooting in public spaces. Permits may be required.
Models also need to feel comfortable working in public. Not everyone enjoys posing with strangers watching. Photographers must create a sense of ease, even in chaotic surroundings.
Despite these challenges, many photographers find the process rewarding. It offers creative freedom and the thrill of capturing something unplanned yet perfect.
Cultural Influence and Future Trends
Street couture photography has played a major role in redefining what fashion imagery can be. It helped blur the line between high fashion and everyday style. It encouraged designers to draw inspiration from youth culture, music scenes, and local communities. It also pushed photographers to think beyond traditional beauty.
The future of this style is likely to lean even more into hybrid formats. Expect more motion content, more experimental lighting techniques, and more collaborations with musicians, dancers, and performance artists. As cities evolve, new environments will emerge as backdrops. Abandoned industrial sites, modern transit hubs, and community spaces may become key stages for visual storytelling.
Technology will shape the next phase as well. Compact cameras, powerful mobile devices, and AI assisted workflows will give photographers more tools to create fast and refine efficiently. Yet the core appeal of the genre will remain the same. People love images that feel honest, confident, and deeply connected to real life.
Ready to Meet the Street?
The rise of street couture photography reflects a cultural shift toward authenticity, individuality, and movement. It captures fashion in its most relatable form. It respects the chaos of everyday environments and uses that energy to elevate style. For photographers, it opens creative pathways. For brands, it offers a modern way to reach audiences. For viewers, it delivers images that feel alive.
Street couture photography is not just a trend. It is a new chapter in fashion imagery, shaped by real streets, real stories, and a global community eager for creativity that feels close to home.