Nikon India has announced two new additions to its APS-C/DX-format mirrorless lineup – the NIKKOR Z DX MC 35mm f/1.7 and the NIKKOR Z DX 16-50mm f/2.8 VR. Both are set to launch in the first week of November 2025.
The NIKKOR Z DX MC 35mm f/1.7, priced at ₹38,995, is Nikon’s first DX-format micro lens capable of achieving a life-size reproduction ratio (equivalent to 1:1 in FX/35mm format). With a bright f/1.7 aperture and a minimum focus distance of 0.16 m, it enables sharp, detailed close-ups with soft, natural bokeh. Its aspherical ED glass element minimises chromatic aberration, while the stepping motor (STM) ensures quiet autofocus — ideal for both photography and video. Weighing just a few hundred grams, the lens is lightweight, portable, and built with dust- and drip-resistance in mind.
Alongside it, Nikon introduces the NIKKOR Z DX 16-50mm f/2.8 VR, priced at ₹78,995, a compact zoom covering 24–75mm (FX equivalent) with a constant f/2.8 aperture. It offers 5-stop vibration reduction (VR), excellent low-light performance, and versatile close-focusing distances of 0.15 m (wide) and 0.25 m (telephoto). The lens features ED and aspherical elements for high-resolution clarity, STM autofocus, and focus breathing suppression for smooth video capture.
Apple has introduced its new M5 chip, capable of delivering over 4x the peak GPU compute performance compared to M4 chip. This will be available in two flagship devices — the 14-inch MacBook Pro and next-generation iPad Pro — marking a unified leap in performance across its computing lineup. While the laptops retain their familiar design, the upgrades under the hood bring significant gains in AI, graphics, and efficiency. Alongside these two devices, Apple also plans to integrate the M5 with the next-gen Apple Vision Pro.
The new 14-inch MacBook Pro is priced from $1,599 (approx ₹1,49,900), features Apple’s latest M5 processor with a redesigned GPU architecture and a Neural Accelerator in each core. Apple claims the chip delivers 3.5x faster AI performance than M4, 20% faster CPU performance, and 1.6x faster graphics. Real-world results include 1.8x faster AI video enhancement in Topaz Video, 1.7x faster 3D rendering in Blender, and 1.2x faster build speeds in Xcode. Battery life has been extended to an impressive 24 hours, compared to 18 on last year’s model.
Design and port layout remain unchanged — users still get a 14.2-inch Liquid Retina XDR display, three Thunderbolt 4 USB-C ports, HDMI, and an SDXC card slot. Configurations go up to 32GB RAM and 4TB SSD (top model around ₹2.5-2.7 lakh).
Alongside the laptop, Apple also unveiled the M5-powered iPad Pro, available in 11-inch (approx ₹92,900) and 13-inch (approx ₹1,19,900) variants. The tablet boasts the same thin design as last year’s model but packs the M5’s AI power, resulting in up to 3.5x faster than M4 and 5.6x faster than M1. It also gains Wi-Fi 7, faster cellular performance, and an upgraded Ultra Retina XDR tandem OLED display.
Both devices ship with macOS Tahoe and iPadOS 26, respectively, and will be available starting 22nd October.
Vivo has announced the global launch of OriginOS6, its latest and most advanced operating system, marking a milestone as the company celebrates its 30th anniversary. Guided by its “OriginDesign” philosophy, the new system focuses on three pillars — smoothness, design, and AI — to enhance human-computer interaction in the AI era.
Powered by the new Origin Smooth Engine, the OS improves app startup speeds, animation performance, and long-term stability. vivo claims an 18.5% faster cold-start time and SGS certification for sustained smoothness, simulating five years of use.
OriginOS 6 also introduces a refreshed visual identity through vivo Sans2, dynamic icons, and adaptive layouts inspired by natural interactions. Users gain greater customization via a redesigned lock screen and home interface.
AI plays a central role, with deep Google integration bringing tools like Gemini and Circle to Search, along with vivo’s own Origin Island for real-time contextual actions. Productivity and creativity are enhanced through AI Retouch, DocMaster, and cross-device collaboration features.
The update will begin rolling out globally in phases starting November 2025, with timelines varying by market.
BenQ has introduced the PD2770U, a 27-inch 4K professional monitor featuring a built-in colour calibrator, aimed at post-production teams, studios, and independent creators. The monitor was unveiled at the Broadcast India Show 2025, markingIndia as the first market for its global launch.
The PD2770U integrates an internal calibration system that adjusts colour accuracy automatically based on ambient lighting, reducing the need for external tools. It covers 99% of Adobe RGB and DCI-P3 colour spaces, along with full Rec.709 support. The display is also certified by Pantone Validated, Pantone SkinTone, and Calman Verified for colour precision across various media formats.
The monitor supports centralised control through its RJ45 LAN port and DMS Local software, allowing studios to manage and synchronise colour calibration across multiple displays. Additional features include a Nano Matte Panel to reduce glare, a magnetic shading hood, Display Pilot 2 software for workflow tools, and a Hotkey Puck G3 controller for quick adjustments.
The BenQ PD2770U will be available in India from November through authorized retail outlets and the company’s official website.
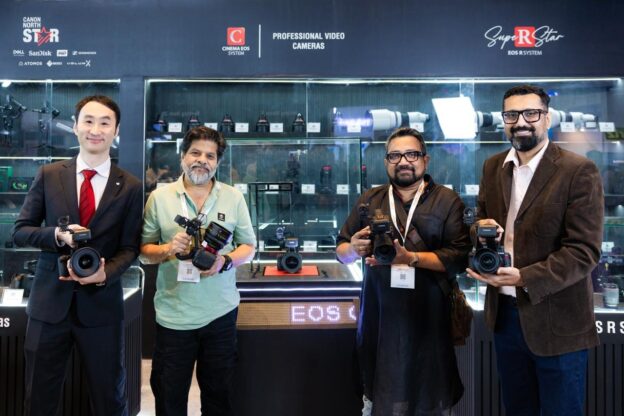
Canon India unveiled the EOS C50, Canon’s compact digital cinema camera designed for professional video production at Broadcast India Show.
The Canon booth featured three immersive zones replicating real-world production environments: the Cinema EOS & DILC Zone, the Virtual Production Zone showcasing PTZ and C400 cameras with Cine Servo, and the R50V Zone for digital-first creators. Visitors experienced hands-on workflows across cinema, virtual production, and live broadcasting.
Canon’s product showcase spanned the full spectrum of content creation: the EOS R50V for creators and vloggers, the EOS R5 Mark II for hybrid filmmaking, and the EOS C400, C80, and EOS C50 for high-end cinematic and OTT productions.
Canon India President & CEO Toshiaki Nomura emphasized the company’s commitment to empowering visual storytellers with end-to-end solutions across broadcast, OTT, and cinema. “This year, we are proud to unveil the EOS C50 for the first time in India, alongside our acclaimed Cinema EOS and PTZ camera range. Our comprehensive imaging ecosystem is built to meet the evolving needs of modern production, from virtual sets and VR to live studios and streaming”
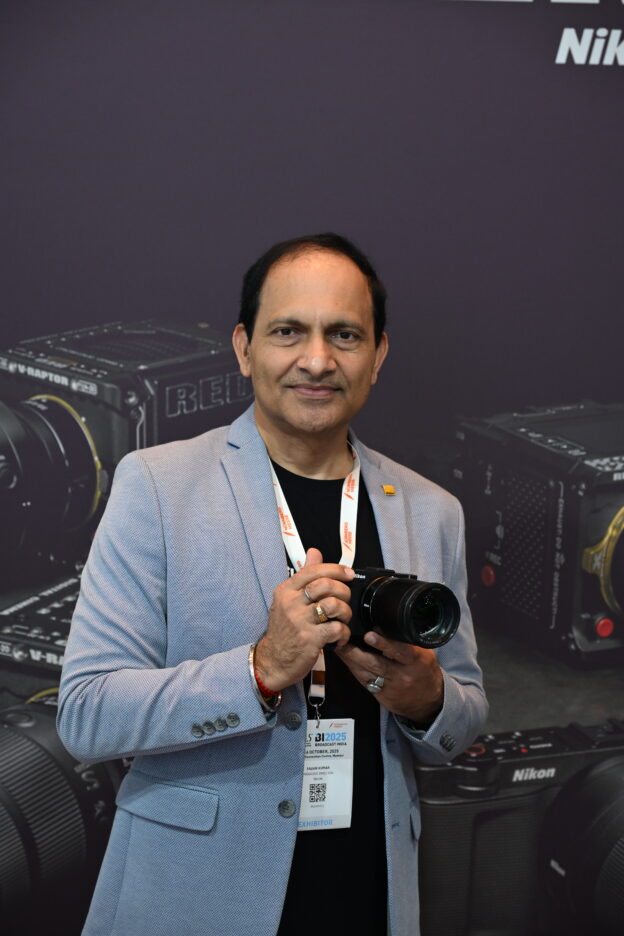
Nikon India unveiled the Nikon ZR, a full-frame cinema camera, at the Broadcast India Show 2025 in Mumbai. Developed in collaboration with RED Digital Cinema, the ZR features internal 6K RAW recording and RED-curated colour science, offering cinematic video and professional-grade audio in a compact 540g body.
Key Specifications:
RED R3D NE codec
Internal RAW video: 6K/60p (R3D NE, N-RAW, ProRes RAW HQ)
Dual base ISO: 800/6400
Monitor: 10.16cm (4-inch) vari-angle with a 3070k-dot resolution
Dynamic range: 15+ stops*
The world’s first in-camera 32-bit float , OZO Audio, 3.5mm line input
Slow motion: Up to 10x slow motion in Full HD (FHD 239.76p)
Cloud-ready: Frame.io integration
Monitoring: Waveform, histogram, LUTs
Stabilisation: 5-axis IBIS
Build: Magnesium alloy, dust-and-drip resistant
Weight: 540g
The Nikon ZR will be available in India from 16 October 2025 at ₹86,995 (body only).
Nikon has also launched a dedicated Z CINEMA Instagram account to provide updates and resources for filmmakers: https://www.instagram.com/zcinema_
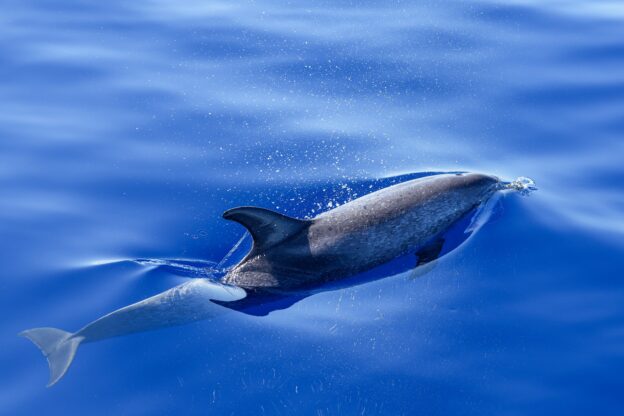
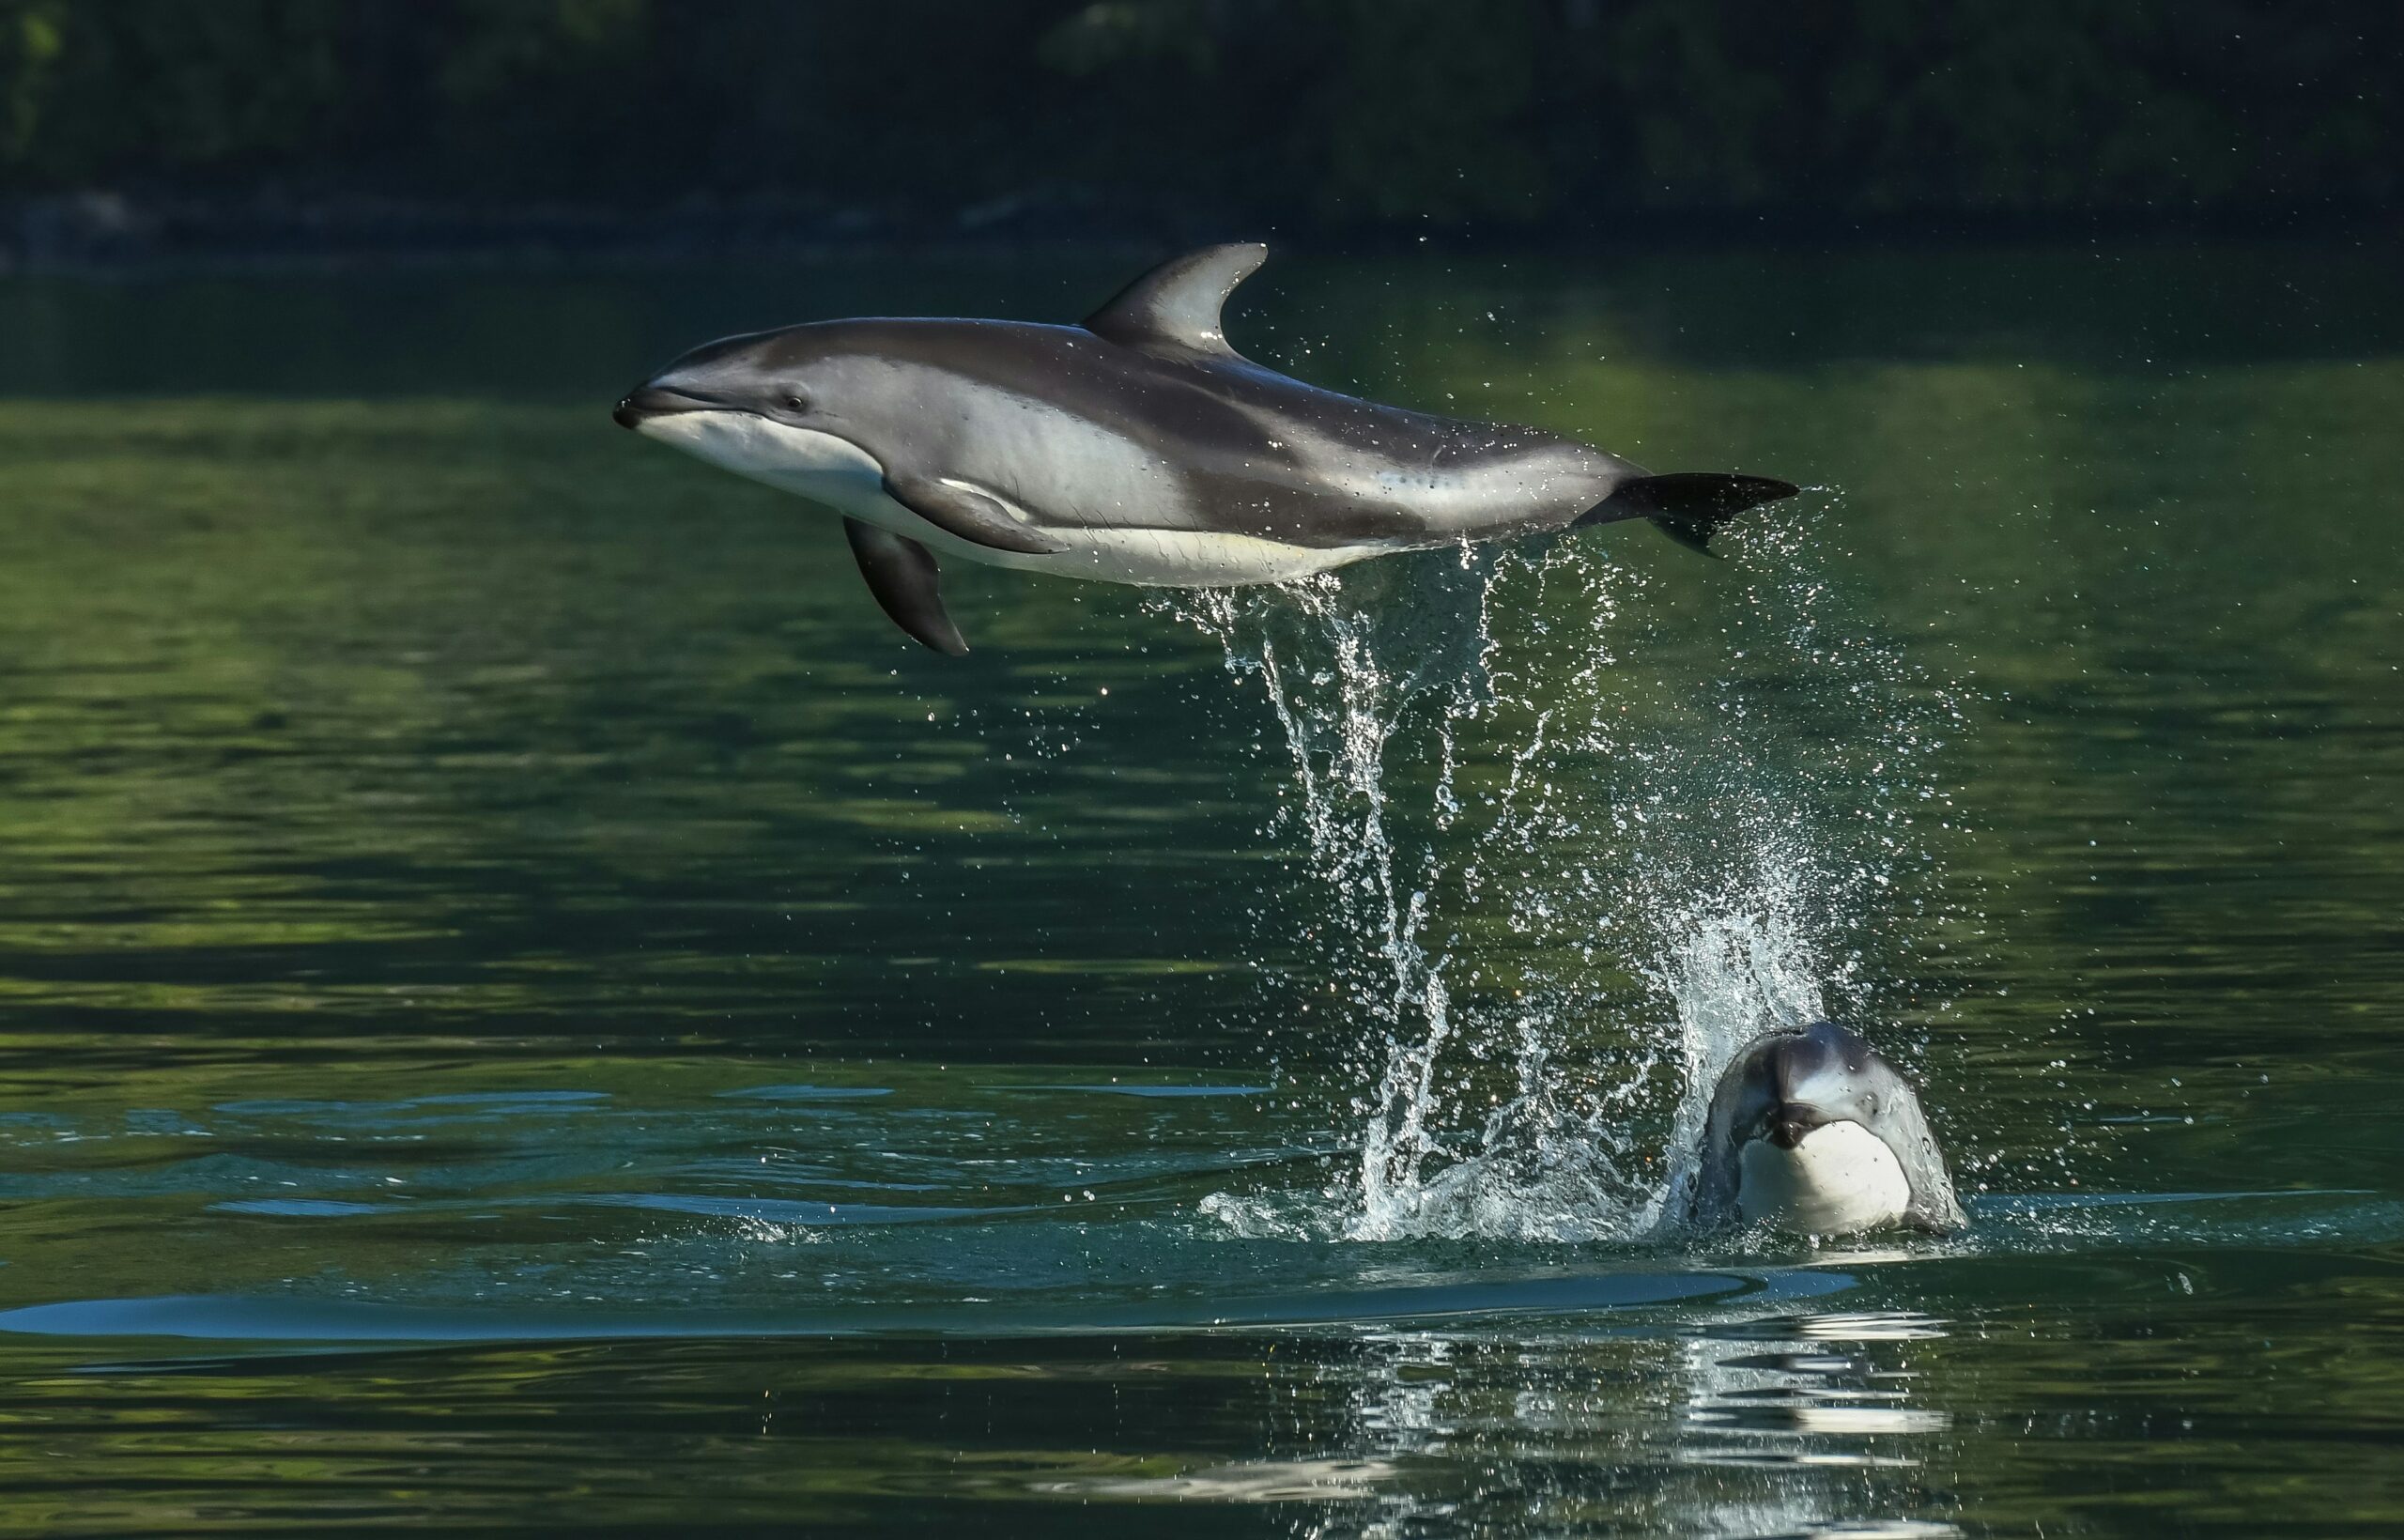
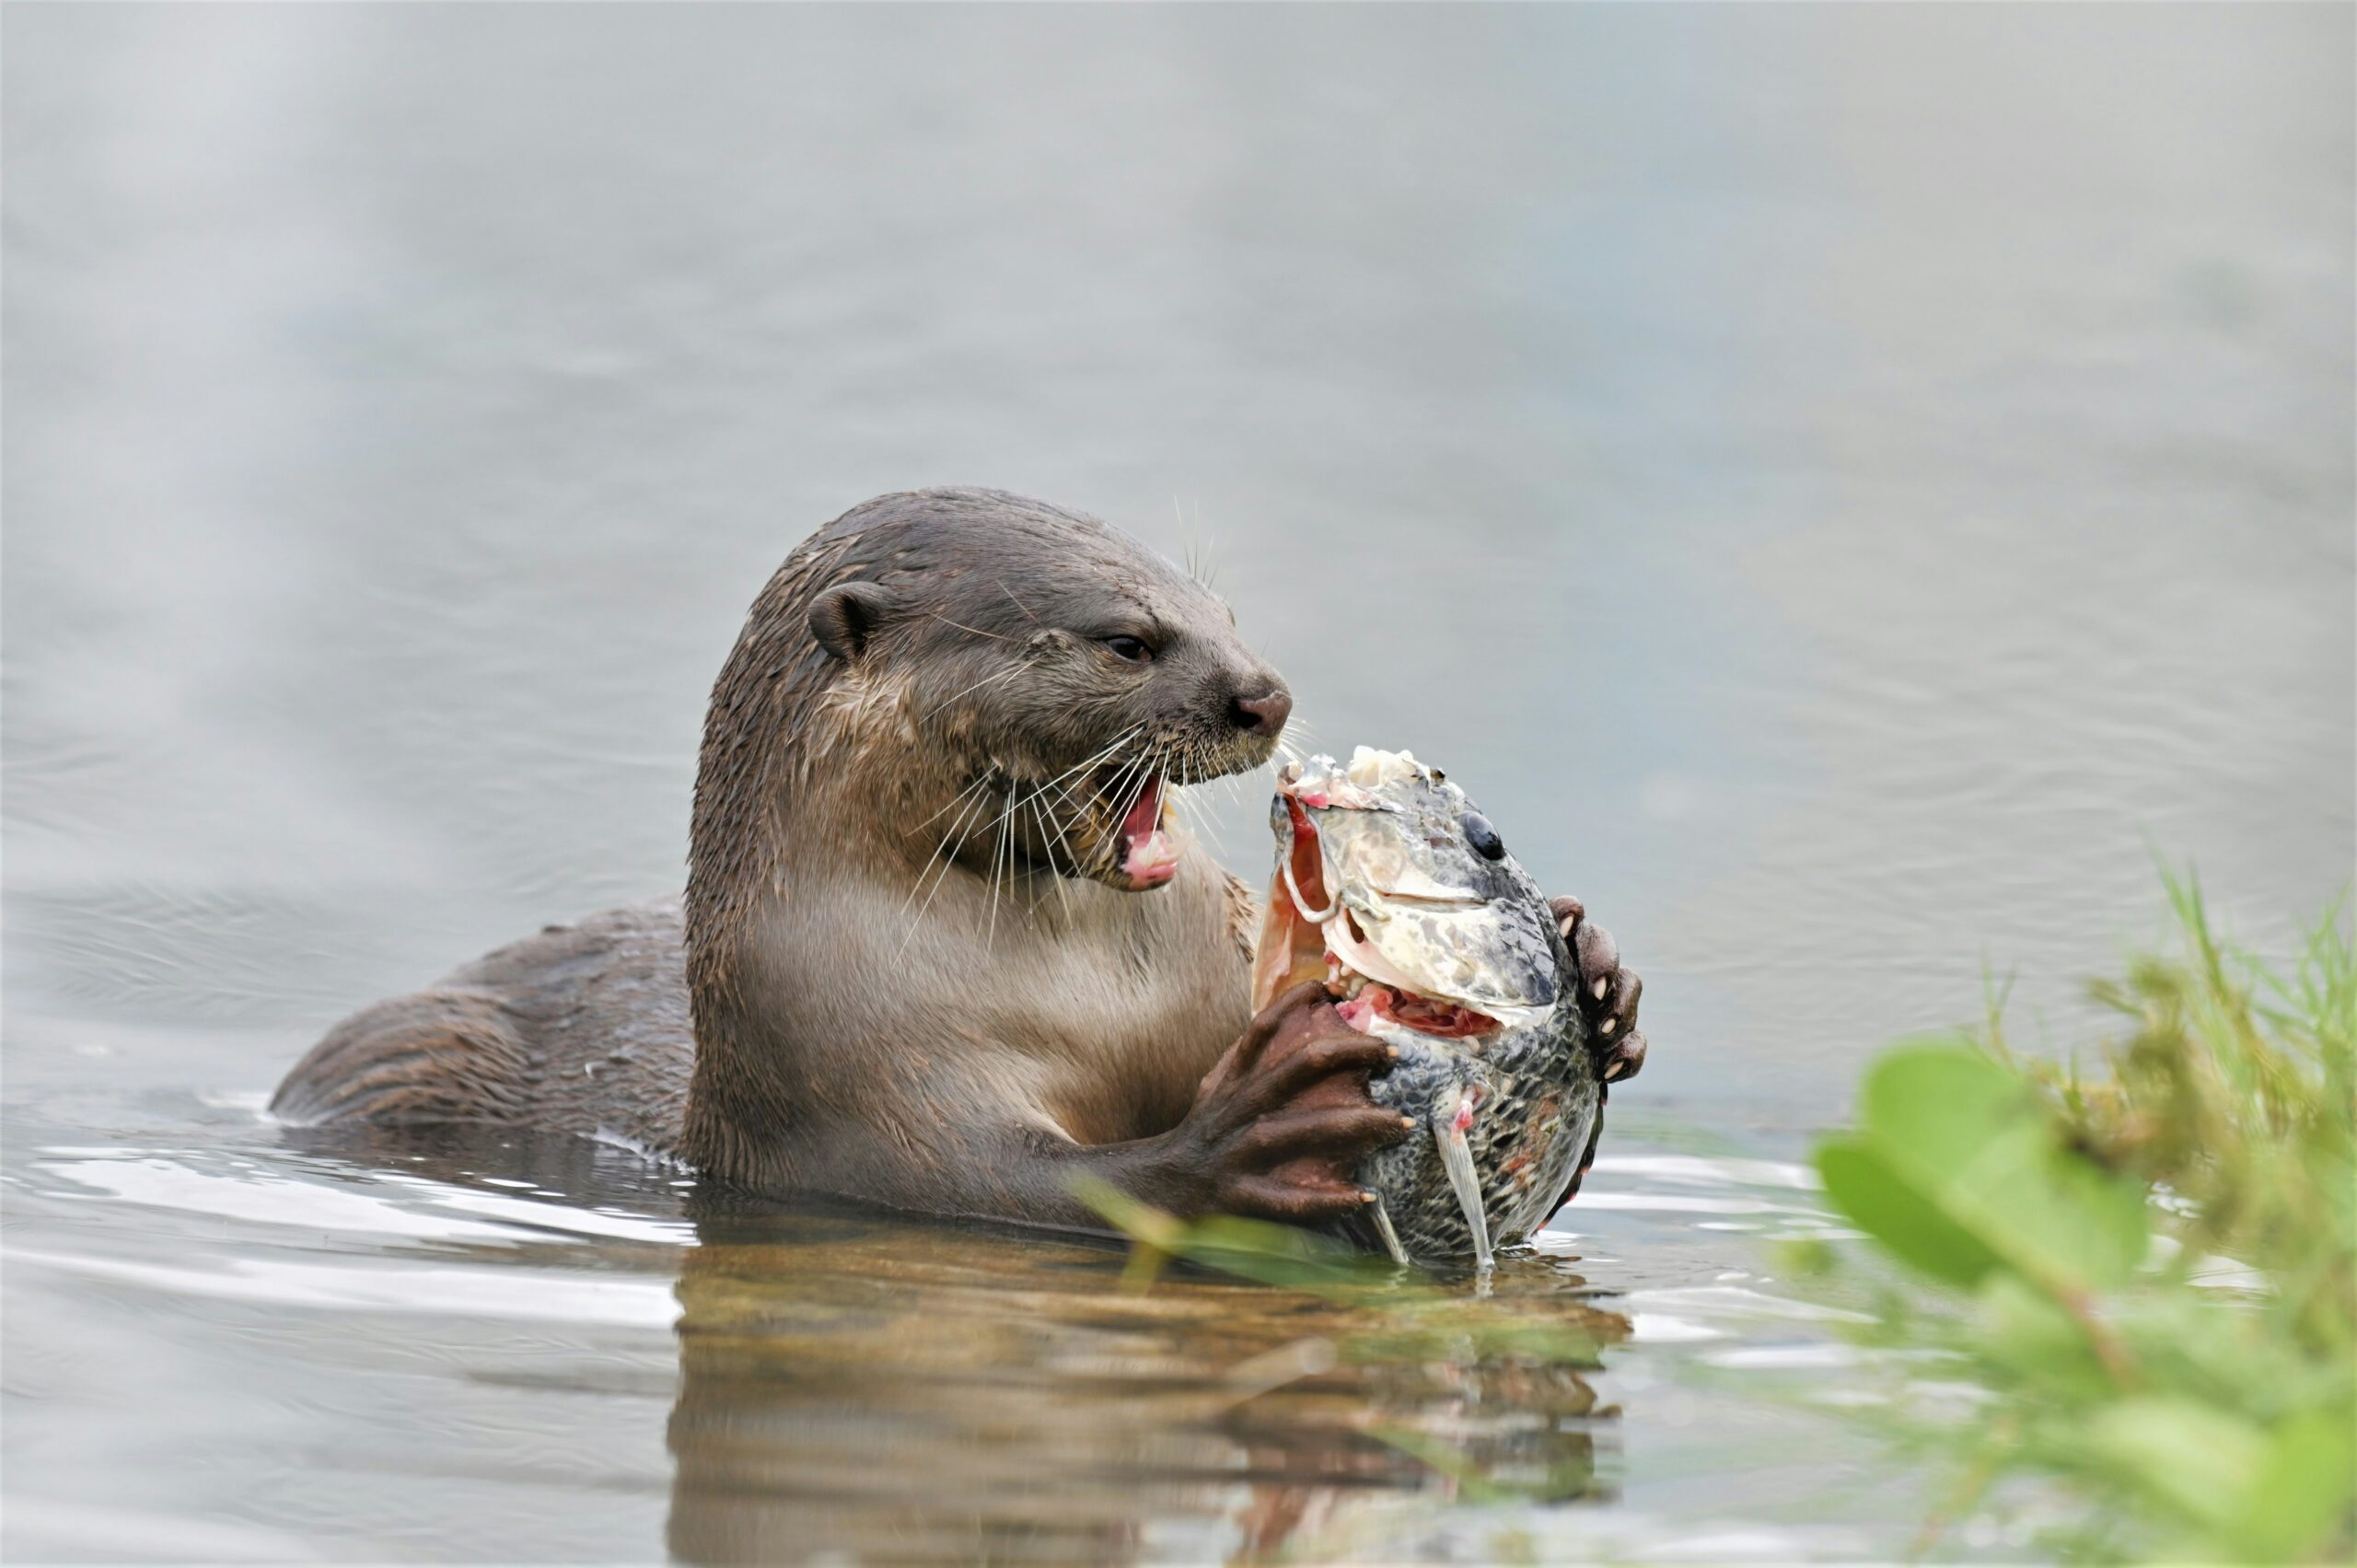
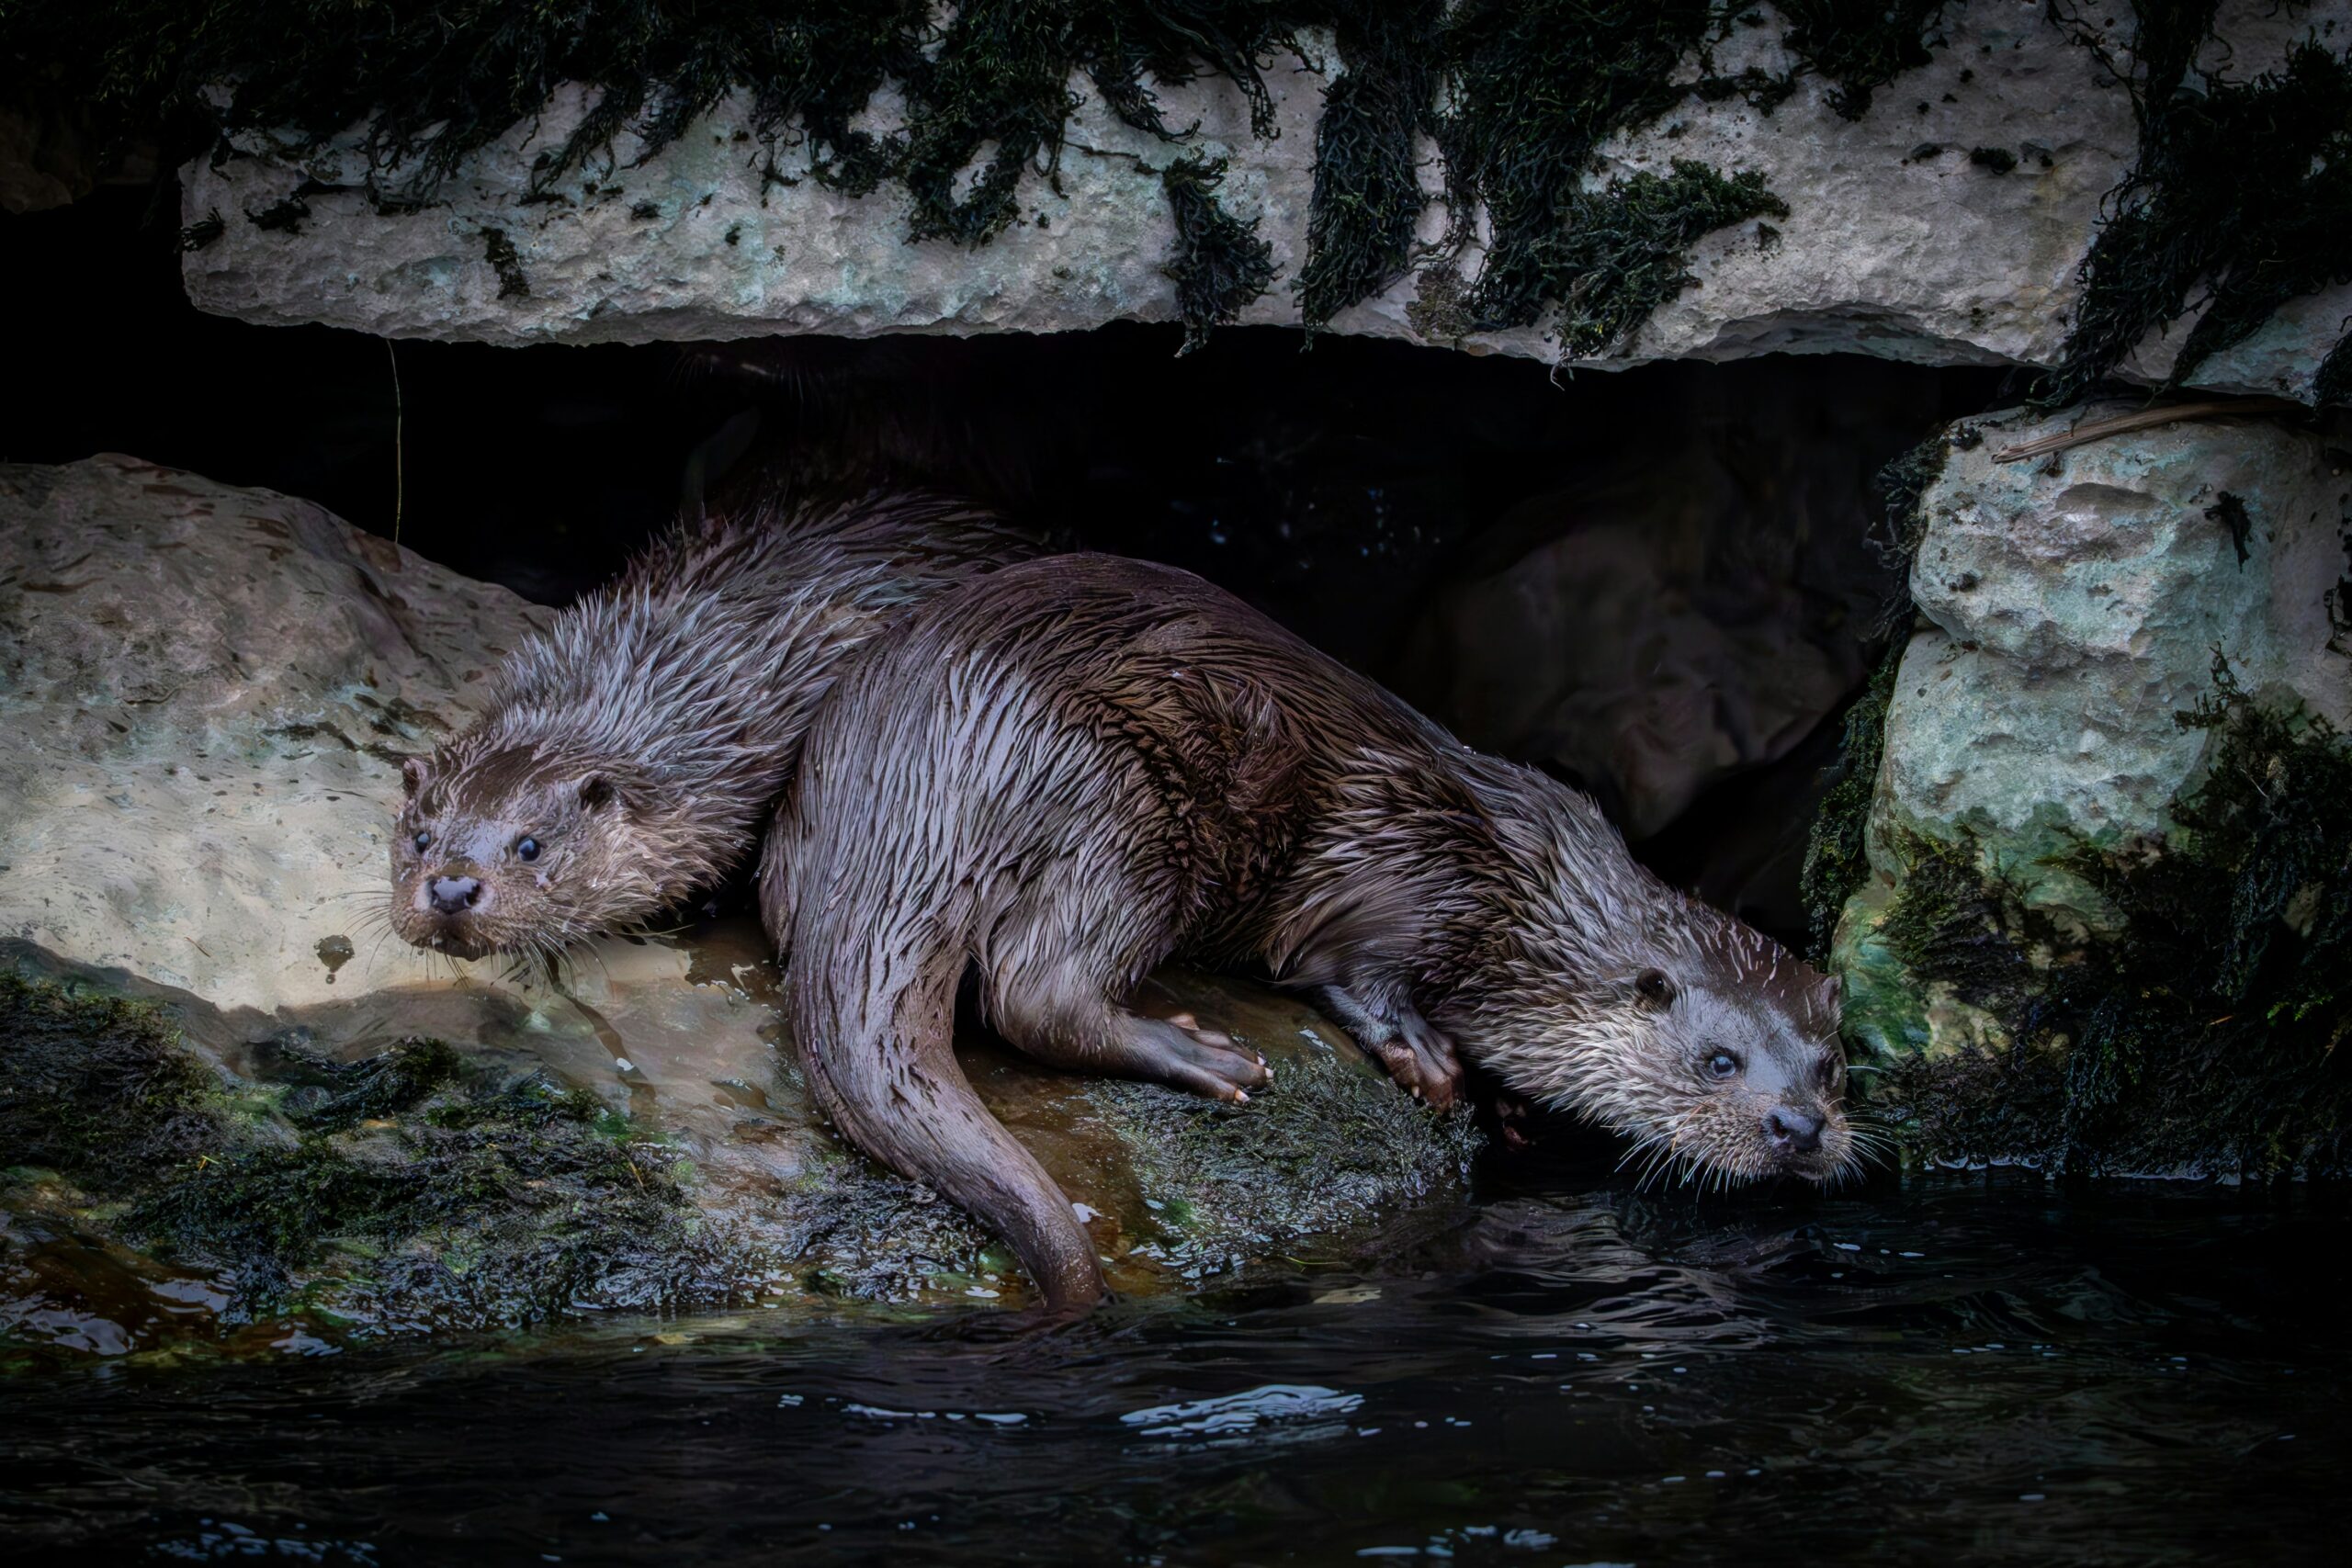
Marine wildlife is among the most fascinating yet challenging subjects a photographer can take on. From seabirds gliding over the horizon to dolphins breaching the surface, or the mesmerising underwater ballet of manta rays and coral reef inhabitants, every encounter offers both artistic and technical hurdles. Mastering the craft of capturing life above and below the waves requires preparation, respect for the environment, and a good balance between skill and patience.
1. Preparation: Know Your Environment
Before even picking up the camera, study the ecosystem you’re entering.
Research animal behaviour: Learn when turtles nest, when whales migrate, or when seabirds feed. Timing your trip with these natural rhythms increases your chances of sightings.
Respect regulations: Marine protected areas often have strict rules about approaching wildlife. Stay updated and follow them closely.
Gear checks: Saltwater is brutal on equipment. Carry protective housings, silica gel packs, hydration vests and additional distilled water to rinse gear with after shooting.
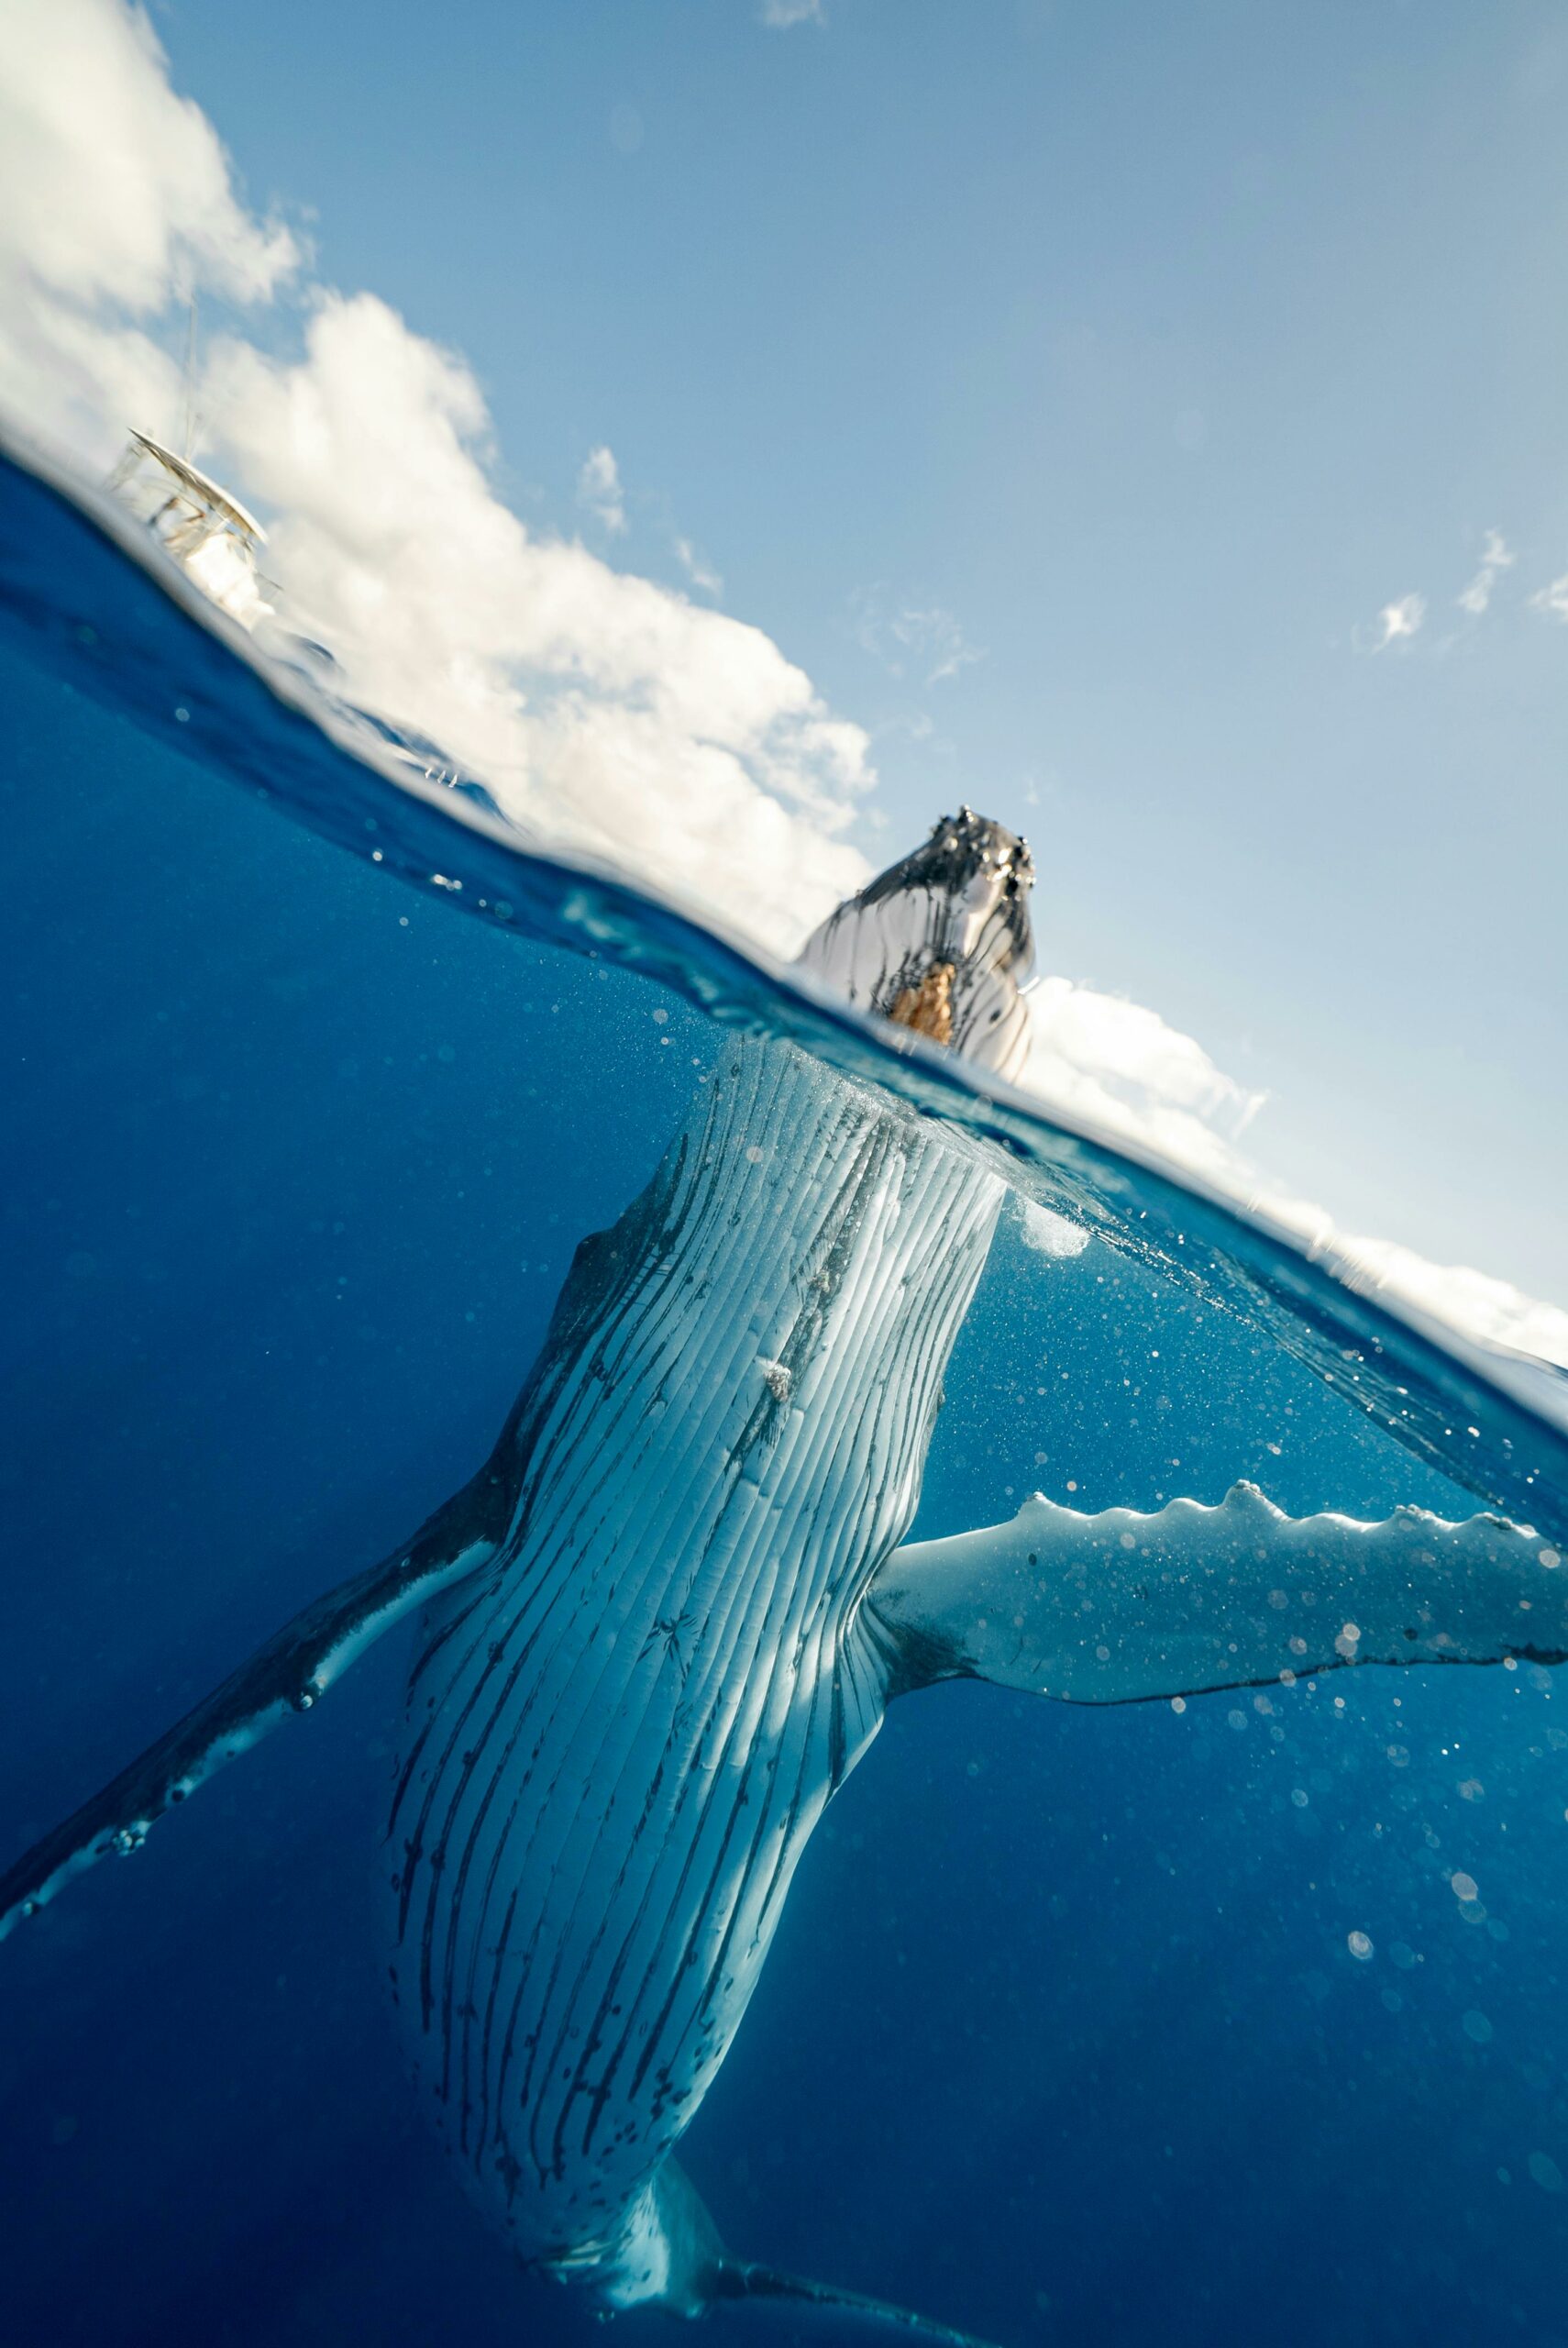
2. Overwater Photography
Marine wildlife isn’t always underwater—some of the most dramatic shots happen at or above the surface. Photographing over water comes with its own unique set of challenges. Unlike land-based shoots, you are often on a moving platform—a rocking boat, a kayak, or even the shoreline with shifting tides. This constant motion means you need to balance stability, anticipation, and quick reflexes.
Lighting is another factor to consider. The surface of the ocean reflects sunlight in unpredictable ways, creating glare and contrast issues that can wash out your subject or obscure details. Morning and late afternoon light often work best, providing softer tones and reducing harsh reflections. Weather conditions also play a critical role: calm seas provide mirror-like surfaces for reflections of birds or marine mammals, while rougher conditions can add drama, with crashing waves and spray enhancing the sense of power in your image.
Animal behaviour is often fleeting and these moments happen quickly and rarely repeat in exactly the same way, so observation and patience are crucial. Keeping a keen eye on the horizon, watching for surface disturbances like ripples or bait balls, and being ready with your camera at all times significantly improve your chances of capturing that perfect split-second action.
Overwater photography also presents a creative opportunity to play with perspective. Positioning yourself at a lower angle close to the waterline can make subjects appear larger-than-life, while higher vantage points from cliffs or ships help you tell the story of the animal in relation to its vast oceanic environment. By combining patience, technical skill, and a sensitivity to the environment, photographers can create overwater images that are as dramatic and captivating as those shot beneath the surface.
Recommended Gear
Telephoto lenses (300mm+): Essential for capturing whales, dolphins, or seabirds without disturbing them.
Stabilization: A tripod topped with a gimbal head helps counteract rocking boats.
Polarizing filters: Reduce glare and improve contrast on the water’s surface.
Techniques:
Anticipate movement: Dolphins and whales rarely breach twice in the same spot. Watch for cues like ripples or bird activity that hint at action.
Use fast shutter speeds: To freeze splashes or birds in flight, work at 1/1000 sec or faster.
Framing with the horizon: Keep horizons straight to maintain balance in compositions.
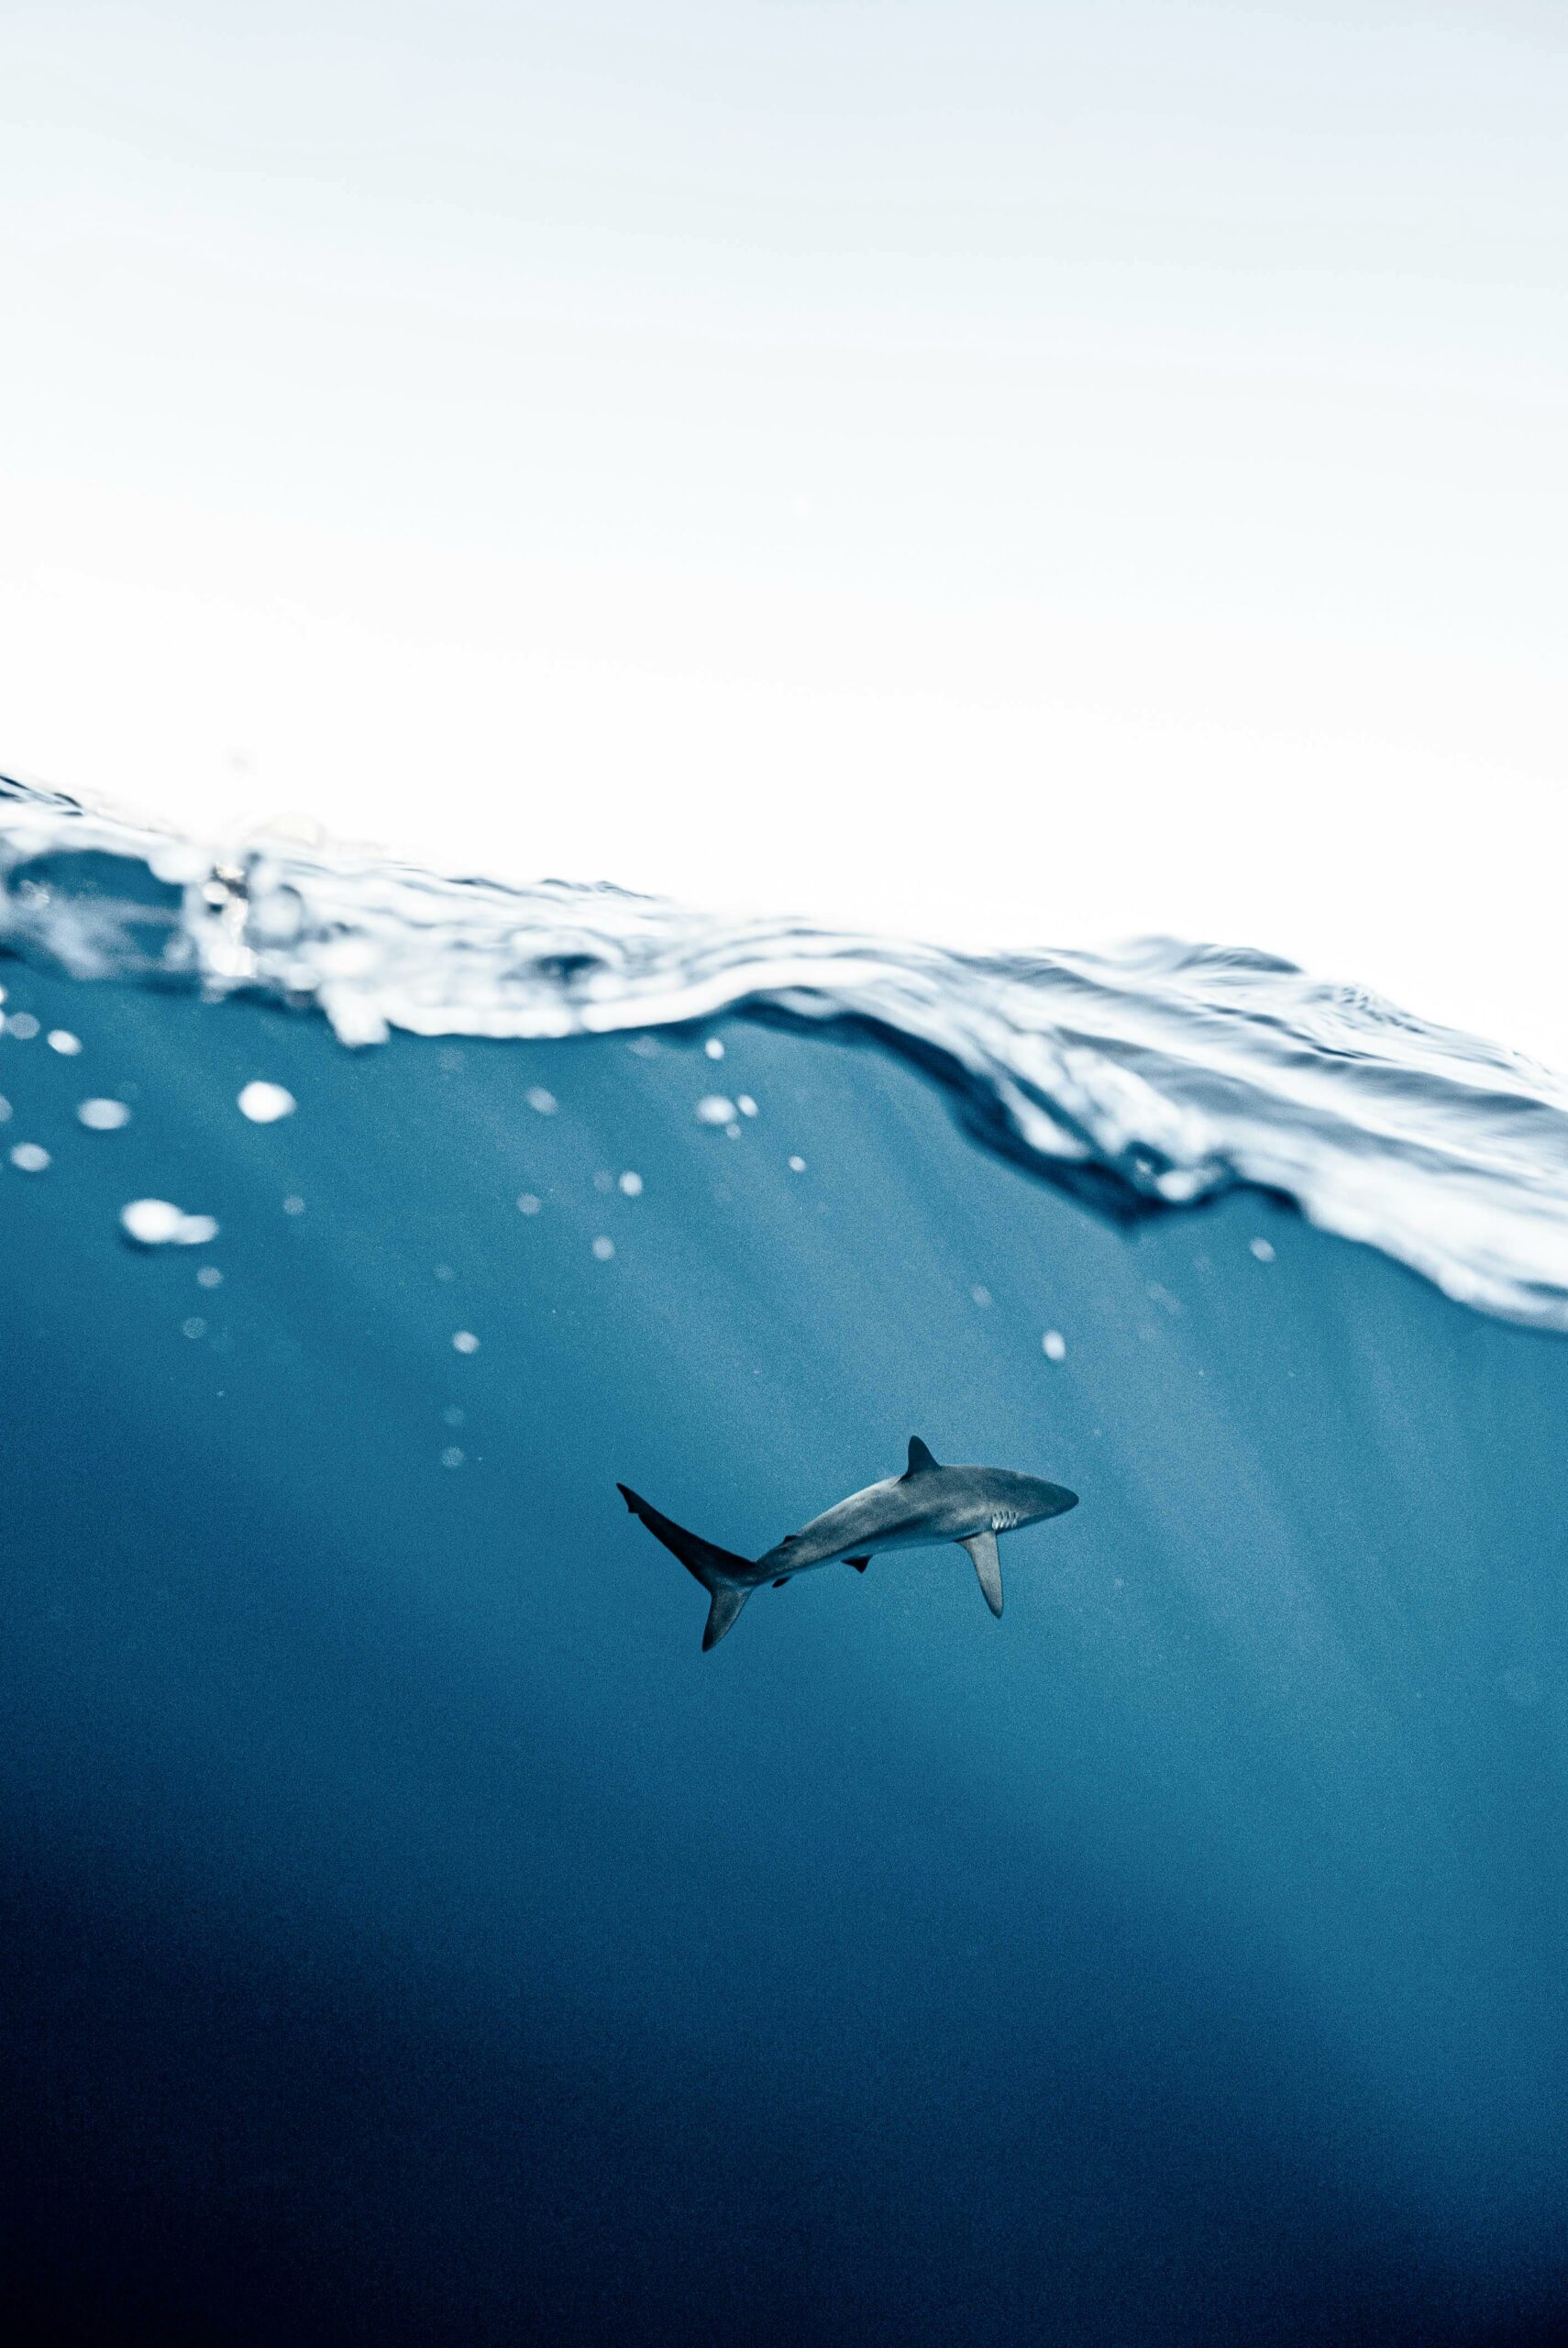
3. Underwater Photography
Taking the plunge opens a completely new dimension. Light behaves differently, colours fade quickly, and movement is three-dimensional.
Unlike shooting from land or boats, underwater photography requires not only technical camera skills, but also strong swimming or diving ability. The ocean is a constantly shifting environment, and success depends on your comfort and confidence beneath the surface. Good buoyancy control, efficient finning, and calm breathing are as important as shutter speed or aperture settings—without them, your shots will be shaky, poorly framed, or full of disturbed sediment.
Diving practice is essential. Scuba divers and free divers alike need to build the ability to hold position without harming fragile corals, stirring up sand, or startling marine life. The better your control in the water, the more opportunities you’ll have to get close to subjects without intrusion. A nervous or poorly trained swimmer will spend more energy fighting currents and adjusting gear than actually taking photographs.
Light also behaves very differently underwater. Within just a few metres, reds and oranges fade, leaving your images overwhelmingly blue or green unless you compensate. Photographers need to master both artificial lighting (strobes, torches) and natural light positioning to restore the vibrancy of marine life. Currents, visibility, and depth changes can further complicate shooting conditions, which is why diving fitness, situational awareness, and patience are just as critical as knowing your exposure triangle.
Underwater photography also asks you to become part of the ecosystem rather than an observer from a distance. Animals often approach when you remain still, calm, and non-threatening. Training yourself to hover silently in the water column not only improves your safety, but also encourages more natural interactions with marine wildlife. When you combine strong aquatic skills with photographic knowledge, your images will carry a sense of intimacy and fluidity that can’t be achieved from above the surface.
Recommended Gear
Underwater housing: A robust, pressure-rated casing specific to your camera.
Wide-angle lenses: Crucial for large subjects like manta rays or schools of fish.
Strobes/lights: Artificial lighting restores colour lost at depth (reds vanish after just 5–10 metres).
Techniques
Buoyancy control: Perfect buoyancy ensures steady shots without disturbing the seabed or animals.
Close approach: Water reduces clarity; the closer you get (ethically), the sharper and more vibrant your images.
Manual white balance: Adjust settings to counteract blue/green colour cast when shooting without strobes. Just like with most of our tips, always shoot RAW alongside JPEG to get the most amount of flexibility in your images.
4. Safety First
Regardless of over or under water, remember that you’re entering their ecosystem, so respect and boundaries are of paramount importance.
For you: For surface photography, secure gear with straps and avoid leaning dangerously from boats.
Underwater, never push your limits. Watch your air, depth, and currents.
For them: Never chase, touch, or feed marine wildlife. Ethical photography means letting animals behave naturally.
5. Storytelling with Marine Photography
The best images don’t just show animals; they tell stories about life in the ocean. Remember, the animals and their environments you’ll capture not only tell the story of the present, but also stories of the past, spanning millions of years.
Capture interactions: A mother and calf whale, predator-prey dynamics, or a turtle surrounded by cleaner fish.
Include environment: Wide shots that show coral reefs, kelp forests, or open ocean convey scale and context.
Highlight conservation: Use your work to raise awareness about pollution, climate change, or endangered species.
Ready to Dive In?
Marine wildlife photography blends adventure, patience, and respect for nature. Overwater, it challenges you to deal with distance and unpredictability. Underwater, it demands technical mastery and calm composure. But the rewards – a breaching whale against a sunset, a sea turtle gliding effortlessly through turquoise waters, or the surreal glow of plankton at night – are unlike any other genre.
Whether you’re just starting with a zoom lens from shore or diving into the depths with full underwater rigs, remember: the ocean is both a subject and a partner. Treat it with respect, and it will offer endless photographic treasures.
Tapan Sheth is a wildlife photographer who’s carved a name for himself through iconic portraits of Indian big cats, especially the Asiatic lions. Through his images, he aims to spread awareness and awe for the rich biodiversity in India with a keen eye on conservation. Asian Photography spoke to him about documenting & conserving wildlife, animal behaviour, unforgettable moments in the wild, and crucial newbie advice. Excerpts:
What first inspired you to focus on Indian wildlife, especially big cats?
When I visited the forest for the first time on a vacation trip, I never imagined it would change my life. The first time I saw an Asiatic Lion in Gir, it completely moved me. I still remember the feeling—the raw power, the grace, and the silence of the forest broken by its presence. It was almost magical. From that day, I knew I wanted to spend my life around them.
Big cats, for me, are not just animals. They are symbols of strength, survival and beauty. Over the years, I’ve spent countless hours in Gir, just observing them. Lions, tigers, and leopards have a presence that is impossible to ignore. Their strength, grace, and silent confidence make them stand apart from all other animals. For me, they are not just predators, but true guardians of the forest. Watching a lion walk with authority, a tiger blend perfectly with its jungle, or a leopard resting silently on a tree branch feels like watching pure magic.
I love big cats because each encounter feels personal, like meeting an old friend. What inspires me the most is how important they are for the balance of nature. By protecting them, we protect the whole ecosystem around them. That connection is what made me focus my work on these incredible animals.
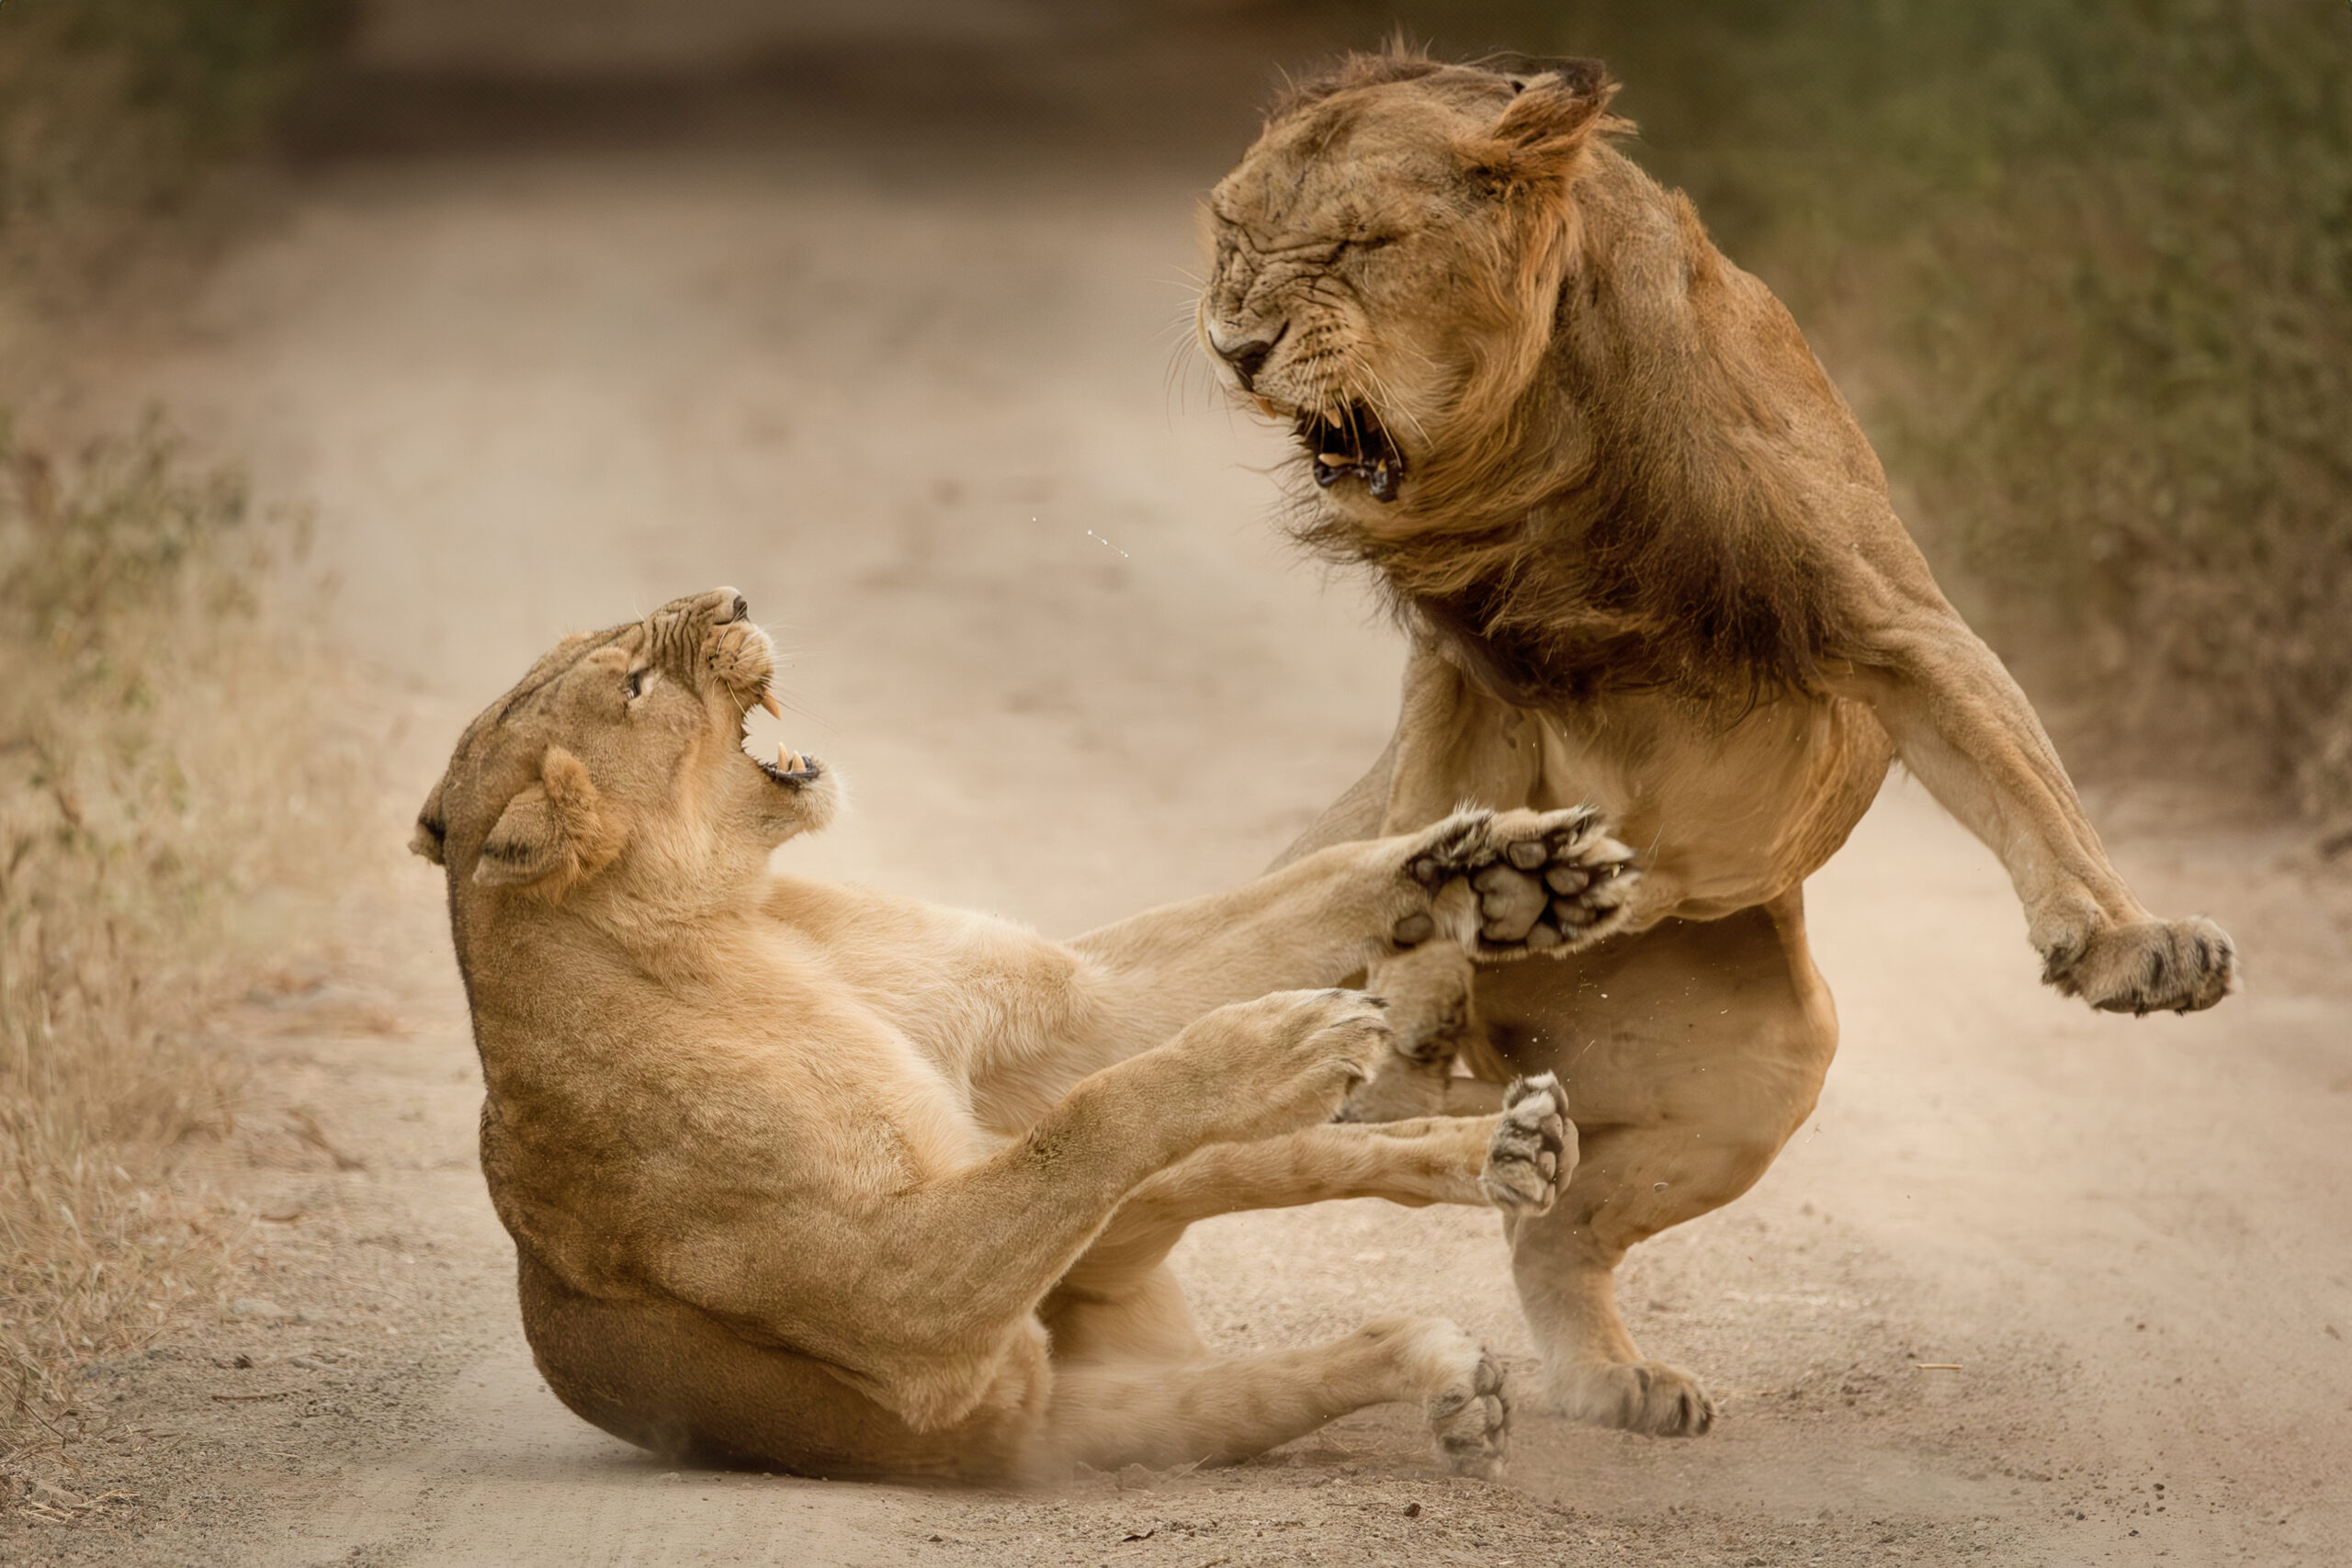
Your images often capture intense animal behaviour. How do you anticipate those moments?
Capturing animal behaviour is all about patience, observation and understanding the forest. Animals never follow a script, so you can’t really predict every move, but you can prepare yourself to read the small signs they give. I spent a lot of time just watching them without clicking, and slowly started noticing patterns. For example, when a lion licks its nose, it often means a yawn is coming. When any big cat holds its tail straight and horizontal, it usually shows irritation or is a warning signal. Birds often poop before they take off, and different calls or alarm voices from animals can tell you that danger is nearby. These little signs are like clues to what might happen next.
Experience also plays a big role. The more time you spend in the wild, the better you get at anticipating behaviour. Sometimes it’s as simple as noticing the time of day. Early mornings or late evenings are usually when animals are most active. At other times, it’s about understanding their body language and the environment around them.
But honestly, the biggest factor is patience. I’ve learned not to rush, to sit quietly, and let the forest reveal its moments. When you respect the space and rhythm of wildlife, you get rewarded with those rare and intense behaviors—a lion roaring, a leopard stalking, or even a small bird protecting its nest. It’s not just about pressing the shutter at the right time, it’s about being present, observing deeply, and letting nature guide you.
Do you see yourself more as a storyteller or a documentarian when photographing wildlife?
This question is a little tricky because I feel I am both, and which one comes forward depends a lot on what I am shooting. Every photograph, no matter how simple, is both a document and a story at the same time.
When I photograph any subject, I often think like a storyteller. Their expressions, movements, and interactions are full of emotions and drama. A lioness carrying her baby in her mouth and shifting to another place, or two tigers fighting for territory already tells a powerful story. Through my lens, I try to capture that mood so people who see the picture can feel the same energy I experienced in that moment.
At the same time, I can’t ignore the documentary side of my work. Every image also becomes a record of wildlife behaviour, habitat, and even conservation value. For example, documenting any big cat crossing a railway track, or some passage of migrant birds rarely seen in a particular area, or even a unique natural history behaviour of an animal, all add important knowledge. Sometimes, a simple photograph of a frog, a snake, or even a tiny insect becomes a valuable piece of documentation of India’s biodiversity.
So, I don’t see storytelling and documentation as separate things. They walk together in my photography. A photo may move someone emotionally while also teaching them something real about the subject. That balance is what I try to achieve. If someone looks at my picture and feels a story while also learning something about the animal or its world, then I know I have done justice to both roles.
Indian wildlife is under pressure from habitat loss. How do you hope your photography contributes to conservation?
Indian wildlife is facing many challenges, and habitat loss is one of the biggest. Forests, grasslands, wetlands—all of these are shrinking, affecting every living creature. As a wildlife photographer, I believe my photography can help by creating awareness and building an emotional connection between people and nature.
Whenever I take a picture, my aim is not only to capture the beauty of an animal, but also to tell its story. When people see such images, they often feel a sense of admiration and respect for the animal. This connection can inspire them to care more about wildlife and the need to protect it.
I also try to share my work through exhibitions, talks, workshops, and social media so that more people can see the value of protecting our natural heritage. My hope is that when people fall in love with the beauty of Indian wildlife, they will support conservation efforts in their own way.
I see photography as a bridge between humans and nature. If my images can touch hearts and encourage even a few people to respect and protect wildlife, then I feel my work has made a positive difference.
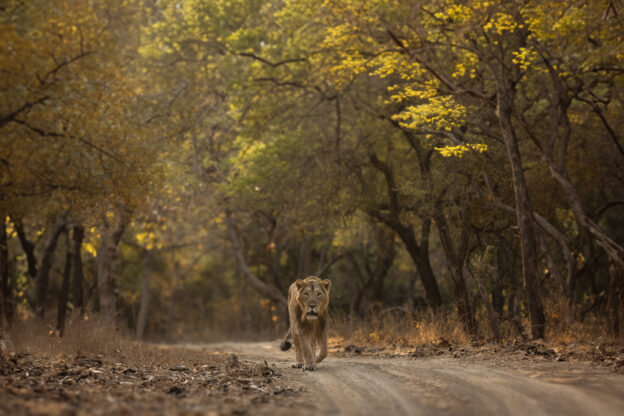
If you had to describe the essence of Indian wildlife in one image you’ve taken, which would it be and why?
This image of an Asiatic lion walking along a dusty forest path is very close to my heart. Asiatic lions are found only in India, and their last home is the Gir forest. That makes this picture very special, because it immediately represents something unique about Indian wildlife that cannot be seen anywhere else in the world.
The forest around the lion, with its mix of golden and green trees, adds another layer to the story. It shows the natural beauty of India’s wild spaces—raw, wild, and full of life. These landscapes are not just backgrounds; they are the lifelines that allow animals like lions to survive and thrive. Through this frame, I wanted to capture not only the animal, but also its world.
The way the lion walks down the path, calm yet confident, gives a sense of power and freedom. It is a reminder of why these animals are called the “kings” of the forest. For me, it also reflects the pride of India’s biodiversity—strong, resilient, and truly one of a kind.
As a wildlife photographer, I believe one image should speak both emotionally and factually. This picture does that. It tells the story of a rare species and at the same time highlights the importance of protecting their home. To me, this single frame represents the essence of Indian wildlife—a combination of unique species, beautiful landscapes, and the deep connection between them.
What’s been your most unforgettable moment behind the lens so far?
There have been many special moments in my photography journey, but if I have to choose the most unforgettable ones, two experiences stand out clearly in my heart.
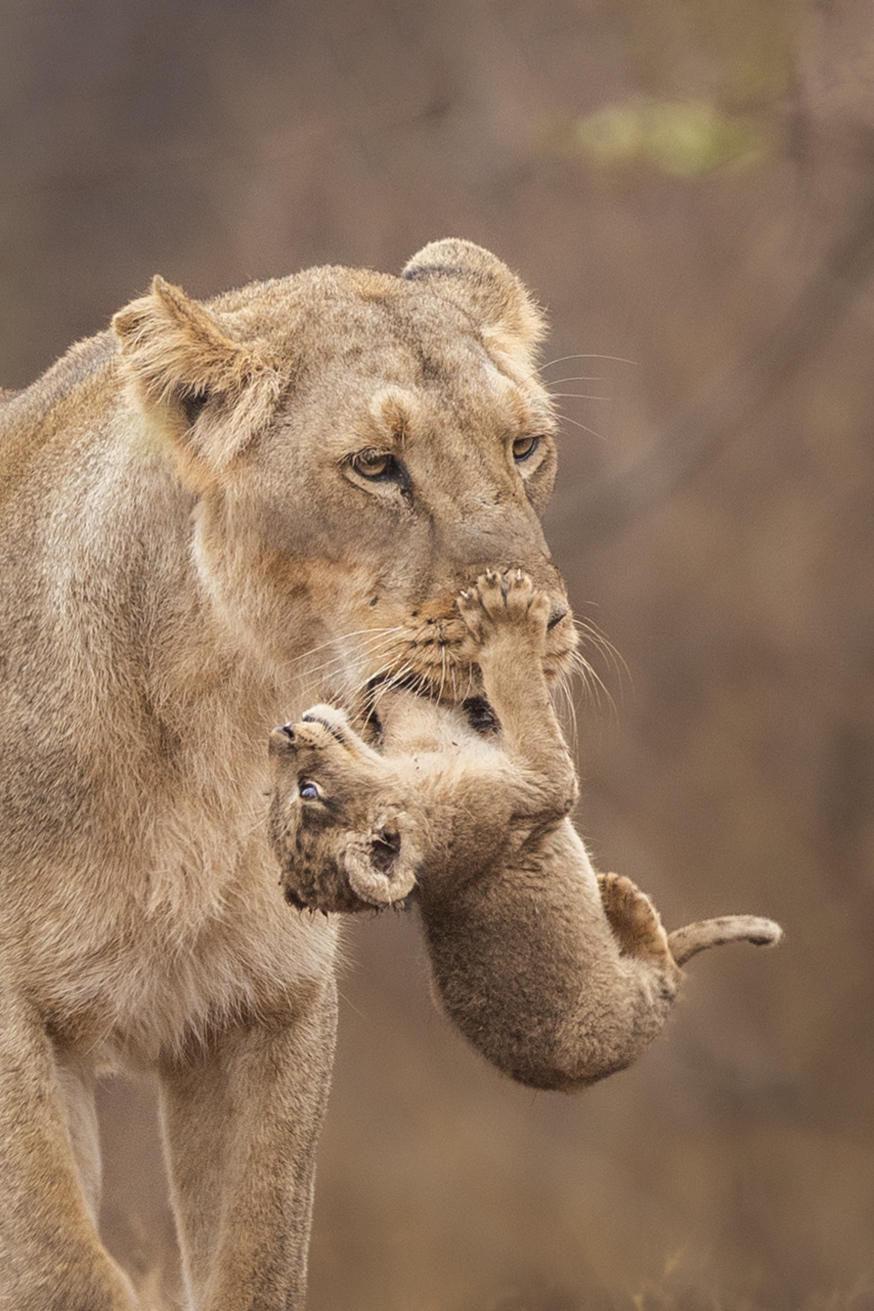
The first one was in Gir, when I saw a lioness carrying her tiny cub gently in her mouth while shifting it to a safer place. In my 12 years of photographing wildlife, this was the very first time I had witnessed such a scene. It was not just a rare sight, but also an incredibly emotional one. Watching the bond between mother and cub, the care and responsibility in her every step, touched me deeply. I still remember the moment so clearly—I actually had tears in my eyes while clicking. It was one of those times when nature makes you feel humble and grateful just to be present.
The second unforgettable moment was when I saw the famous tigress Riddhi with her cubs. They were crossing an island, moving gracefully through the water. The sight of a strong tigress leading her young ones, showing them how to survive, was breathtaking. It felt like watching a live drama of strength, courage, and motherhood, all unfolding right in front of me.
Both of these moments are etched in my memory forever. They remind me why I fell in love with wildlife photography—it’s not just about the picture, it’s about the emotions, the stories, and the privilege of witnessing such raw and beautiful moments in nature.
What would be the most vital thing you’d like to teach a newbie photographer about wildlife?
If I had to teach one vital thing to a new wildlife photographer, it would be this—don’t just focus on clicking pictures. Learn about the animals first, study their species, their behaviour, their habitats, and the role they play in nature. When you understand your subject, your photography becomes more meaningful and powerful.
Respecting the animals and mother nature is equally important. Always maintain a safe distance, avoid disturbing them, and never harm their environment just to get a shot. Wildlife photography is not about chasing popularity or getting likes and shares on social media, it’s about observing, learning, and telling the story of nature in the right way.
Cameras and lenses are so advanced today that anyone can take sharp and beautiful pictures. What will truly set you apart is your knowledge, patience, and respect for wildlife. Spend more time watching and understanding your subjects before clicking. The more you know, the better your images will be.
Like the famous line from the movie 3 Idiots—Don’t run after success; focus on excellence. In wildlife photography, excellence comes from respect, knowledge, patience, and a genuine love for nature.
Aparupa Dey is a wildlife photographer dedicated to capturing the raw beauty of Indian wildlife. Her work spans across multiple habitats and species, highlighting the charms and challenges faced by her subjects. For her, no creature is too small, as is reflected by the respect and space she gives to them while wading through muddy plains and waist-deep waters pursuing the perfect shot. Asian Photography spoke to her about capturing a wide range of subjects, evolution of process, risks she took while making photographs and more. Excerpts:
How has your work and process evolved over the past years?
Over the years, my work and process have evolved significantly, shaped by both experience and deeper observation of wildlife. Initially, my focus was largely on capturing the obvious moments like clear sightings, striking compositions, and technically perfect shots. But with time, I’ve learned to slow down, anticipate the behaviour of the subjects.
Now, my process is much more research-driven and thoughtful. I spend considerable time studying species, their habitats, and behaviour patterns before even stepping into the field. The evolution of my work reflects a shift from purely technical execution to a more holistic approach blending preparation, patience, and creative vision to create images that resonate deeply with viewers.
What drew you to capturing smaller animals and birds rather than focusing on only big mammals?
I don’t judge animals based on size; I see them all simply as life. Growing up in a rural area abundant with wildlife, I began my journey as a hobbyist, often spending time by the riverside in my village, capturing little colourful birds, jackals, mongooses, and other creatures. Over time, I realised that these lives aren’t just existing, they each have a world of their own. If you take the time to observe closely, you’ll see how they interact, protect their nests, nurture their young, and display behaviours full of intention and complexity. It was this fascinating world and these behaviours that drew me to focus on them, even more than travelling to exotic locations.
Could you describe your preparation before entering the field and how do you choose your subjects on the field?
If I know the place and what I am going to capture then most probably I know what to expect and where. But things change when I go to a new place. Usually, it begins with selecting the species I want to photograph. Then I study them, their habitat, the best time for sightings, and the prevailing weather conditions. I also gather details about their life cycle, such as mating seasons or the right time to spot cubs.
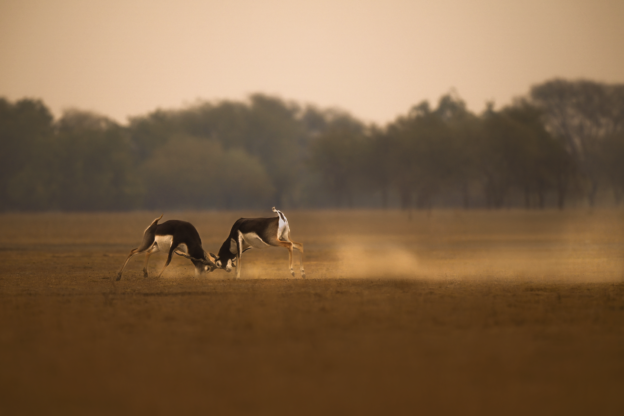
And they do exhibit different kinds of behaviour during different times. For instance, if you visit a blackbuck habitat during their mating season, you’ll often witness males locking horns in dramatic fights to display their strength and to defend their territory. If one can position themselves against the setting sun, then they can capture dramatic images of black bucks locking horns with dust arising into the golden light. That’s where my research pays off.
After that, I connect with local guides to get firsthand insights and cross-check my research. I make sure to prepare weather-appropriate clothing, protection for my camera gear, and do a basic financial analysis of travel and related stuff. I also watch videos on YouTube about the location to get a sense of the landscape and possibilities there. Once all this groundwork is done, I set out on the field.
What was your riskiest experience in the wild—in terms of light, weather, movement or safety?
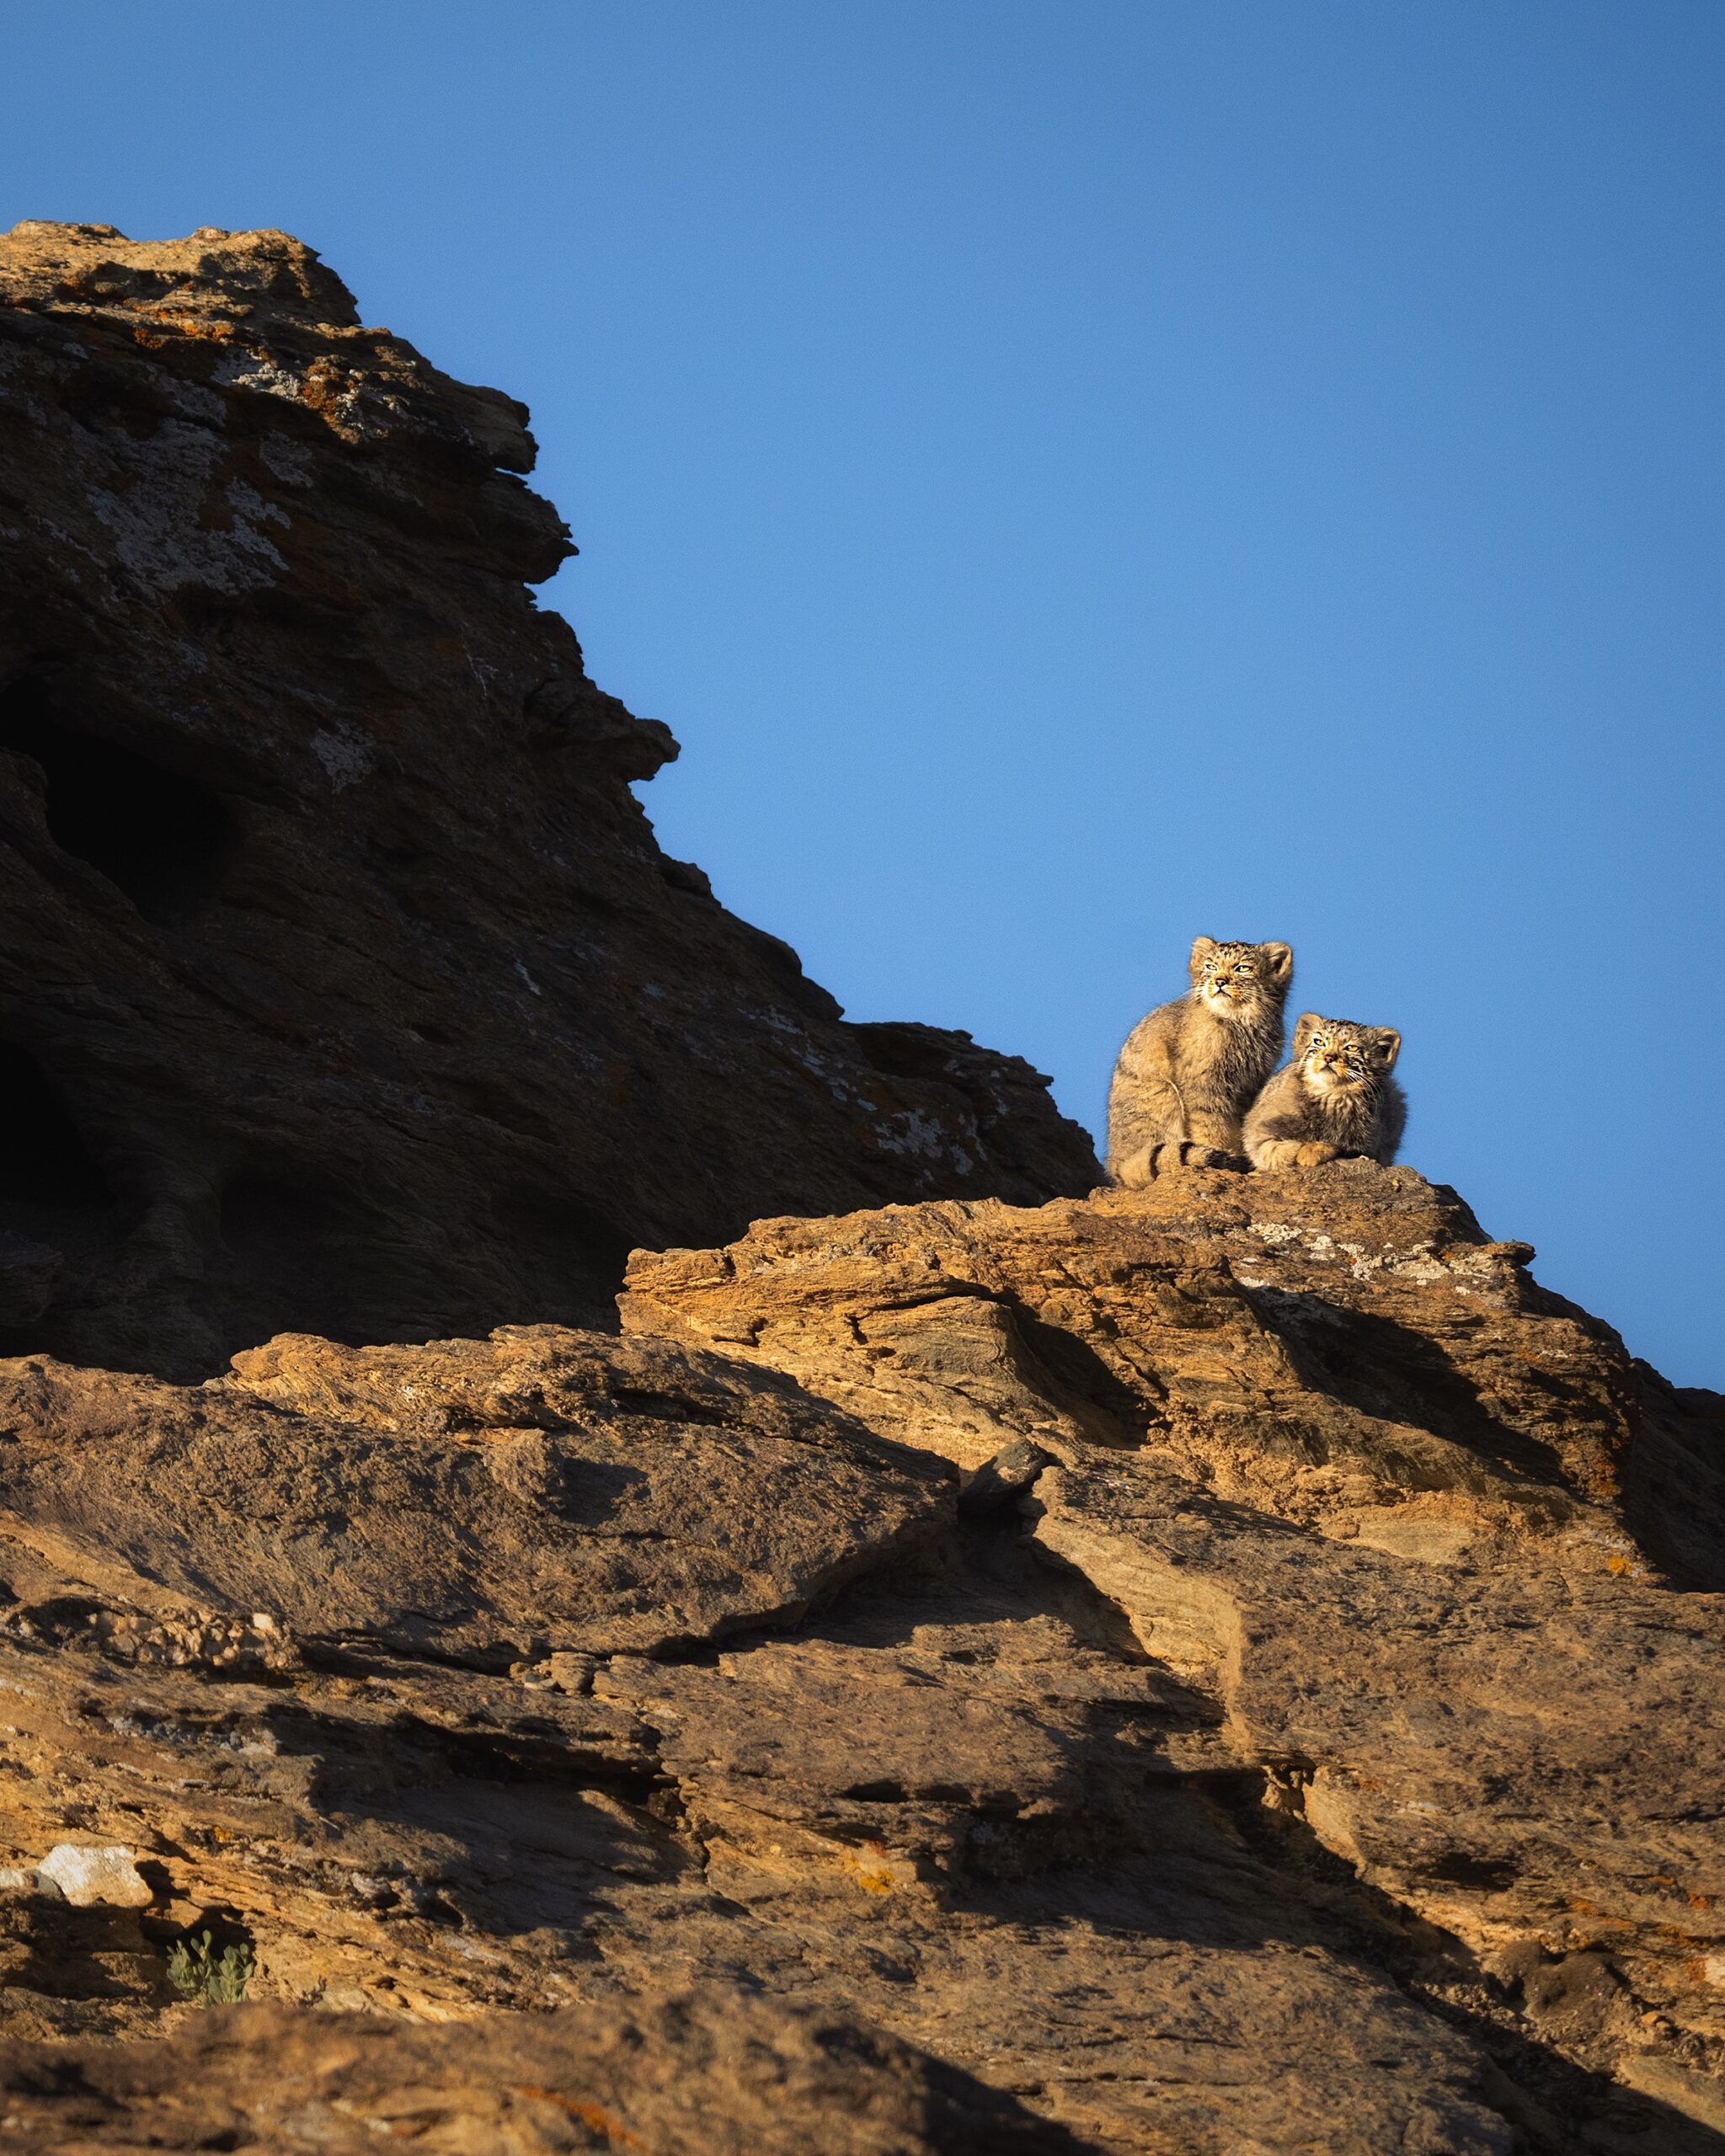
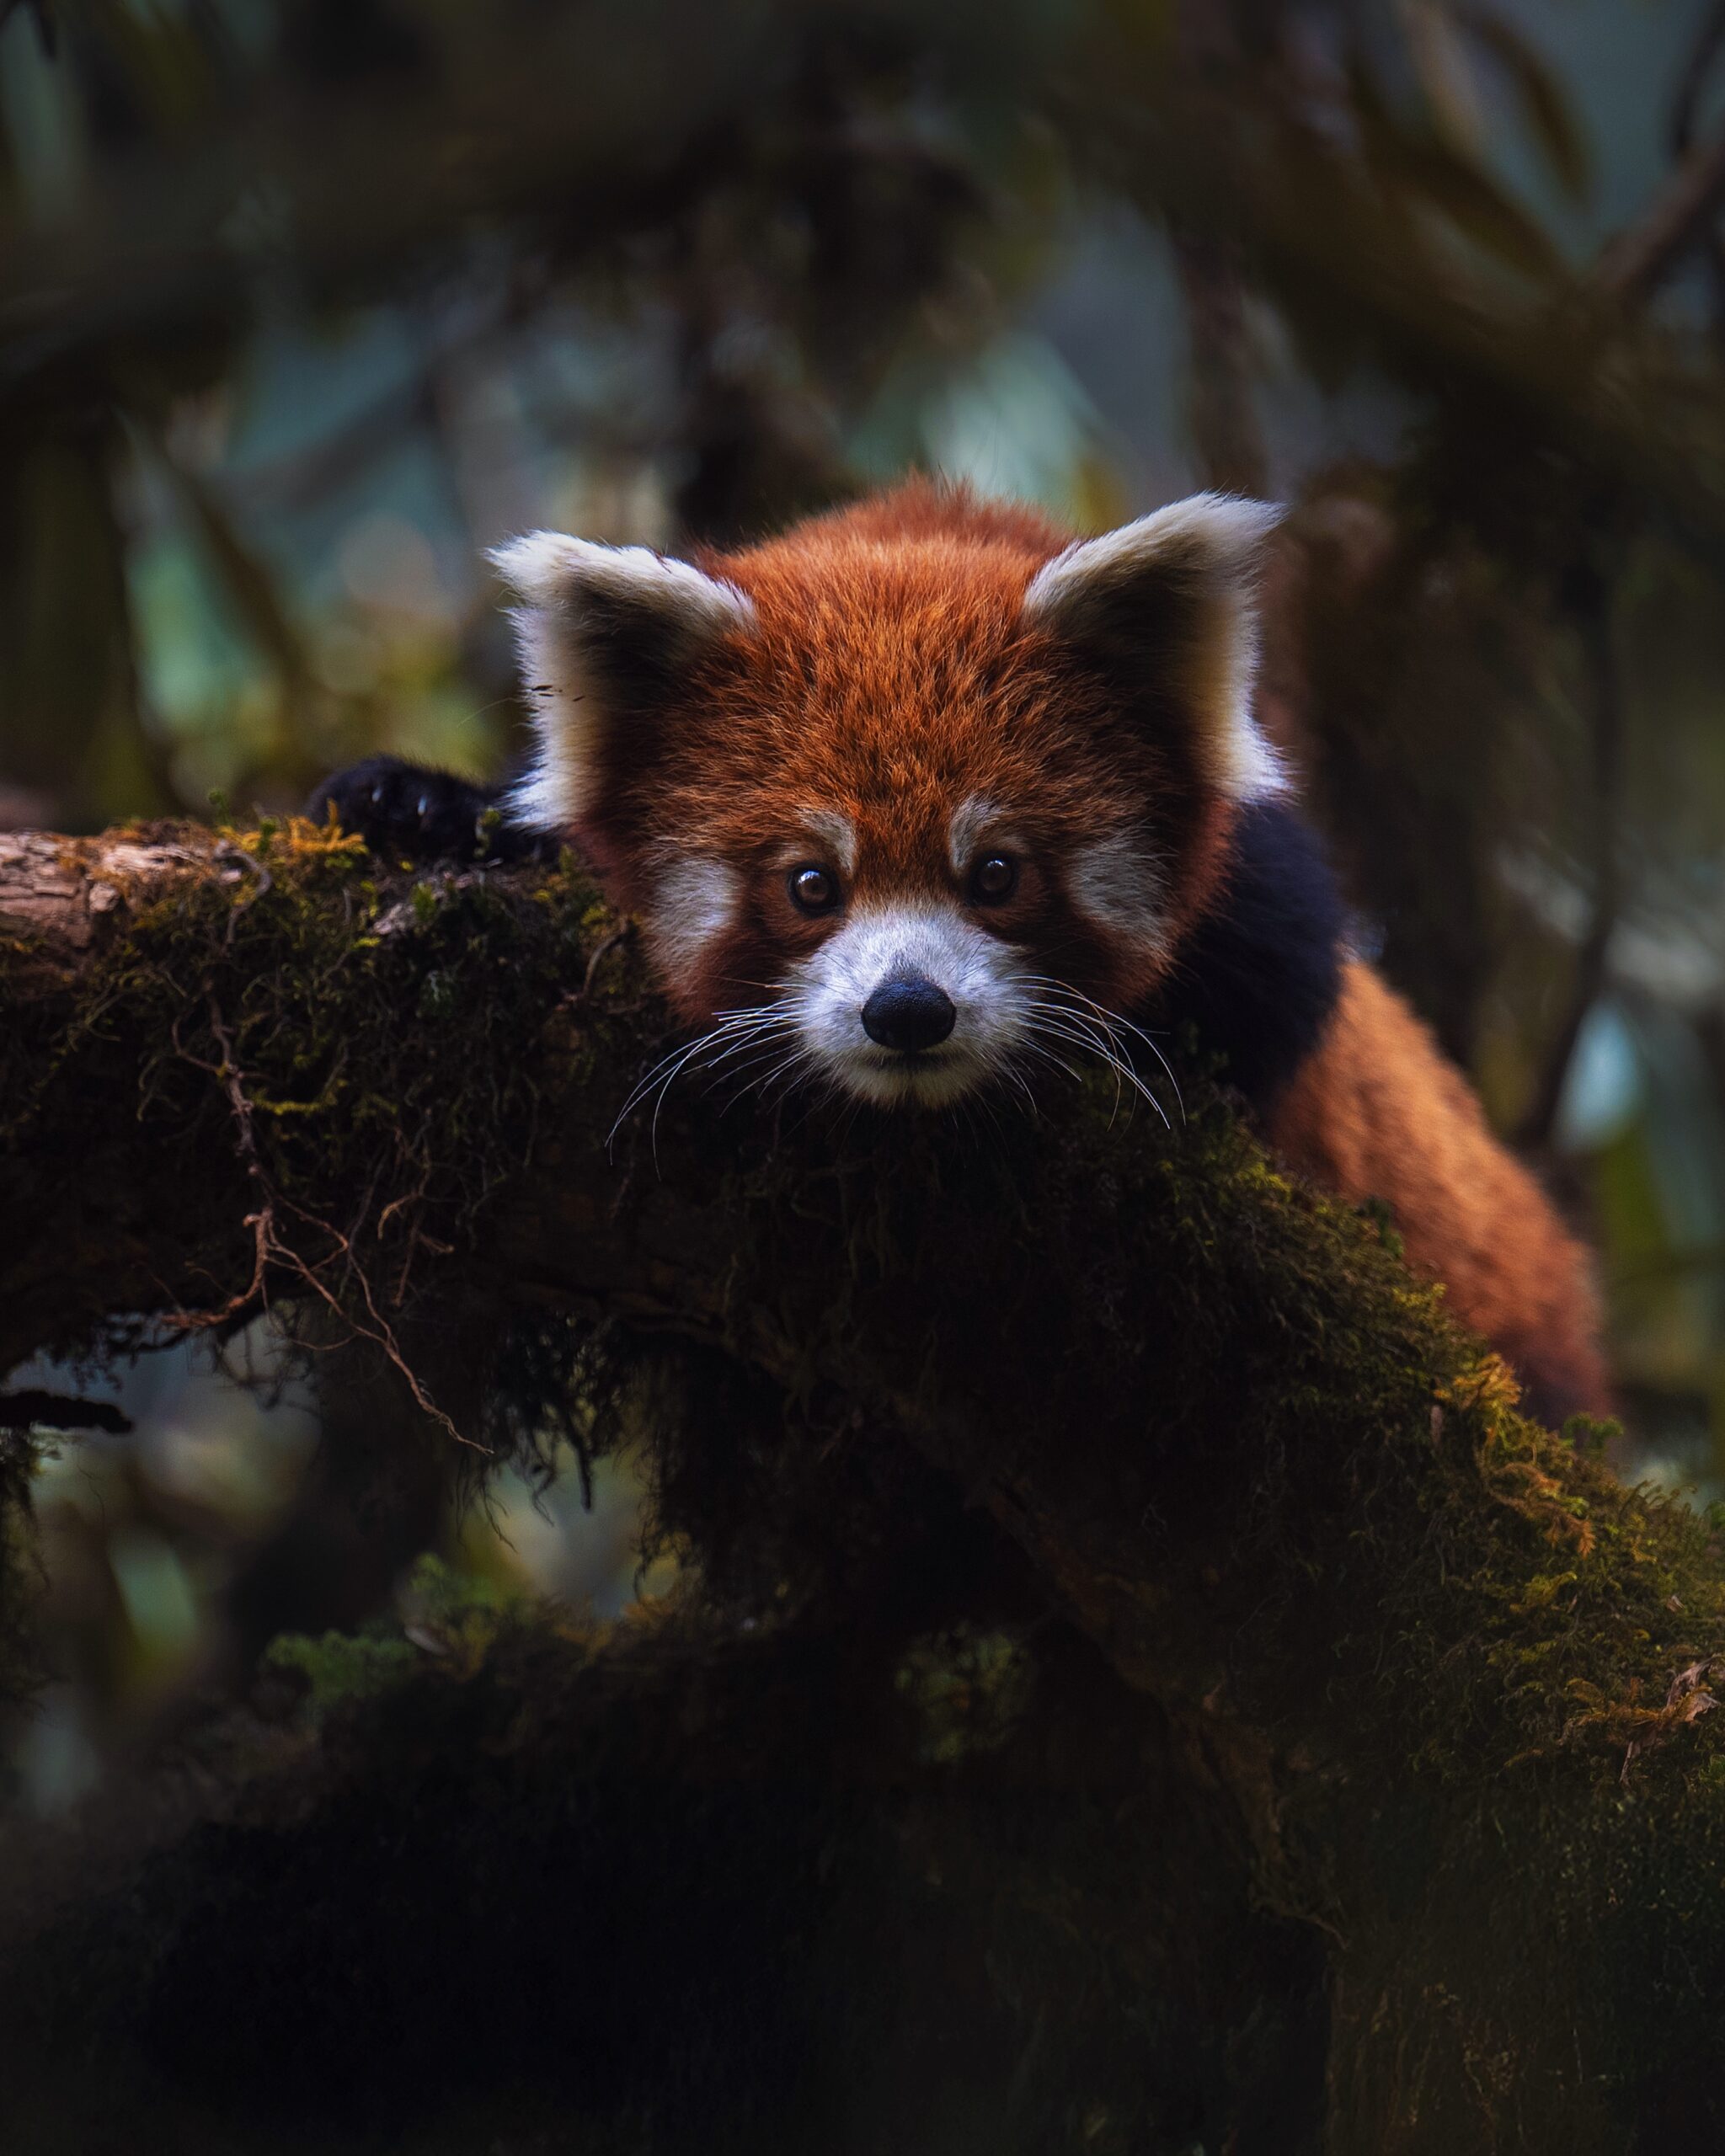
I think my recent Red Panda expedition in Nepal stands out the most. The terrain was extremely tough—we had to constantly ascend and descend sizeable mountains covered with thick bamboo, making movement nearly impossible. Carrying all our equipment through that was especially challenging. The slopes were steep, the ground damp, and being in a temperate forest meant the weather was unpredictable. Thick fog often reduced visibility to just half a meter, making every step an intense challenge.
How has guiding other photographers influenced your photography and vision?
Well, this is something which is a by-product of interacting with other people or fellow photographers. It forced me to observe more carefully, and explain the “why” behind every shot when asked, whether it’s about composition, behaviour or patience. It made me more conscious of my own approach, helping me refine my techniques. It’s also broadened my perspective, as seeing how others interpret the same scene often inspires me to experiment and look at wildlife in new ways.
How do you see fresh possibilities, perspectives and shots while shooting at the same place/spot?
The goal isn’t just to photograph a species, but to capture it in action and in dialogue with its environment. Even when the place and species are familiar, their behaviour and the natural conditions are constantly changing. By ‘natural condition’, I mean elements like light, shadows, clouds, rain, mist, temperature, and wind etc. all of which shift daily. These factors, combined with the species’ behaviour, open up countless possibilities for unique shots. And if you feel like your images are starting to repeat, simply switch to a different lens or focal length, and a whole new range of possibilities unfolds. And personally this concept has worked for me.
I started photography in 2014 a little actively while I was a student. From 2014 to 2022, for eight long years I kept on returning to the same stretch of river which is approximately 2km away from my home with my mother to capture wildlife and each day I returned with tons of images and a heart full of happiness of capturing and observing something special. Therefore all I would say is keep returning to the same spot whenever you can. Even if some shots repeat, you never know what fresh combination of action and environment awaits you next time.
If you could capture one image that represents your philosophy as a photographer, what would it look like?
If I could capture one image that represents my philosophy as a photographer, it would be of a wild animal completely absorbed in its natural behaviour, framed in harmony with its surroundings. Not a staged moment or a dramatic chase, but a quiet, authentic interaction between the species and its environment, maybe a bird silhouetted against shifting light, or an elephant emerging through mist. For me, that balance between subject, action, and nature’s variables is what truly defines my vision: to tell stories that are honest, intimate, and deeply connected to the wild.
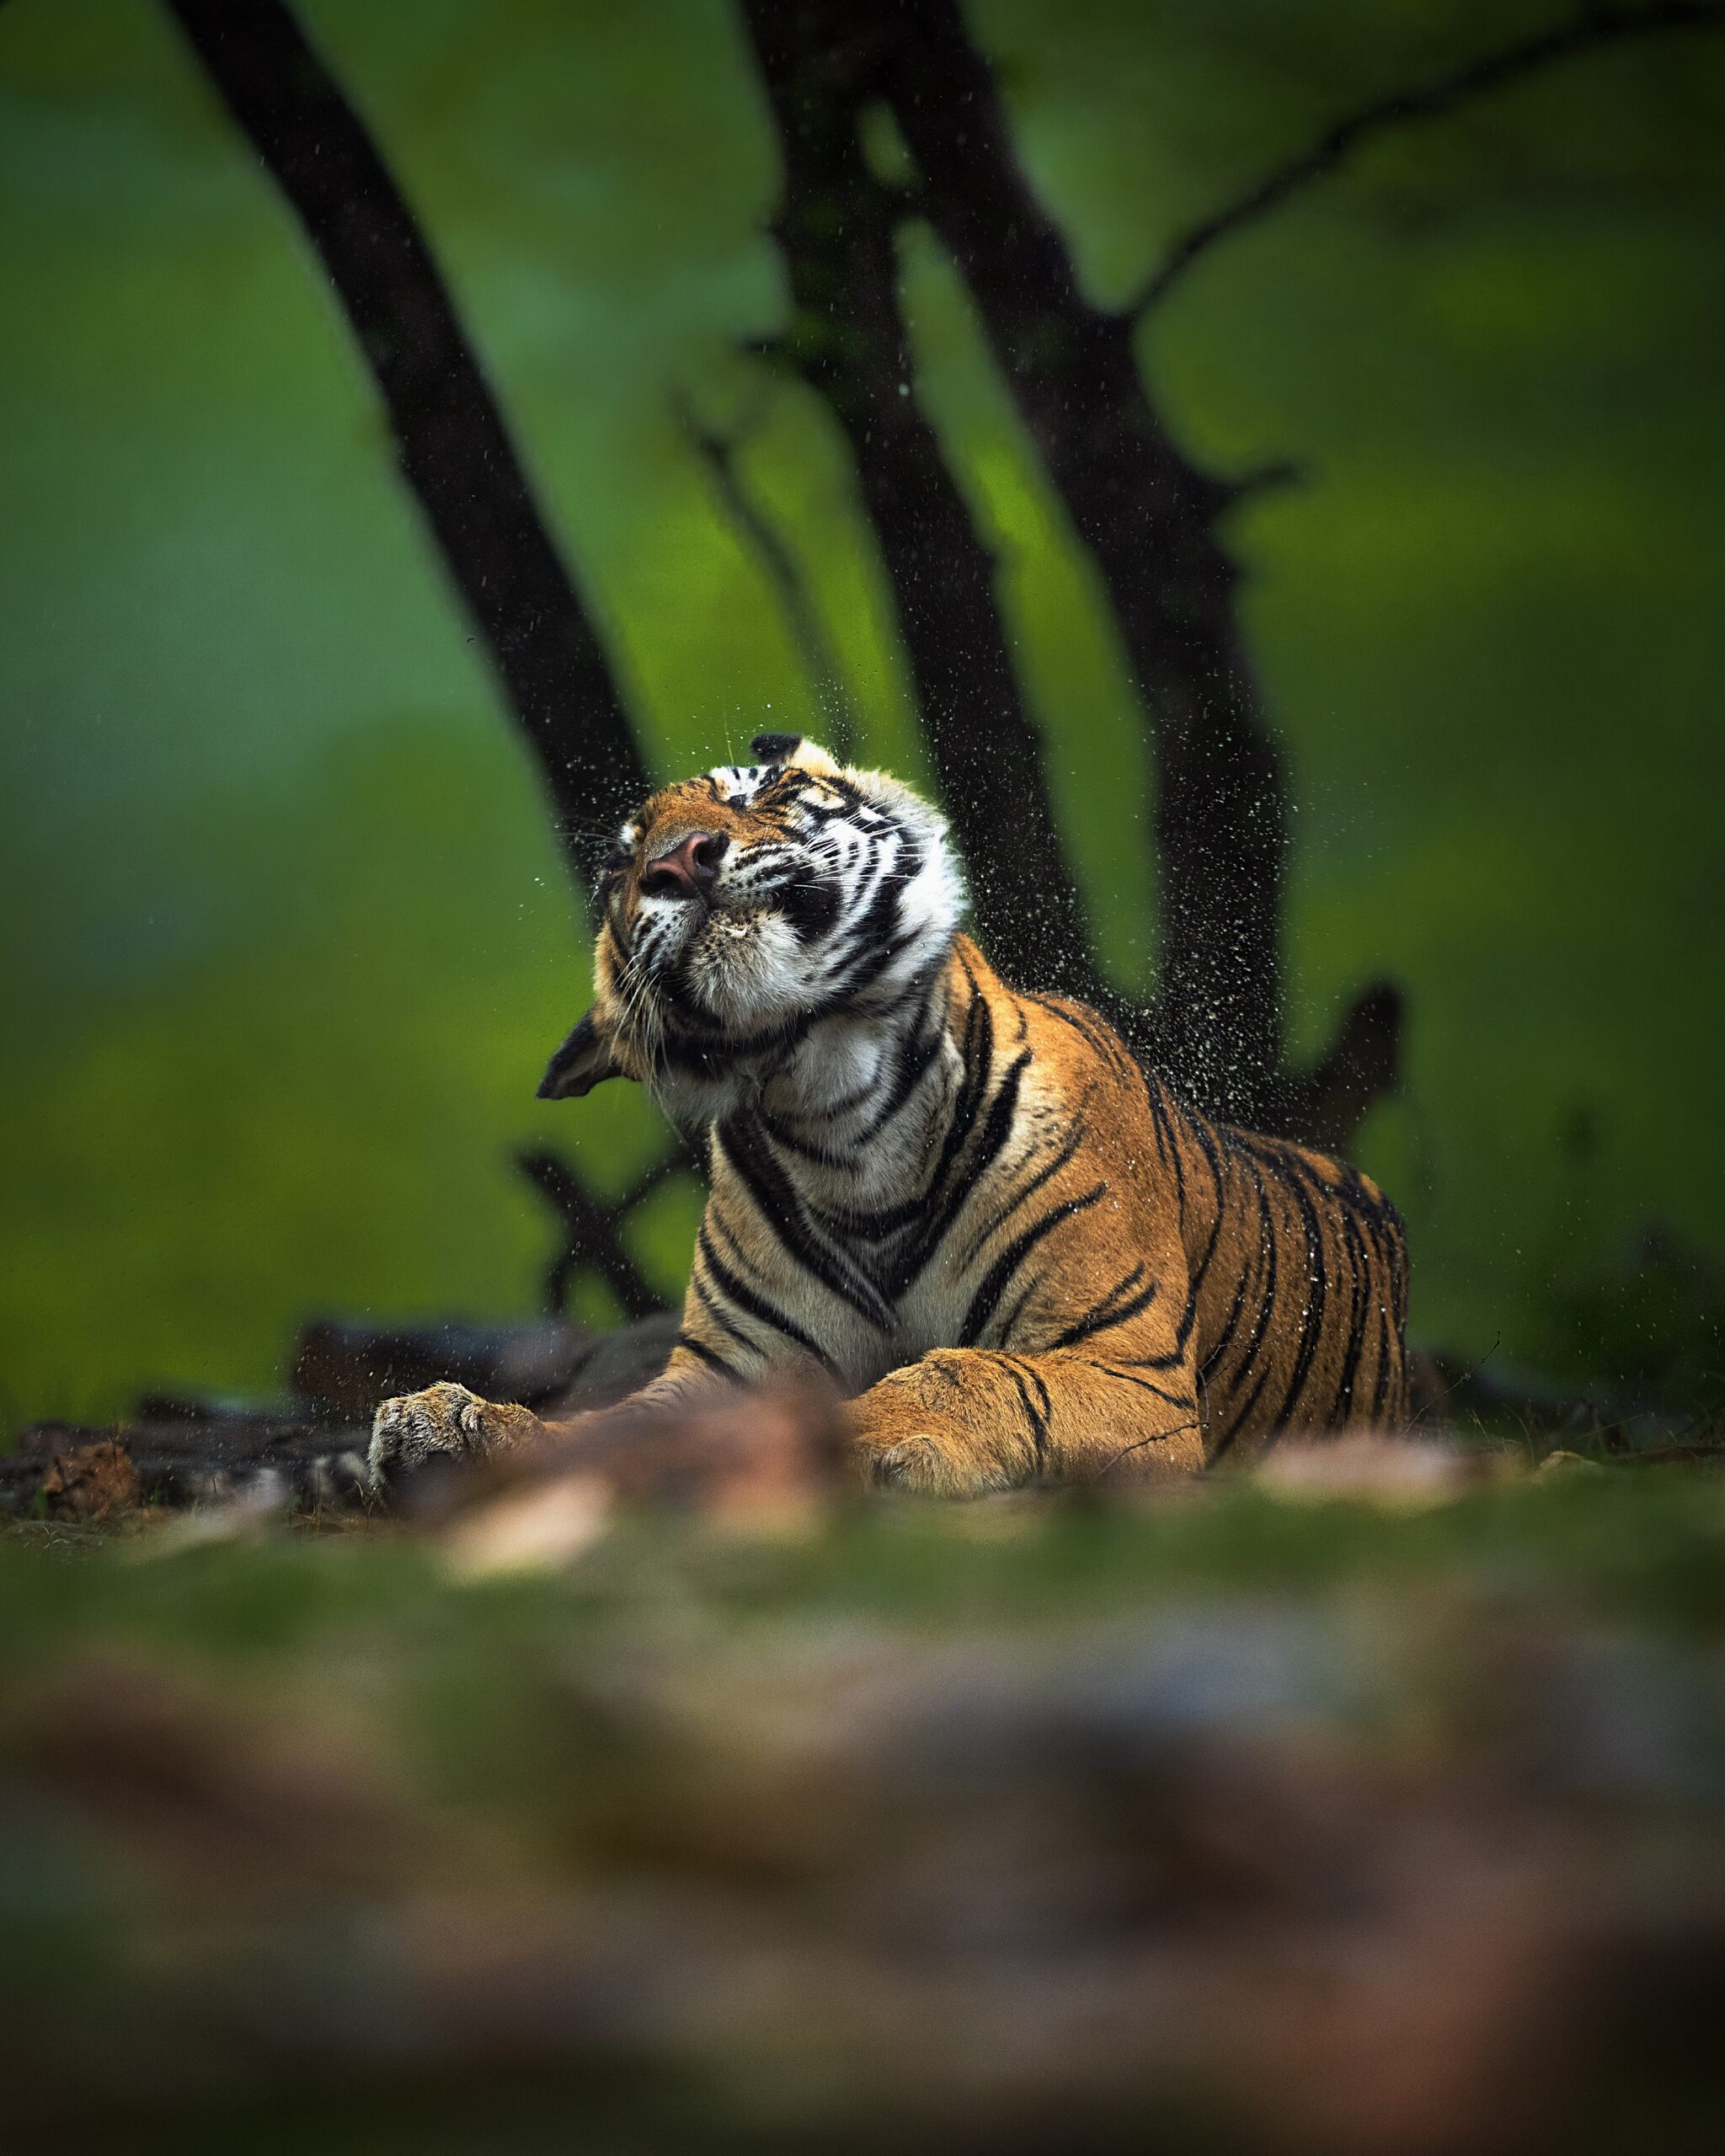
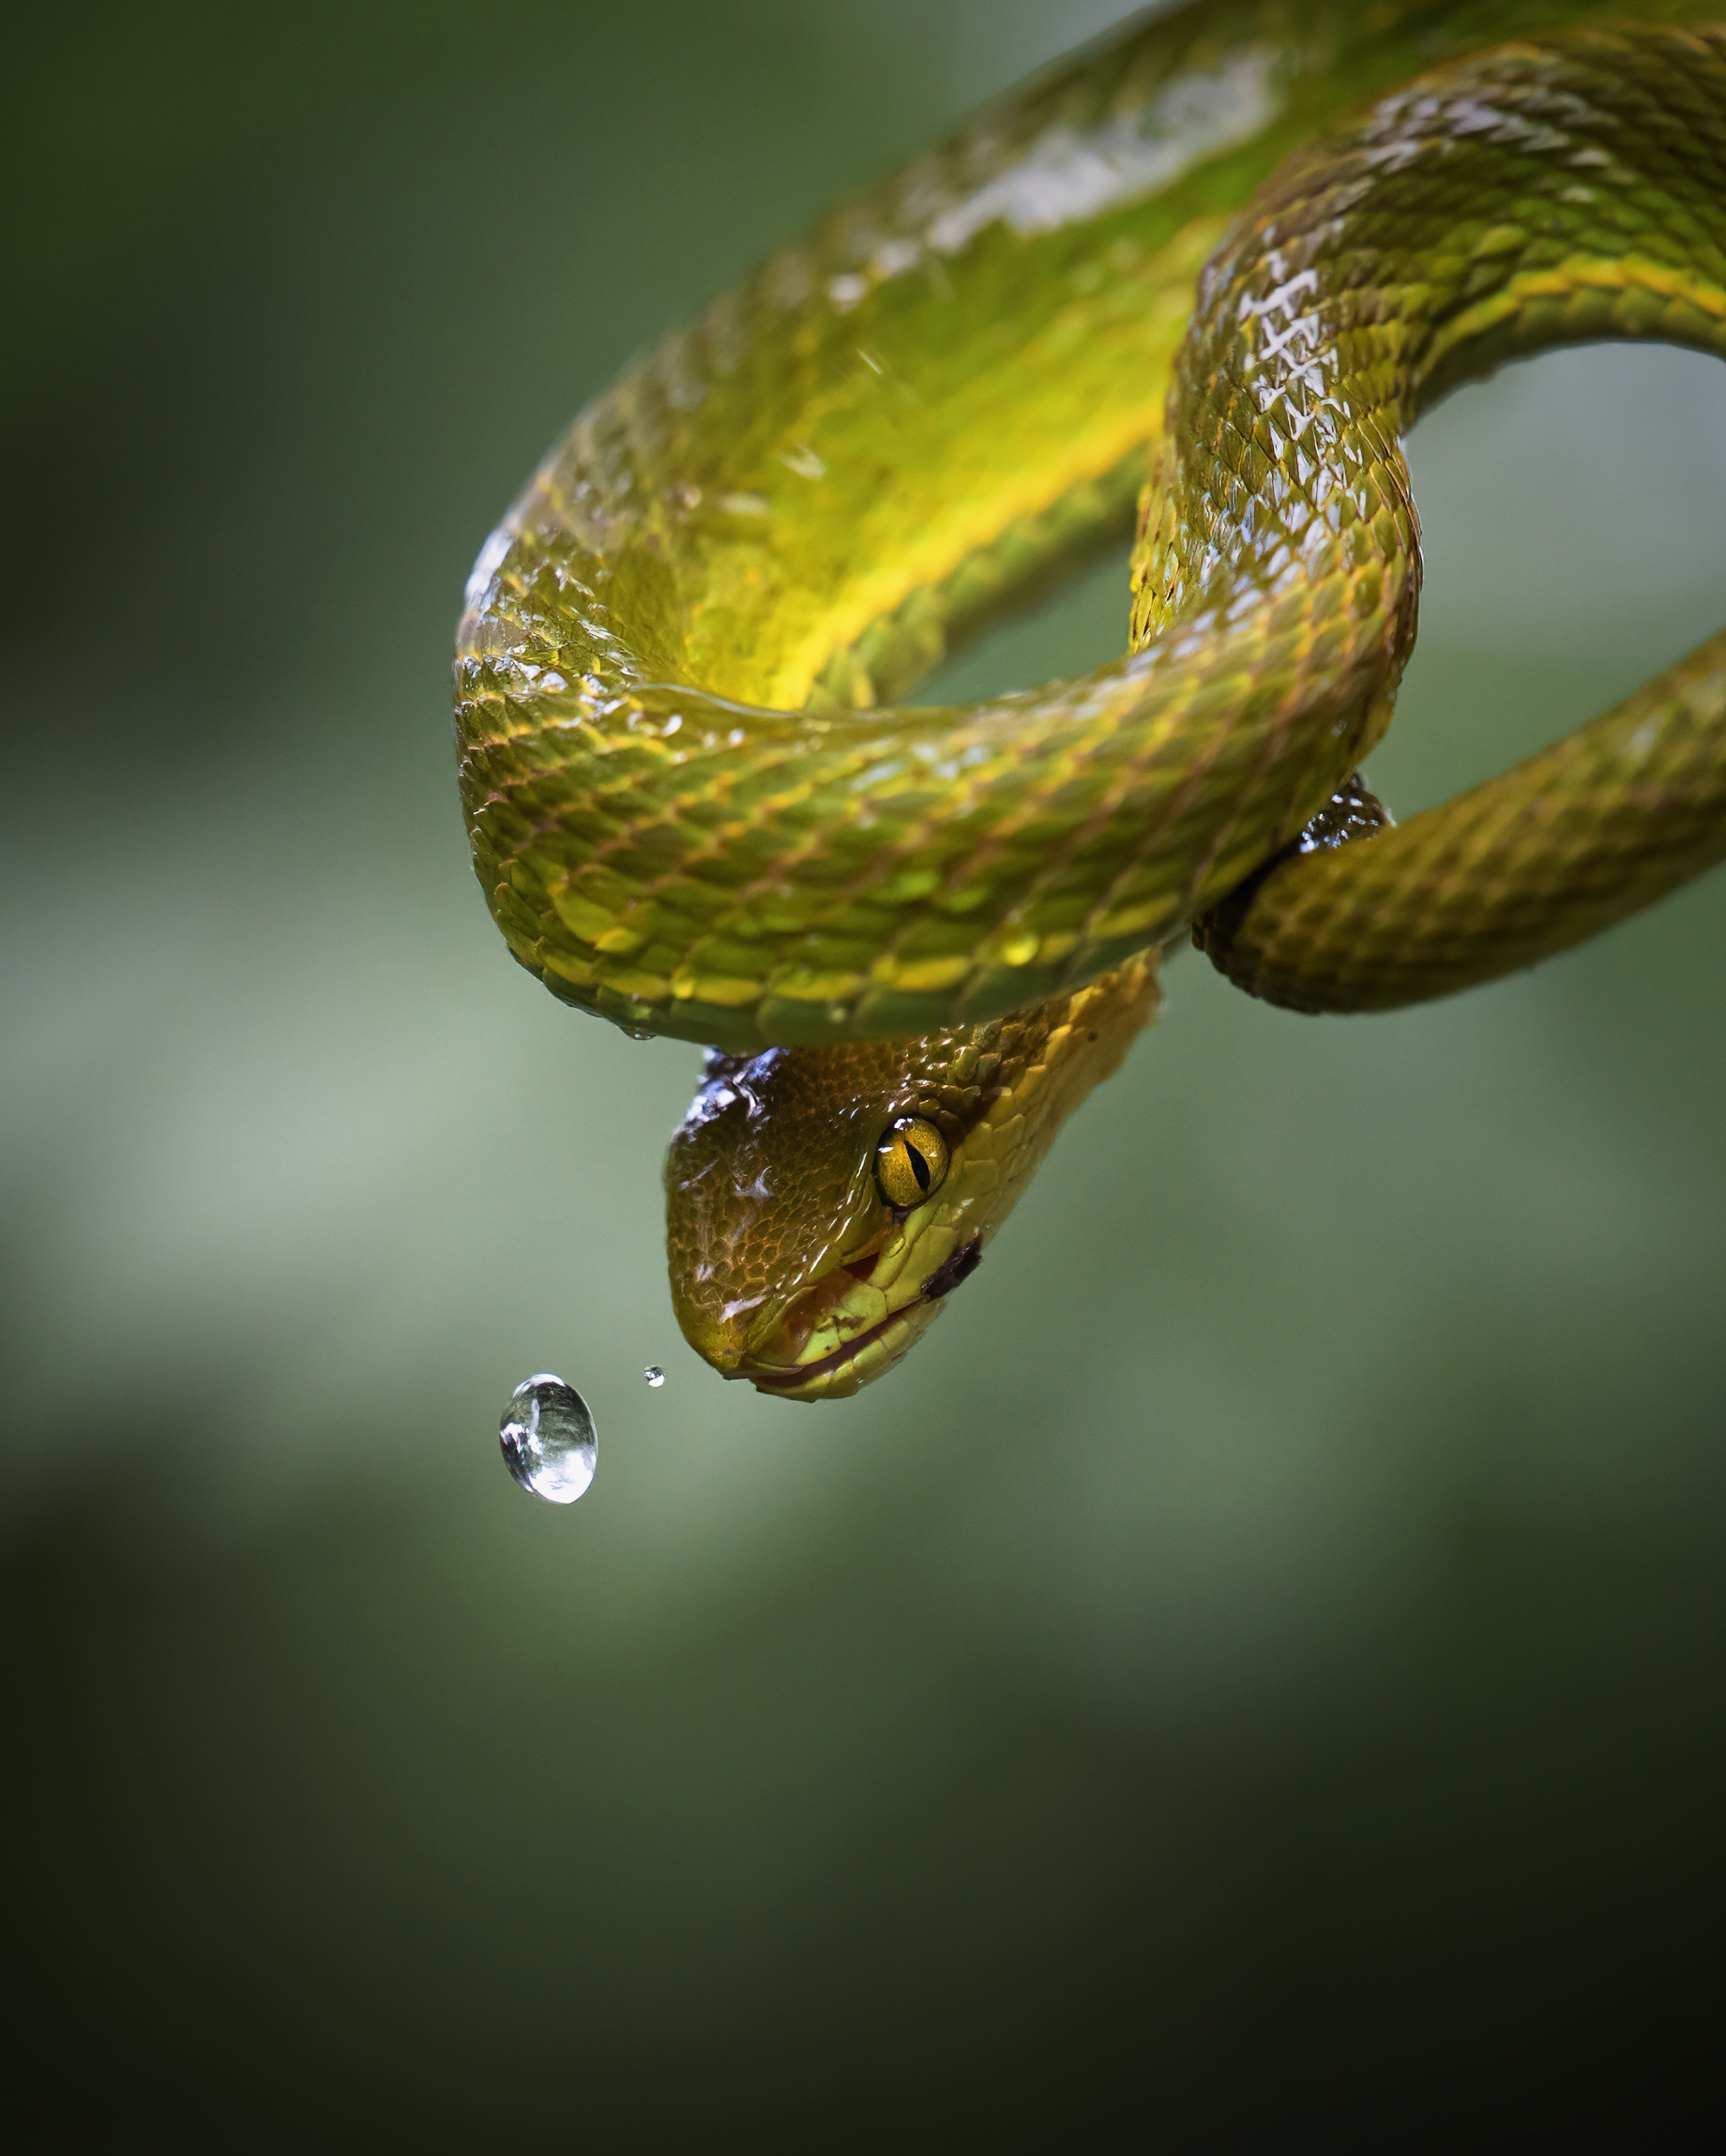
Most Impactful Wildlife Photos Over the Last Years
Humans of the Wildlife
Photographing Marine Wildlife 101
Reviews
iPhone 17 Pro Camera Review – Apple’s Most Serious Camera Yet?
Vivo X200 FE Camera Review – What’s the Hype?
The Humans Behind the Wild
There’s something truly surreal about capturing wildlife — a feeling that can only be experienced, not explained. From photographing the stealth and power of the majestic big cats to framing the untouched, almost mystical landscapes they inhabit, wildlife photography can be deeply addictive.
But while we often focus on the grandeur of animals, flora, and fauna, we sometimes forget the people who make these encounters possible — the forest guards, naturalists, and local communities who dedicate their lives to protecting and preserving the wild. They are the unseen guardians behind every breathtaking frame, adding a deeply human layer to the wilderness experience. In this month’s issue, we turn our lens toward the humans behind the wild, celebrating their indispensable role in conservation and storytelling.
Speaking of humans — the photographers themselves are no less heroes of this space. A single image can spark awareness, ignite conversations, and even drive change. When was the last time a photograph made you pause and reflect on a pressing environmental issue? As you browse through these pages, you’ll find some of the most impactful wildlife images of the year — our tribute to the photographers who use their craft to make a difference.
For those stepping into the world of wildlife photography, the journey can be as challenging as it is rewarding. Mistakes are inevitable — but each one teaches something valuable. To help you along the way, we’ve included a feature on common mistakes to avoid in wildlife photography — insights drawn from the field and the experiences of seasoned professionals.
And, of course, inspiration lies at the heart of every creative pursuit. In this issue, we’ve showcased the works of leading photographers such as XXX, whose perspectives and passion continue to inspire a new generation of wildlife photographers. Our hope is that their journeys help you refine your own — to experiment, to evolve, and to fall in love with the wild all over again.
We hope you enjoy this special wildlife issue, one that our readers have come to anticipate every year. Whether you’re flipping through the pages in print or exploring them digitally, we trust it will leave you as inspired as we were while putting it together.