Are vendors paying for promises that don’t exist?
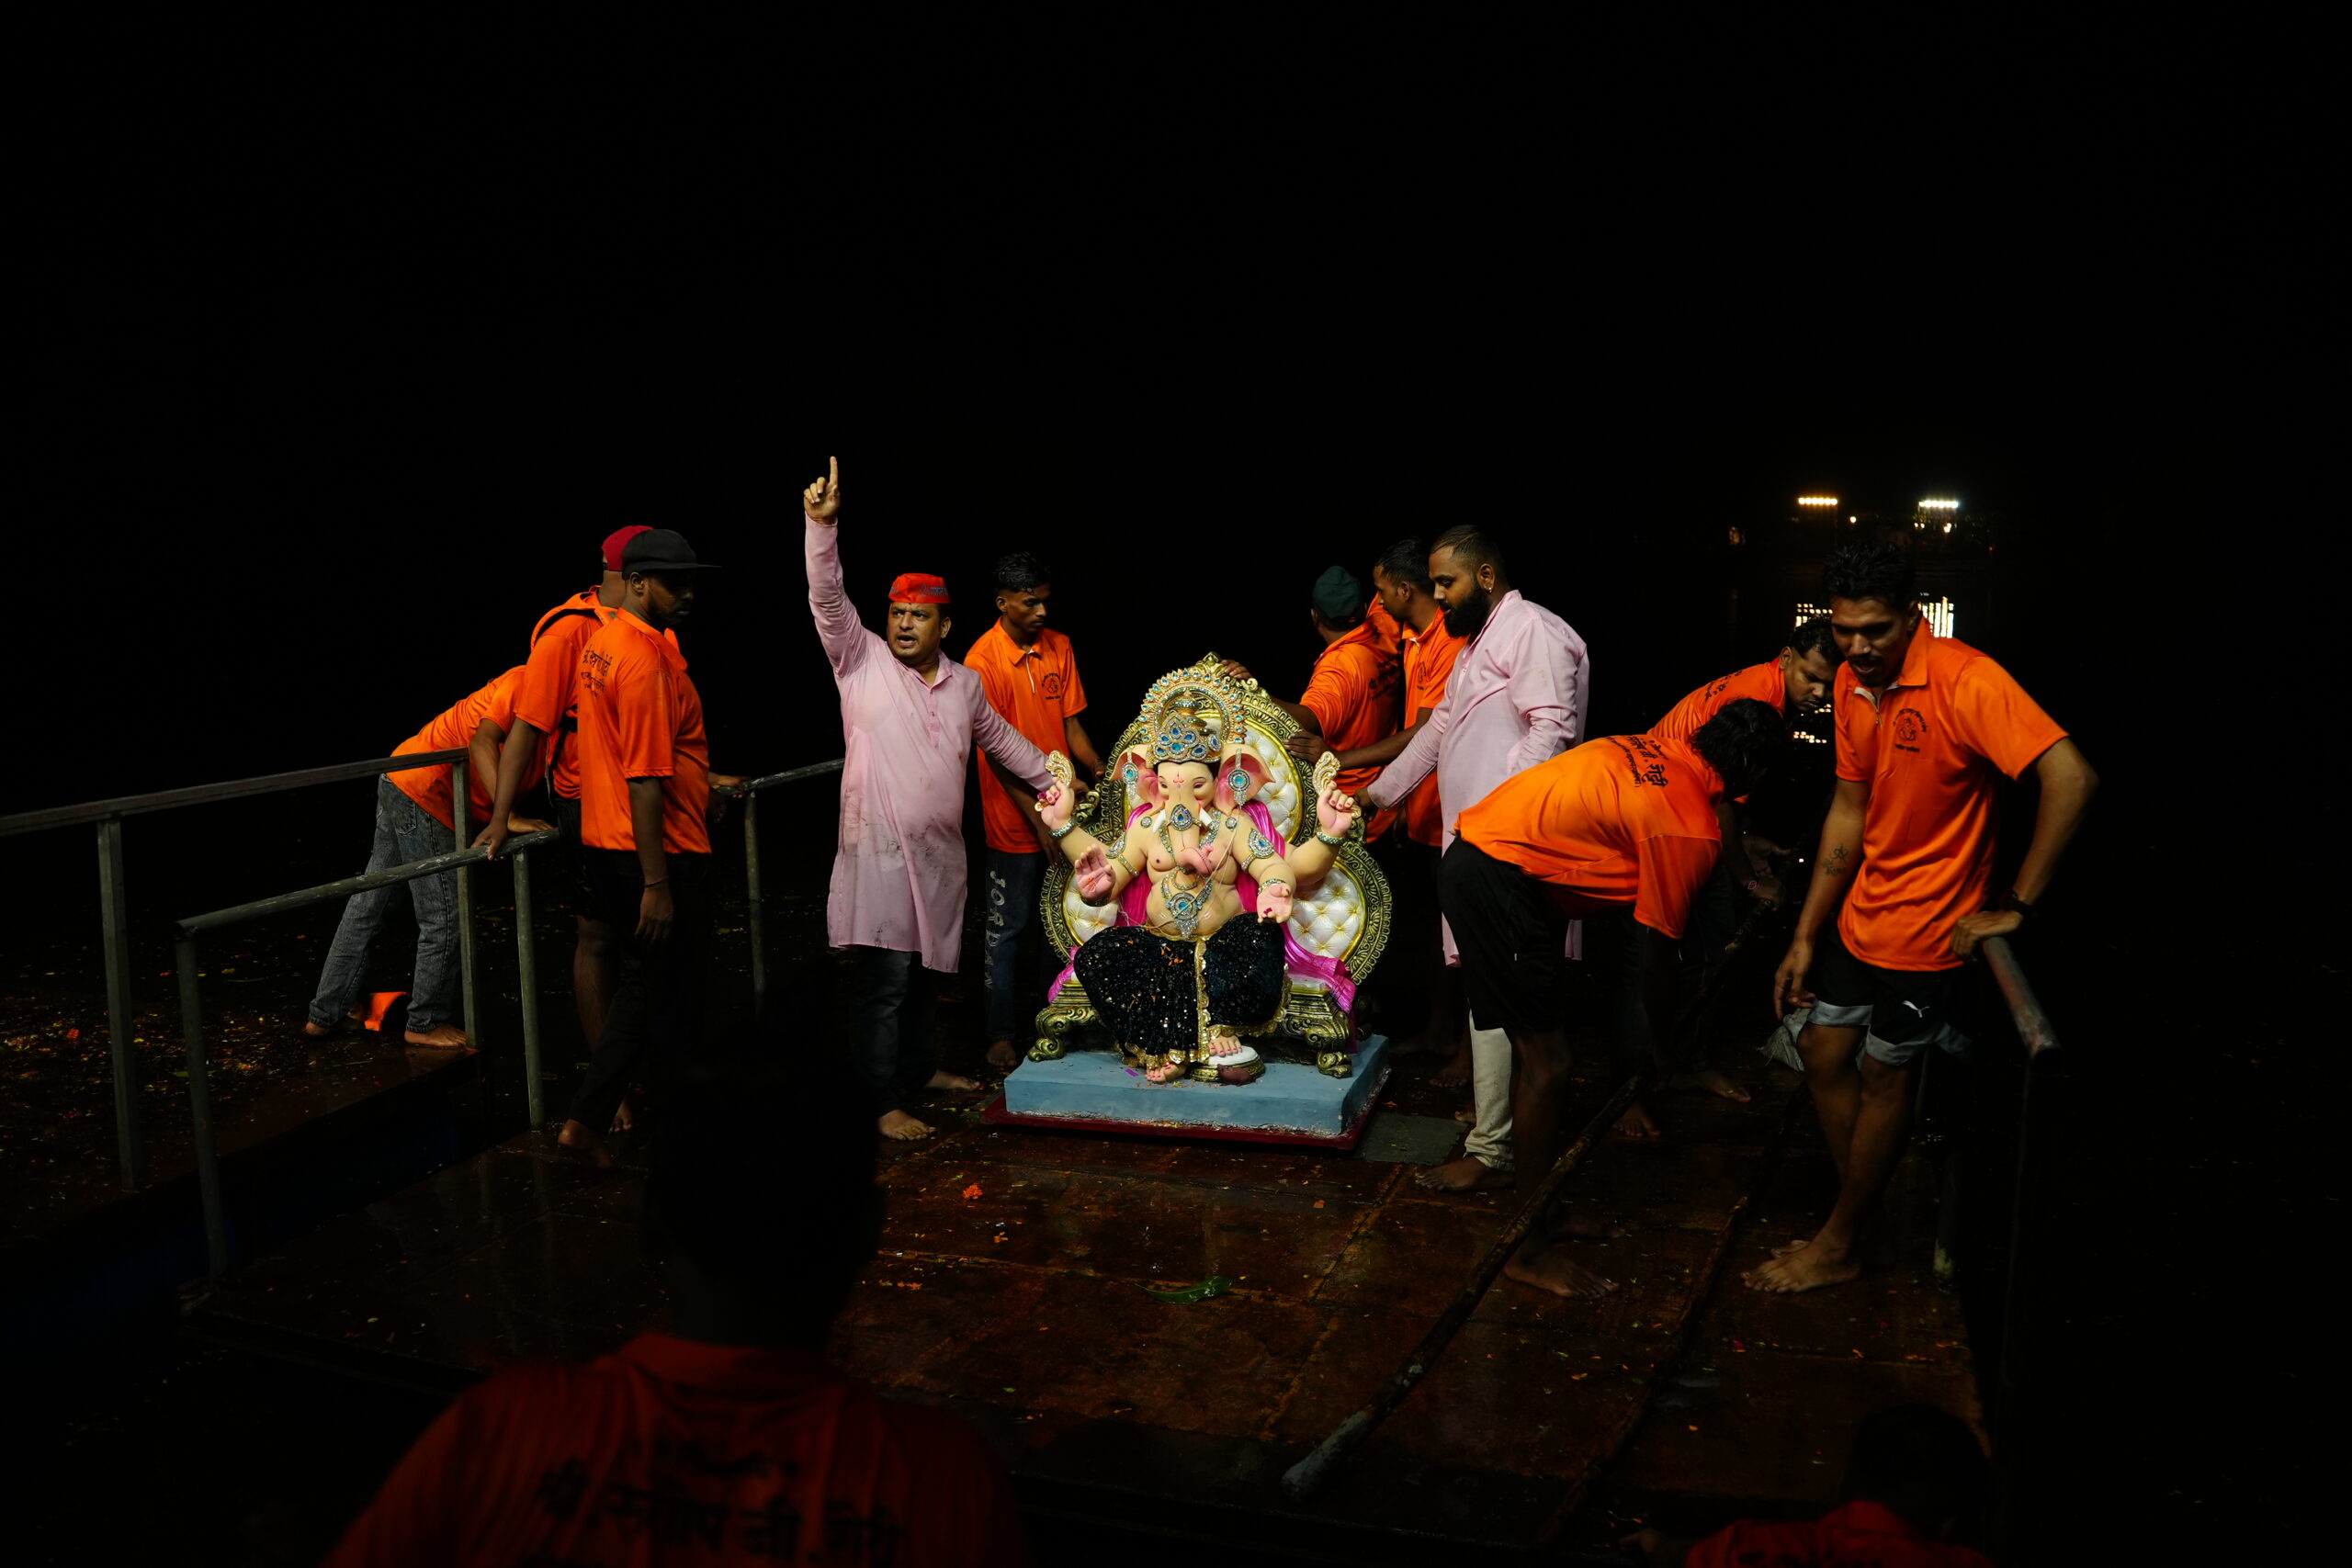
The wedding season is here—and with it, the frenzied hunt for the perfect photographer, the right décor, and a venue that screams grand. Weddings in India aren’t just celebrations; they’re productions. And over the last decade, aggregator websites have pitched themselves as the ultimate fixers—digital bridges connecting families to vendors who make their big day happen. But behind the glossy ads and Instagram-perfect branding, cracks are beginning to show.
In recent months, professional photographers have reached out to Asian Photography, flagging what they call a “systemic problem” in the wedding industry—where aggregator platforms promise visibility and high-quality leads, but fail to deliver on both fronts. And worse, charge a premium while doing so.
We decided to dig in. And after months of analysing submitted records, one thing became clear: the fairy-tale narrative of India’s booming wedding-tech scene might be glossing over some serious realities.
The Promise vs. the Paywall
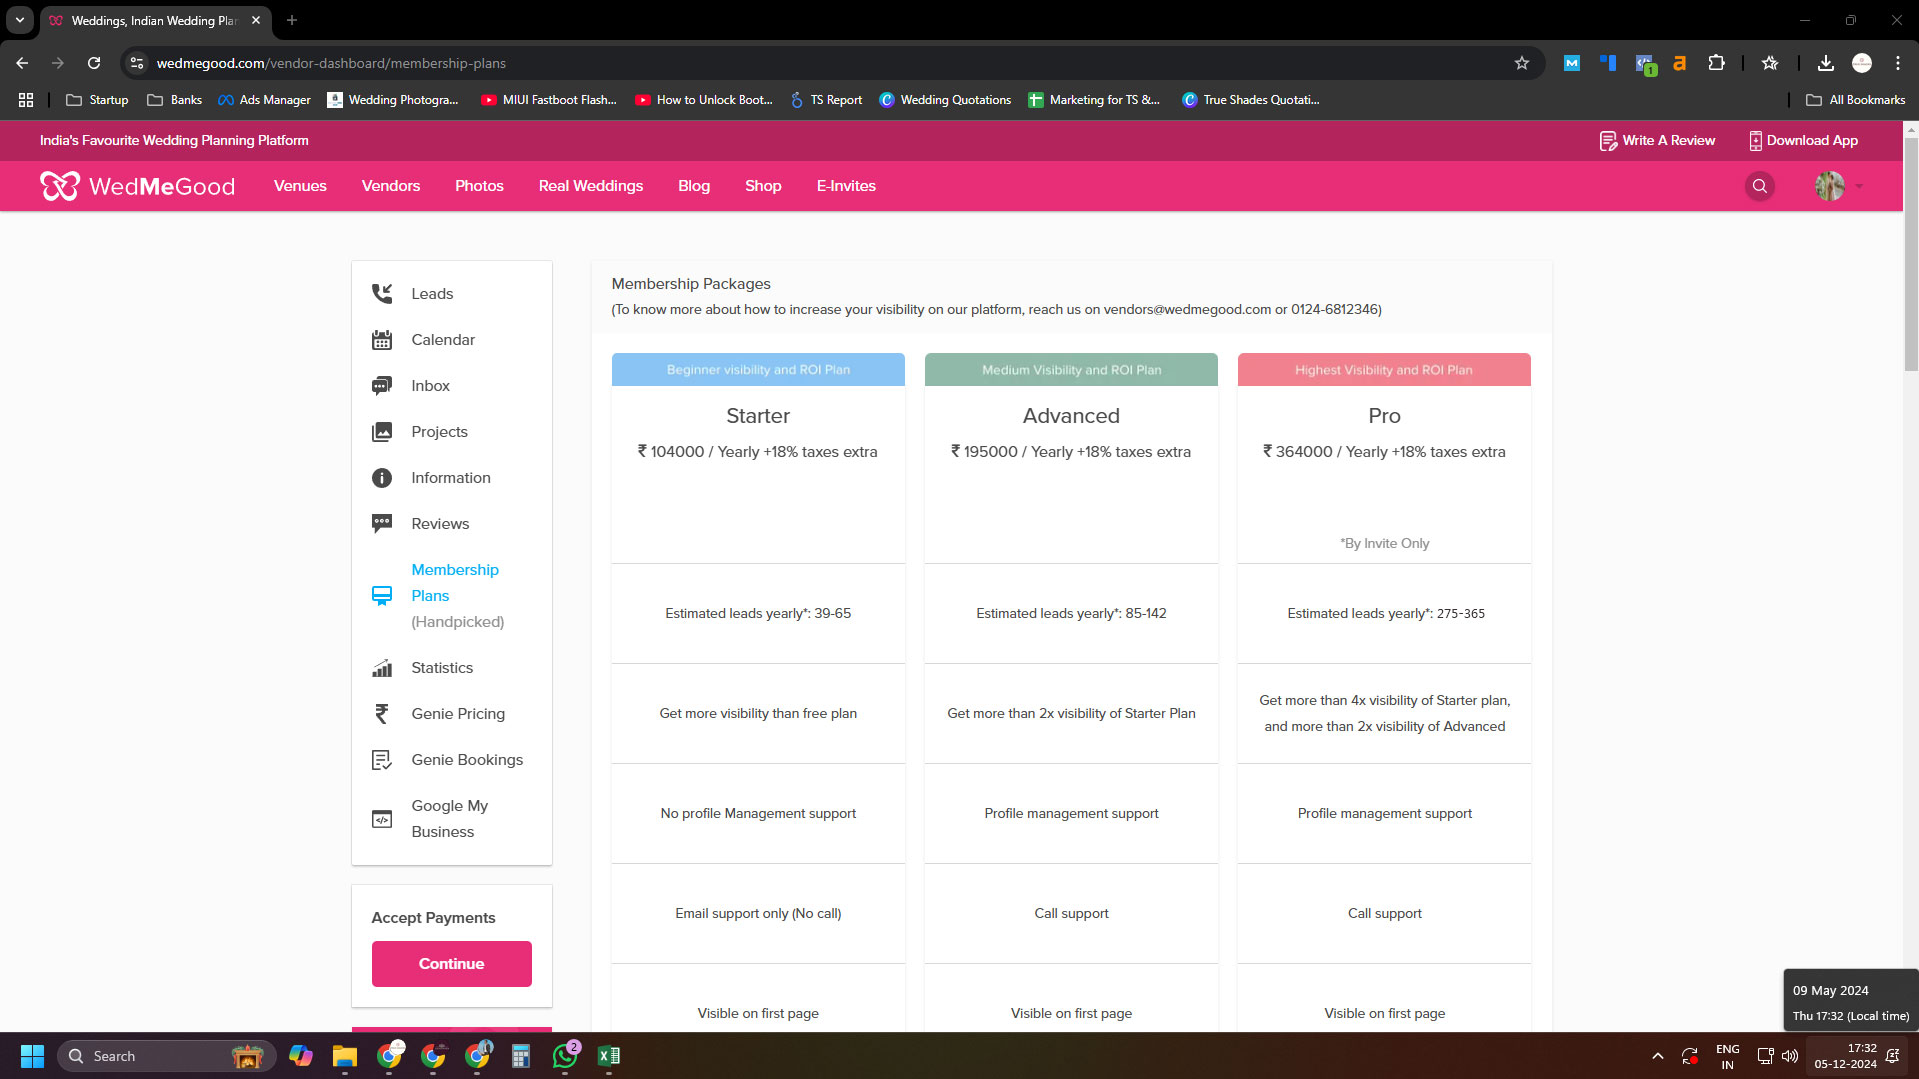
For wedding vendors—photographers, makeup artists, and designers—platforms like WedMeGood, Wedding Sutra, and Weddingz are the modern-day marketplaces. Listing yourself is free, but if you want to actually be seen, you pay. It’s a model that has worked well across several industry types, nothing fishy about that.
These ‘premium’ packages are marketed as gateways to guaranteed visibility and “assured high-quality leads”. The pitch? That your next big client—the one willing to pay for your artistry—is only a subscription away.
But for many vendors, that dream has turned into an expensive illusion.
The Sales Pitch That Went Sour
Take the case of a local photography business True Shades Photography and its founder Arshid Bhimji. They were approached by WedMeGood’s sales team with an offer—a premium tier promising 300+ leads per year with a premium price tag of ₹3.6L+GST attached.
The founder was initially skeptical, having been burned before. But the sales team insisted that things had changed—that WedMeGood had evolved, that its decade-long experience guaranteed results.
Convinced, the studio signed up, paying only part of the substantial sum—a decision that would prove to be wise in the future.
Three months and countless follow-ups later, the results were dismal. Fewer than half the promised leads had come through, and most were either spam or irrelevant. And this wasn’t during an off-season lull—it was the peak of India’s wedding season.

When the founder compared notes with peers, the picture was clear. Dozens of vendors across categories—from photographers to make up artists—were reporting the same story.
A Pattern Emerges
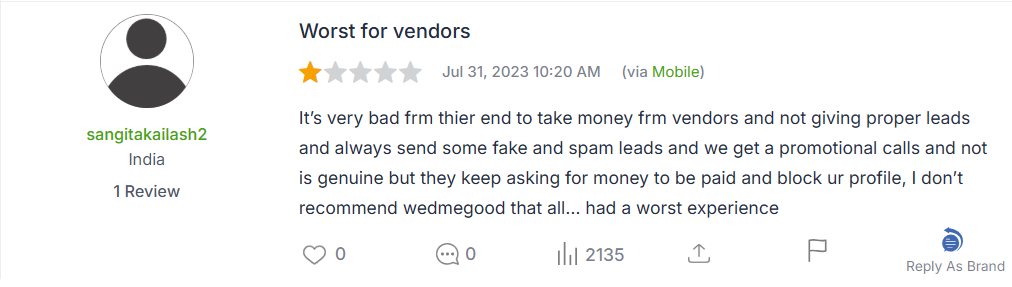
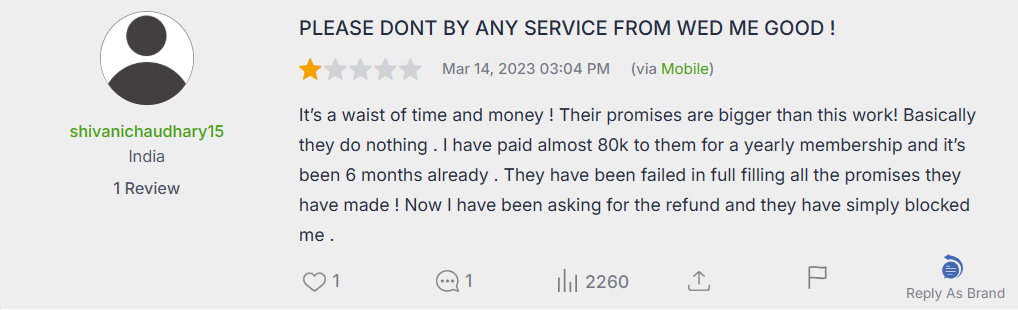
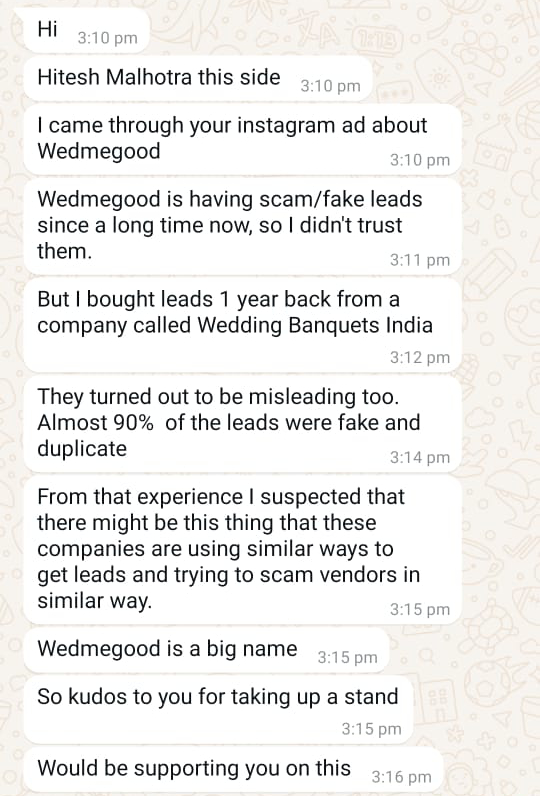
A scan through public reviews and industry forums revealed a troubling pattern. Vendors alleged aggressive sales tactics, misleading assurances and a near-impossible refund process once things went south.
One photographer who bought WedMeGood’s top-tier package for an entire year said he received “virtually no return” on investment. What followed, he claims, was worse—unresponsive customer managers and vague, evasive answers whenever he demanded accountability.
The Fine Print Problem
Here’s where the story takes a sharper turn.
While sales teams allegedly use words like “guaranteed leads”, WedMeGood’s own Terms & Conditions explicitly say the opposite—that lead estimates are not guaranteed, and that performance may vary widely.
In other words: what’s sold on the call, isn’t what’s written in the contract. This could be a bait-and-switch that would raise eyebrows in any other industry. But in the fragmented wedding market, where most vendors are independent professionals with limited legal recourse, it often goes unchallenged.

WedMeGood’s Response
To ensure balance, we reached out to Anand Shahani, Co-Founder of WedMeGood, with specific questions regarding the complaints.
About Lead Numbers
Shahani acknowledged that discrepancies in lead volumes can occur, even among vendors subscribed to the same plan in the same city. According to him, WedMeGood acts only as a platform, not a lead generator. “It’s ultimately up to the user to click through a profile,” he said, which seems fair.
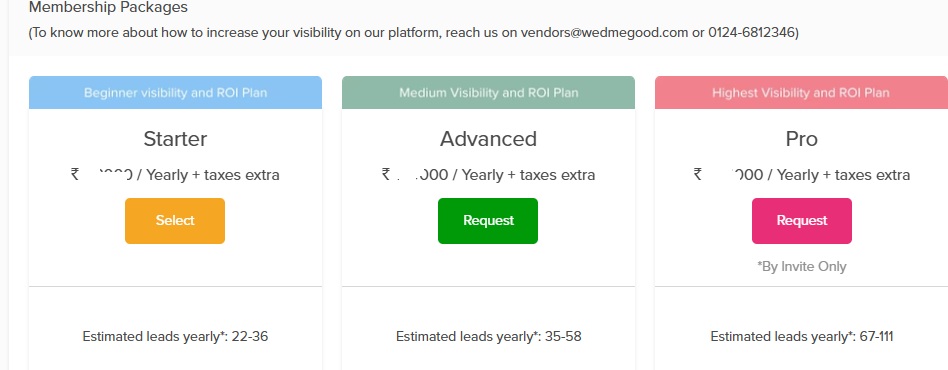
He shared internal data showing that a mid-tier membership in Hyderabad typically receives 35-58 leads annually, while the top-tier might see 67-111 and that this count is based on historical records of partners on the platform. He added that the lead counts and price would vary depending on the city and demand-supply metrics.
Shahani added that the company is open to an independent audit by an industry body and claimed that WedMeGood actively invests in spam detection. Verified spam leads, he said, are not counted toward the vendor’s total.
However, vendors do claim that “spam” inquiries remain visible on their dashboards— counted and charged as valid leads.
We followed up with questions about these inconsistencies, the sales team’s alleged pressure tactics, and why the company continues to market packages with “assured” visibility if none can actually be guaranteed.
About Spam Leads
Shahani stated that its system allows vendors to mark leads as spam while also using backend algorithms to automatically detect and flag suspicious activity and said it is working to improve spam detection accuracy.
About Unfulfilled Lead Commitments
Addressing concerns about unfulfilled lead commitments, he reported that 30% of photographers receive more than their promised leads, 68% meet expected commitments, and only 2% fall short, while also emphasising long-term vendor renewals reflecting consistent performance. He also added that many users who discover vendors on the platform later contact them directly through social media, which the company does not count in its own lead data.
About Sales Team’s Tactics
Furthermore, he also clarified that its sales and partner success teams operate separately to ensure both onboarding and ongoing support–describing this as a standard industry practice–and noted that vendors who wish to avoid follow-up calls can request to be added to a “Do Not Contact” list.
When Leads Cost More Than They’re Worth
For vendors like the founder of True Shades Photography, who presented us with extensive records, the situation is clear: the return on investment simply doesn’t add up and despite conversation with WedMeGood CEO–no refund has been made on his request.
He now advises new photographers to skip expensive subscriptions altogether. “Assist experienced shooters, build your reputation, and rely on referrals. It’s slower—but real”.
The Bigger Picture
Aggregator platforms are not inherently flawed. The model works in theory: vendors get exposure, customers get convenience. But when the delivery fails, the imbalance erodes trust and it doesn’t end with one vendor or one company, but snowballs on the entire ecosystem.
Yes, there are success stories on WedMeGood. But the volume of dissatisfaction also raises an important question: Is the platform doing enough to ensure that success isn’t the exception but the rule?
Our Take

The wedding industry thrives on reputation. One bad review can undo years of goodwill—and the same applies to platforms. If WedMeGood and others like it want to remain relevant, transparency must replace opacity. Sales scripts can’t outshine statistics.
Charging vendors thousands while offering assurances of “potential leads” is not a sustainable business model. Although running a platform has its challenges and we understand that, there needs to be a more robust solution. And standard industry practices aren’t meant to be followed to the T, they’re meant to be improved upon and evolve with time.
Vendors would do well to remember one golden rule: In an industry built on trust, the best leads are still word-of-mouth—not paywalled promises.