Every wedding photographer’s nightmare is losing client photos. One corrupt memory card, one failed hard drive, one accidental delete, and months of trust and effort can vanish in seconds. Wedding photography is not just another creative business, it’s also memory preservation. When clients hire you, they’re not only paying for your artistic eye, but also for your reliability. That’s why building a solid backup system and workflow is not optional. It’s your safety net, your reputation, and sometimes, your career.
Why Backups Matter More Than You Think
No one expects data loss until it happens. Cameras fail, laptops crash, files get overwritten, and cloud sync errors occur. Even professionals who know better sometimes take shortcuts, thinking you will back it up later. But later can come too late.
Losing wedding photos is not like losing landscape shots or product images. You can’t recreate those moments. The couple’s first kiss, the father’s speech, the look on the bride’s face—all gone. That’s why your workflow must include redundancy at every step. The goal is simple: no single point of failure.
Step 1: Start Redundancy in the Camera
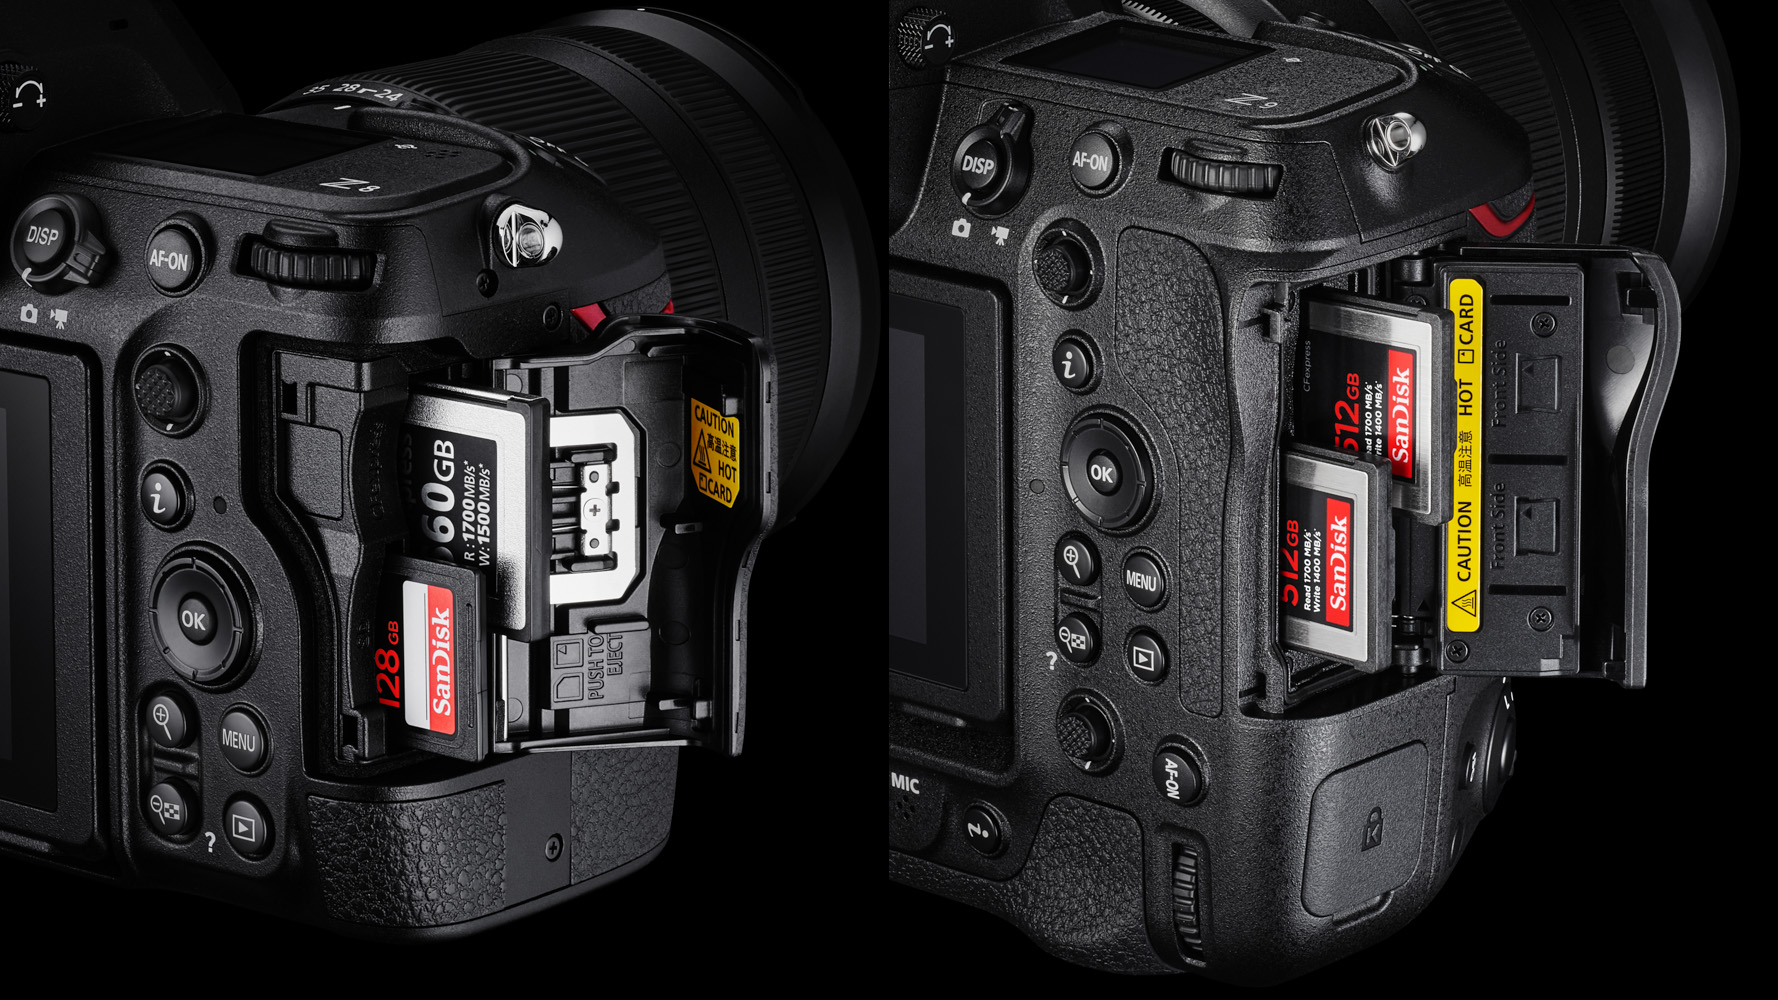
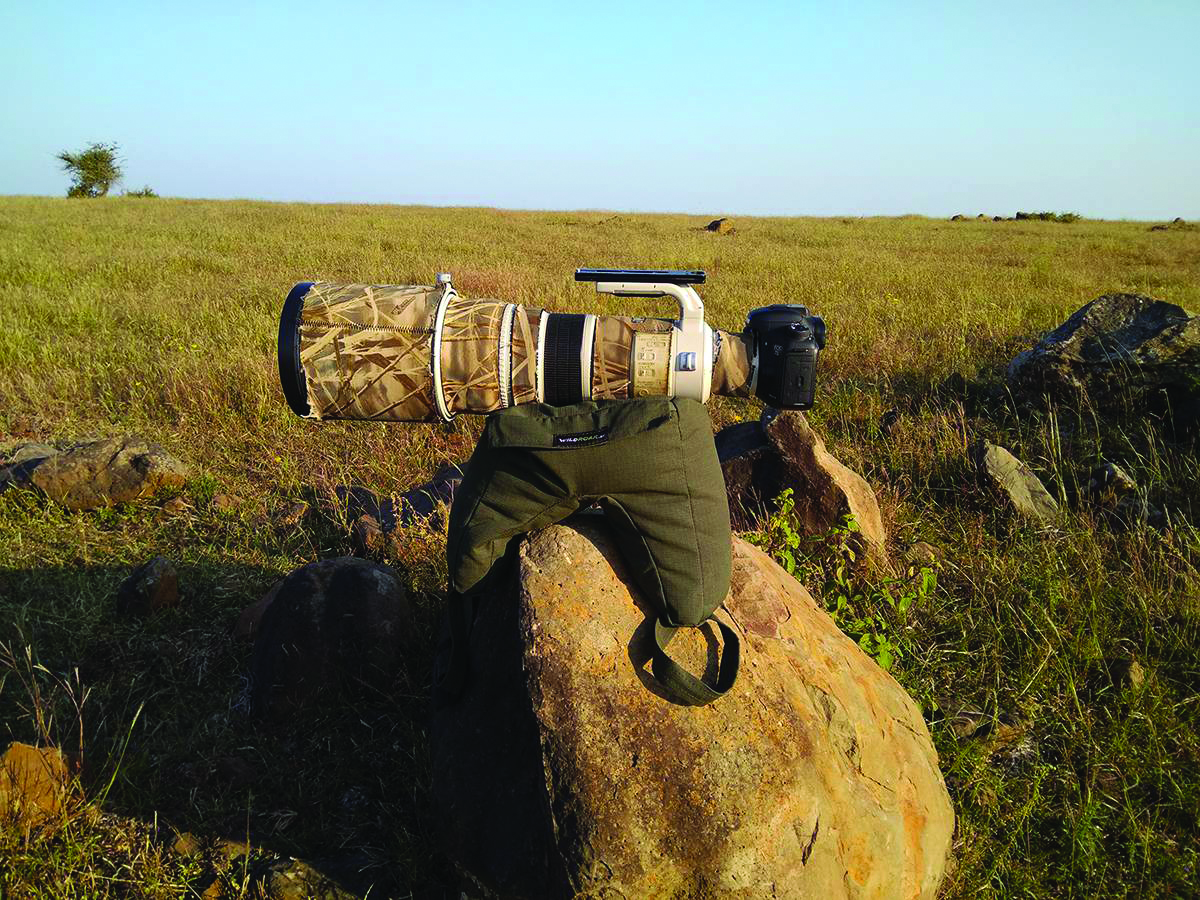
Your first layer of protection begins during shooting. Choose a camera that comes with two card slots—they also come with redundant recording features. When shooting RAWs or RAW+jpeg, choose the duplicate option to have a second copy of pictures on the second card. If one card fails, you still have the full set.
Use high-quality memory cards from trusted brands and rotate them frequently. Cards wear out over time, especially under heavy use. Label them, track their age, and retire them regularly. Avoid filling cards completely. Leaving some space helps prevent corruption issues.
Step 2: Immediate Backup After Shooting

The moment you finish shooting, your mission changes from capturing memories to protecting them. Never wait until the next day to transfer your files, do it on-site on a laptop to two separate hard drives, while keeping the data on the cards.
A simple rule to follow is the 3-2-1 backup strategy:
- Keep 3 copies of your data
- Store them on 2 different types of media
- Have 1 copy stored off-site
For example, after downloading the files to your main working drive, duplicate them to an external hard drive and also upload them to a cloud backup system. This combination gives you protection from drive failure, theft, and disasters like fire or water damage.
Step 3: Structure Your File Management
Good backups are useless if you can’t find what you need. Build a consistent folder structure and naming convention for every client. Include the wedding date—Y-M-D format to search them easily—followed by the couple’s names, and shoot type (for example, 2025-10-15_SamAndJenna_Wedding)—inside, separate RAW files, edited files, and deliverables.
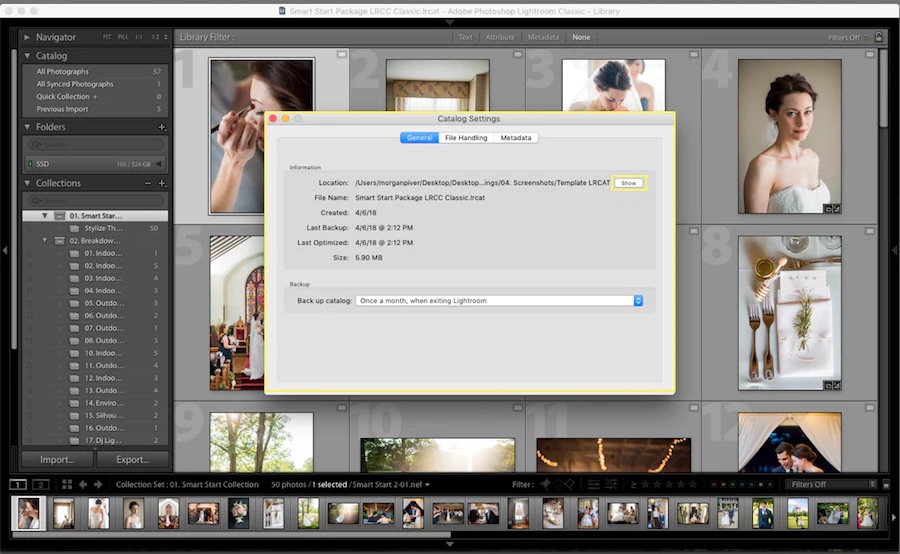
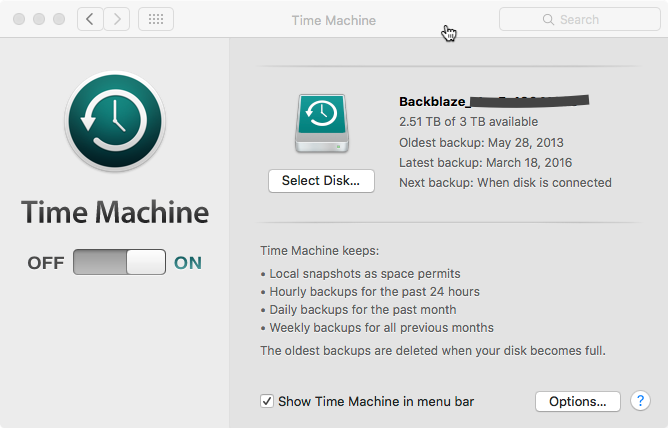
Organised workflows save time during editing and protect against accidental deletion. When you know exactly where every file belongs, you reduce mistakes. Many photographers also use catalogue-based systems like Adobe Lightroom, but remember that catalogs themselves need backup too. A corrupted Lightroom catalogue without a backup can disconnect your edits from your photos. Pro tip, have a backup system like Apple’s Time Machine enabled to store a copy of all your work on a daily basis at a secure location.
Step 4: Use Reliable Hardware
Not all drives are created equal. Consumer-grade external drives can fail under constant use. Invest in professional hardware—NAS units with RAID functionality that provide both speed and redundancy.

A RAID 1 setup mirrors data across two drives. If one fails, the other keeps your files safe. RAID 5 or RAID 6 configurations spread data across multiple drives, offering both speed and security. NAS (Network Attached Storage) systems add convenience, allowing automated backups and remote access. Conversely, you can buy a DAS or Direct Attached Storage setup if setting up storage over a network seems complicated. There are systems on the market that sell you a premade package which require minimal setup, but are also airgapped from the internet, just as a safety feature.
Regardless, regularly check your drives for health using tools that monitor bad sectors or drive temperature. Replace drives before they fail, not after.
Step 5: The Cloud as Your Safety Net
Cloud storage has become essential for long-term security. Services like Backblaze, Google Drive or Dropbox, can automatically sync your files in the background. The advantage is simple: even if your entire office setup is destroyed, your photos still live online.
However, cloud backups should complement, not replace, physical backups. Upload speeds can be slow for large RAW files, and syncing errors can occur. Make sure to double-check that your backup software verifies uploads and notifies you of any failed transfers.
For faster cloud workflows, you can also back up JPEG previews or compressed versions first, followed by full RAW files later. That way, you always have a version of the images safe in the cloud while the larger files upload overnight.
Step 6: Automate Where You Can
Human error is one of the main reasons for backup failure. Automating your backup process removes that risk. Use software that runs scheduled backups daily or weekly. Most NAS systems and external drives support automation tools that mirror and check files from your main working folders.
Set your system to notify you of failed tasks. Even the most advanced setup is useless if it stops syncing without your knowledge. Automation ensures that your backups stay current without relying on memory or habit.
Step 7: Test and Verify Regularly
A backup is only as good as its recovery. Too many photographers assume their system works until they try to restore files—and discover missing data or corrupted folders. Schedule routine checks. Once a month, retrieve a few random files from your backups to confirm they open correctly.
Also, keep documentation of your workflow. Write down where backups are stored, how often they’re updated, and what software you use. In a high-stress situation, clear instructions can make the difference between recovery and panic.
Step 8: Plan for the Long Term
After delivering photos to clients, don’t immediately clear space by deleting old files. Keep final edited images and RAW files for at least one year, if not longer. Clients sometimes request additional prints, albums, or re-edits later.
Long-term storage can be simplified by moving archived weddings to slower, larger-capacity drives or cold storage options like Amazon Glacier. These are designed for rarely accessed but permanently safe data.
You can also create a separate “client archive” drive with clearly labelled folders for each year. That way, even if your main system evolves, your historical data remains intact and easy to locate.
Step 9: Communicate Your Backup Policy
Your clients may not ask about your backup process, but mentioning it in your consultations can set you apart. It builds confidence when they know their memories are handled with professional care. You can include a short note in your contract explaining your storage and retention policies.
It’s also worth clarifying how long you keep the images and whether you provide long-term cloud access. Clear communication prevents misunderstandings and shows your commitment to quality.
Step 10: Learn From Mistakes and Evolve
Every photographer eventually faces a scare—a missing folder, a damaged card, or a near loss. Take those moments as lessons. Improve your system each time you identify a weak point. Technology changes fast, and your workflow should evolve with it.
Regularly review new tools, cloud options, and storage technologies. What worked five years ago may not be the best solution today. Treat your backup workflow as an active part of your business, not a one-time setup.
The Bottom Line
Photography is more than capturing images; it’s about protecting them. A solid backup system shows respect for your clients’ memories and your own professionalism. The truth is, you can replace equipment or reshoot a portrait session, but you can never redo a wedding day.
When your workflow has multiple layers of protection—dual card recording, on-site & offsite backups, and cloud storage—you sleep better at night. You know that no matter what happens, your clients’ stories are safe. In the end, reliability is what clients remember most and sets a professional photographer apart. The photos you take become part of their lives. Your job is to make sure those memories never vanish.